Welcome

My name is Lisa and I'm a crafty girl with wanderlust working as an engineer by day. My blog chronicles projects in my home as well as pictures and stories from my travels.

Search


Instagram

Blog Index
The journal that this archive was targeting has been deleted. Please update your configuration.
Navigation

Entries in Photography (10)

Thursday
Nov142013

10 Pictures Series

Recently I have been thinking a bit about what I want to do with my blog. One of the main things was that I wanted to document some of my travels for myself. Unfortunately, gathering up all the photos and details for me to make one of my travel posts takes me a while so I haven't kept up on it for the trips I have taken since I started the blog much less done a lot of documenting of trips that happened earlier. For example so far this year I've been to Japan twice, Colombia, the Dominican Republic, Florida, Atlanta, New York, Northern Michigan, Chicago, Arizona, Kentucky, Milwaukee and Connecticut but I've barely written about those travels.

On the flip side I have loved looking through my old travel pictures to post my Picture of the Day, but I wasn't really writing down anything other than the date and place of the photo and I haven't been too motivated to post them lately. After thinking about things I decided that I would replace my Picture of the Day with a 10 Pictures From (insert place here) series. This way I could share a few photos from a place and write a little bit with the idea that I could start more effectively documenting my travels. I still plan to write some detailed travel posts like I always have but I think this will be a good way to catch myself up on documenting some of my favorite travel photos and memories.

My plan is to start tomorrow. I just need to pick the first place to write about!

Friday
Oct122012

A Little Splurge

Wednesday I came home from work in the evening to find a package I had ordered on my front porch. After coveting a wide aperture lens and an external flash for a long time I finally bit the bullet and had decided to buy a Canon EF 50mm f/1.8 II Camera Lens and a Canon Speedlite 430EX II Flash.

This past month I had a pretty rough schedule at working a ton of overtime to meet deadlines for my job. I was exhausted mentally and physically and I needed a little pick me up. Normally I am not one for retail therapy but in this case I decided to do it for a few reasons.

First, this was not an impulse purchase but instead something I had been thinking about for a while. Second, it fit into the budget I have set aside and save up for myself to buy fun things. Third, although the reality is that it is better to take photos in natural light I really don't have a chance to work on projects much outside of evening hours. I wanted to be able to take better pictures when I am working on things at night and I am hopeful this will help me do it. Fourth, after pulling a seventy hour work week a girl just needs something to look forward to and I felt a little splurge could be justified.

Now that I have the lens and flash I couldn't be more thrilled with them. I have been having fun taking pictures around the house and my neighborhood just to try them out. Next week I plan to post some pictures and results using my new set-up.

I can't resist sharing one photo now (this is just with the new lens, no flash) so here is a picture of a purple kale in my front yard. I have a lot to learn about using this new equipment, but I think it is going to be fun.

Have you splurged on anything recently? Have you ever rewarded yourself after a stressful patch at work?

Wednesday
Jul112012

Fun With Instagram

I'm in Ontario, Canada for work and despite being absolutely exhausted after two incredibly long work days I couldn't sleep last night. I've been meaning to try out Instagram for a little while and so I decided to sign up and play around with a few photos that I took on my phone this past month. Yes, I realize that it is mostly pictures of food. What can I say? I love to eat!

All of the fun Instagram filters are awesome and I think I may be addicted. If you are interested in following me on Instagram my user name is "homeandawaywithlisa". 

Are you on Instagram? What is your favorite filter? What is your user name?

Tuesday
Jun192012

How to Mount Photos

While I was mounting the photos from my giveaway to celebrate my six month anniversary of blogging I thought I would share how to do it. Pictures can buckle when the mount board, mat board and picture expand and contract at different rates when the temperature changes. By hinging the mat board to the mount board and hanging the photo from T-hinges you keep the picture as free to move as possible and minimize the chance of warping.

To mount a photo you need a mat board and mount board that are the same size and some linen tape. Start by laying your mount board face up with the mat board face down and align their edges. If the thicknesses of the mat board and the mount board aren't the same put something underneath the thinner one so that they are level. Cut a piece of linen tape the width of the boards and then lay it along the seam between them to make a hinge. Flip the mat board down and so that it is right side up.

Now that you have hinged the mat and mount board the next step is to mount the photo. Place your photo under the mat board and adjust it to the position you want. Once you have it where you like it, place a paper weight on the photo to hold it in place and then flip the map board back. Cut two short pieces of linen tape. Carefully lift up the top corners and slip the tape halfway under with the sticky side up. Cut two more pieces of linen tape and then place them sticky side down over the previous pieces of tape. The picture will now be hanging from the two tape T-hinges. To complete just remove the paper weight and flip the mat board pack over the picture. Your picture is now ready to frame.

Thursday
May312012

Digital Photo Storage Organization

Back when I used a film camera I used to organize my photos in chronological order in photos boxes and kept my negatives in binders. When I switched over to digital back in 2003 I had to find a good way to sort and deal with all of the digital photo files I now had.

My system has evolved a bit over time, but here it is in a nutshell. On my hard drive I have a folder for every year. Under every year I have a folder for every month and then every activity within that month. I then put my pictures within that activity folder. For the example below I went to Zingermans for dinner in March so those photos are in 2012/March 2012/Zingermans.

That system works well for basic things that happen in a month, but it is insufficient for the photos I take on a trip. On a vacation it is not uncommon for me to snap over a hundred photos in a day and when you multiply that by a week or two it ends up being a lot of photos. To organize trip photos I make a trip folder under the month that the trip occurred and then make sub-folders for each day of the trip with the place that I was on that day. For each day I then make another set of folders about the specific activities/places I saw on that day and then number the folders in order of when I did them on that day. So for the example below, the third thing that I did on March 18 in Rome on my Italy trip was visit St. Peter's Square so those pictures are in 2012/March 2012/Italy Trip/March 18 Rome/03 St Peters Square. Having the sub-folders for each activity on a day is great so that I don't have to try and remember a few years later where a particular photo was taken.

The two exceptions that I have to this system are that I keep the pictures that I take of blog projects in a separate area (but similarly structured) and I keep pictures of my house in folders sorted by room. Overall, I have used my system for a while and it works really well for me to be able to quickly find any photo I am looking for.

How do you organize your digital photo files? What system do you use to easily find photos?

Tuesday
May292012

Giveaway Ending Tomorrow

My six month celebration giveaway is ending tomorrow so if you want to enter, please comment on the original giveaway post. Also, if you liked me on Facebook, started following me on Pinterest or pinned some of my posts for extra entries make sure that you comment that you did so on the original giveaway post so I can count it.

I also want to say thank you so much for all of the sweet comments everyone has posted about my pictures. It really means a lot to me. Thank you!

Wednesday
May232012

Giveaway to Celebrate Six Months

Six months ago I decided to start up this blog to motivate me to finally write down and share some of my travel stories and pictures as well as get projects done around my house. It has definitely provided me with that motivation and I am also lucky to have had people actually reading what I have been writing. 

As a thank you I want to send a matted enlargement of one of my travel pictures to six people. All you have to do to enter is look through the photos I've posted under Picture of the Day and then comment on this post telling me which one of my photos you would like if you won.

You can submit additional entries with separate posts doing one of the following:
- Like my page on Facebook (Post what name you liked me under)
- Follow me on Pinterest (Post what name you followed me under)
- Pin one of my posts to Pinterest (Post a link to your pin)

Only posts on my blog (not on facebook) will count as entries and you can have a maximum of five total entries.

Some Rules:
- To be eligible you must be 18 years of age or older and a resident of the US or Canada 
- Entries will close on Wednesday May 30, 2012 at 12:00 Noon EST
- The six winners will be chosen by a random number generator based on the posts
- I will notify the winners by email and they will have 72 hours to confirm with a valid US or Canadian address  and verify the picture that they want otherwise an alternate winner will be chosen 
- The photos are being provided by Home and Away With Lisa and I am not being compensated in any way for this giveaway

Update: The winners are (in alphabetical order): Cindy, Ethylene, Kathy, Mary-Lou, Rene and Veronique. Thank you all so much for your wonderful comments about my photographs. It is truly kind of you and I really appreciate it. 

Thursday
May032012

Practical Tips for Travel Photos: Dealing with Bad Weather

When the weather is gorgeous and the skies are blue it really isn't so hard to take some beautiful vacation photos.

If the weather isn't cooperating with your travel plans, however, it can be a little more challenging to capture great photos on a dreary day. Here are a few practical photography tips to make the best of the weather and get some lovely shots on your trip.

Adjust your white balance
Gloomy or cloudy weather can give a cold feeling to your photos if you don't have the white balance set properly on your camera. Find out how you can adjust it on your camera and either manually set it or put it in cloudy mode. Personally, I always shoot in raw with my camera because I love the flexibility of being able to tweak the white balance on my photos after the fact. Having the right white balance can really affect the quality of your picture. 

Limit the amount of blank sky
Capturing a large expanse of sky that is filled with a vibrant sunset or interesting clouds set against a backdrop of blue can make a lovely photo. A picture that is predominately blank, white sky, however, is not so interesting. There is no rule that says the horizon line needs to be in the middle of your photo so try tilting your camera down a bit to minimize the empty space. Another trick is to like up tall things, like trees or buildings, in the foreground your picture to fill up the expanse. You can also try tilting the frame a bit to play around with the composition to find a way to minimize blank sky. 

Creatively add color
Grey days can result in photos that seem to have no color in them. Avoid drab photos by actively trying to add color in. Look around for a patch of flowers, a brightly colored door, colorful umbrellas or a tree with bright foliage and then move around until you can find a composition of your subject that can include it. For me this often means a lot of crouching or standing on tip toes so I can line things up, but it is worth it. 

Focus on details
One nice thing about overcast weather is that you don't have harsh shadows caused by bright sunlight. The diffuse light makes it a perfect time to take photos of details of things, especially items like carvings which have a lot of depth and could get swallowed up in shadows.  

Embrace the weather
Don't fight the weather. It is part of your experience on your trip so embrace it. Take pictures of people with brightly colored umbrellas and raindrops on leaves. Using puddle reflections can also provide fun pictures. Dark, angry, stormy skies make a lovely backdrop for great photos. Also, be on the look out for rainbows after the rain subsides.

 
Best of luck for wonderful weather on your next trip! Happy travels!

Wednesday
Apr042012

Practical Tips for Travel Photos: Introduction

I love to travel and I love to take pictures so naturally I take tons of photos on my vacations. In trying to improve my photography skills in the past I looked up some articles online for advice.

A lot of what I read was geared toward someone who was an aspiring professional photographer or someone who was traveling for the purpose of taking pictures so it wasn't really practical for me. Tips like avoiding taking pictures in the middle of the day and using a tripod just weren't realistic.

Would I have better pictures if I followed these guidelines? Of course I would but photography is something fun I do while I am on my trip, not the purpose of it. I'm not willing to do anything that would significantly change my travel experience for the sake of taking pictures. I like to travel light and a tripod would slow me down. The middle of the day is prime time for sightseeing and I am not going to forgo taking photos then just because the light is harsh. I needed an approach that fit in with my style of traveling and over the next few weeks I am planning some posts with practical tips for taking travel photos that can work for everyday people like me.

The primary purpose of this post is to introduce this series but I thought I would also share my number one travel photography tip: If it means something to you, always take the photo. It's so simple and obvious but also easy to lose track of sometimes if you get too caught up in trying for perfection.

When I was in Peru in the Fall of 2007 there was a guy in our hiking group on the Inca Trail that was carrying a fancy camera with several lenses and a heavy duty tripod on the four day trek. After we headed off I thought it was a little strange that he hadn't bothered to take a picture all day despite talking about his equipment at length. I asked him about it and he explained all sorts of reasons why the light wasn't any good because of the time of day and the direction of the sun. Although everything he said was technically true, the one reason to still take pictures that trumps all of that is that you will never have a chance to take those photos again.

Professional photographers or people on photo vacations can wait for good conditions or take lots of time to set up perfect shots. For the rest of us we take a brief pause to snap a picture and then move on to enjoy our travels. If you don't take the picture in the moment you won't have it. I've never regretted taking a picture, even when it was a terrible shot, but I have definitely regretted not photographing something. Even when I was broke in grad school using a film camera I always left money in my budget for plenty of film developing. Nowadays with digital cameras there is no reason not to shoot now and delete later. That doesn't mean to go crazy and not be judicious but it does mean to err on the side of too many rather than too few photos.

Plenty of pictures that I have taken are objectively not that great, but that is not the point for me. If I see a really cool building that requires me to shoot into the sun to capture it I am still going to take the picture because I want to remember it. My travel pictures are a visual record of my memories on my trip, and while I want them to be the best I can make them I am not going to leave something out just because I can't make into an amazing shot. In my judgment all that it takes for a picture to be worthwhile is that it means something to me.

When you are traveling, keep in mind why you are taking pictures in the first place, give yourself permission to be okay if things aren't perfect and press the shutter button. You'll enjoy your vacation more and probably end up with photos that are more meaningful and representative of your experience.

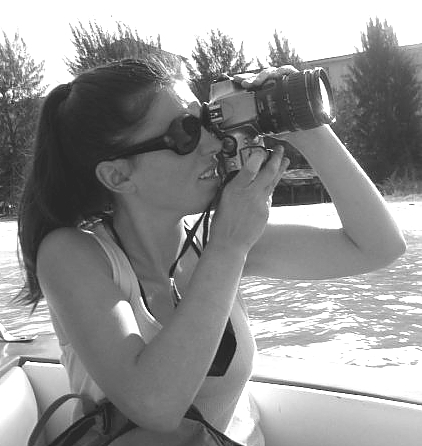
Notes: The photo of me was taken by the fabulous Miss Trisha in Saipan, December 2008. Yes, it is true, I am indeed wearing sunglasses while taking a picture. We were on a fast moving boat and I didn't want to lose the shot so I just quickly grabbed my camera and snapped away. 
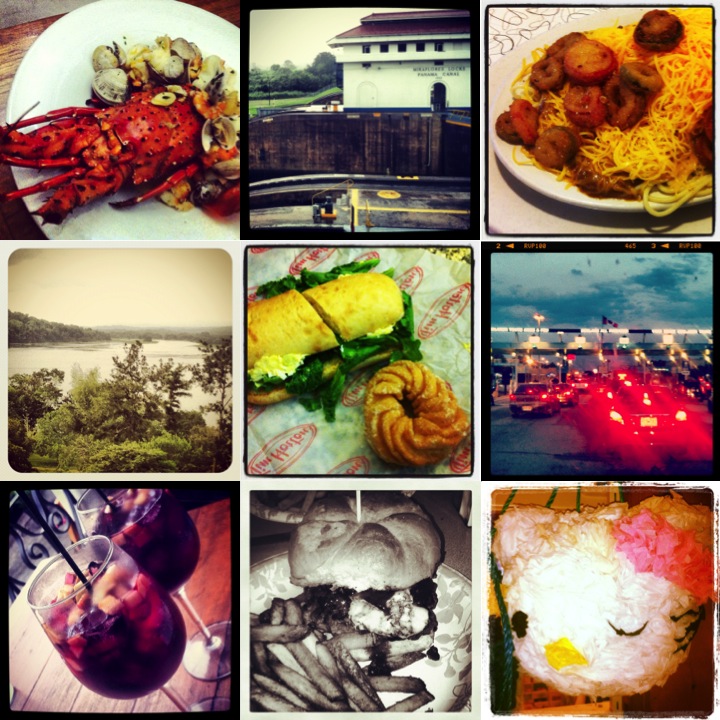
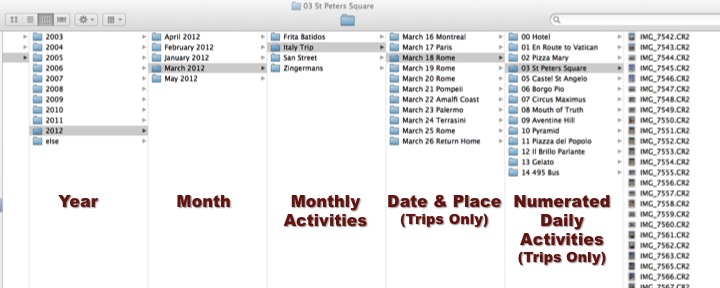
Wednesday
Mar282012

Cameras Past & Present

I've had some questions about my travel photographs so I thought I would start by sharing what camera equipment I use. Over the years I've used a variety of cameras that I've all really enjoyed and worked well for me.

Canon Rebel (Summer 1999 - Fall 2003)
When I finished undergrad I saved some of my summer internship money to buy myself a 35mm film Canon Rebel with a kit lens in the Summer of 1999. I loved that camera and toted it everywhere with me during grad school. This was the camera that I took on my first trip overseas. The only downside was that with all the pictures I took I was always lugging tons of film around with me. 

Canon Digital Rebel (Fall 2003 - Summer 2010)
After I finished grad school and started working I decided to use some of the money from my annual bonus to buy the original Digital Rebel in the Fall of 2003. Before the Digital Rebel there weren't really any options for an affordable digital SLR so I was pretty excited when it came out. Although I was a little sad to give up my film, pretty quickly I was in love with the flexibility that having a digital camera provided me. Initially I used the EF-S 18-55mm kit lens but then I upgraded to a bigger zoom lens a few years later which proved to be a nice multipurpose lens for me.

Sadly, my beloved camera finally died on me. I took it everywhere including a lot of humid locations. On my trip to Guatemala in 2010 the shutter button started acting funny and I had to press it really hard to take a picture. I was in some rain storms during that trip and when I returned home some of the switches on the back of the camera had stopped working. My Rebel served me well over the years and I took tens of thousands of pictures with it.  

Canon EOS 7D (Summer 2010 - present)
With my Rebel dead I needed to buy a new camera. Since I used my old camera for seven years I decided to get a camera that I really loved and could use for many years again. After investigating a lot of options I ended up splurging on a 7D.

While searching around for a good price I found it was offered among Adorama Camera's refurbished equipment. Adorama Camera is a well known company and its Canon refurbished products are refurbished by the manufacturer and come with a 1 year warranty. Combining that with the fact that buying it refurbished saved me a few hundred dollars I decided that was the way to go.

My 7D has been fabulous and I love the pictures that I can take with it. I also really enjoy being able to capture video with the camera. With my 7D I use a Canon EF-S 18-200mm f/3.5-5.6 IS lens. I find it is a great multipurpose lens to use while I am traveling. It gives me a lot of flexibility in one lens that enables me to pack light.

Canon Power Shot G12 (Summer 2011 - present)
Before heading on my trip to Southeast Asia for three weeks last summer I decided to get a point and shoot camera. After researching my options I decided to get a Powershot G12. I like to shoot in RAW which is supported by the G12 and it also gives me the flexibility to change the aperture and shutter speed which I like.

My 7D is my main camera but I love being able to slip my G12 into my pocket to take pictures when I am out with friends or at a restaurant. I also use it when I am in situations where flashing my SLR around isn't the smartest idea. For example if I am in a crowded market known for pickpockets then I keep my 7D packed away and use my G12 instead. It allows me to take nice pictures in situations where I might otherwise be a little uneasy with using my 7D. I also like having a small backup camera with me on my travels in case something happens to my 7D.

So what kind of camera do you use? What do you love about it? What would your ideal camera setup be?