 While I was mounting the photos from my giveaway to celebrate my six month anniversary of blogging I thought I would share how to do it. Pictures can buckle when the mount board, mat board and picture expand and contract at different rates when the temperature changes. By hinging the mat board to the mount board and hanging the photo from T-hinges you keep the picture as free to move as possible and minimize the chance of warping.
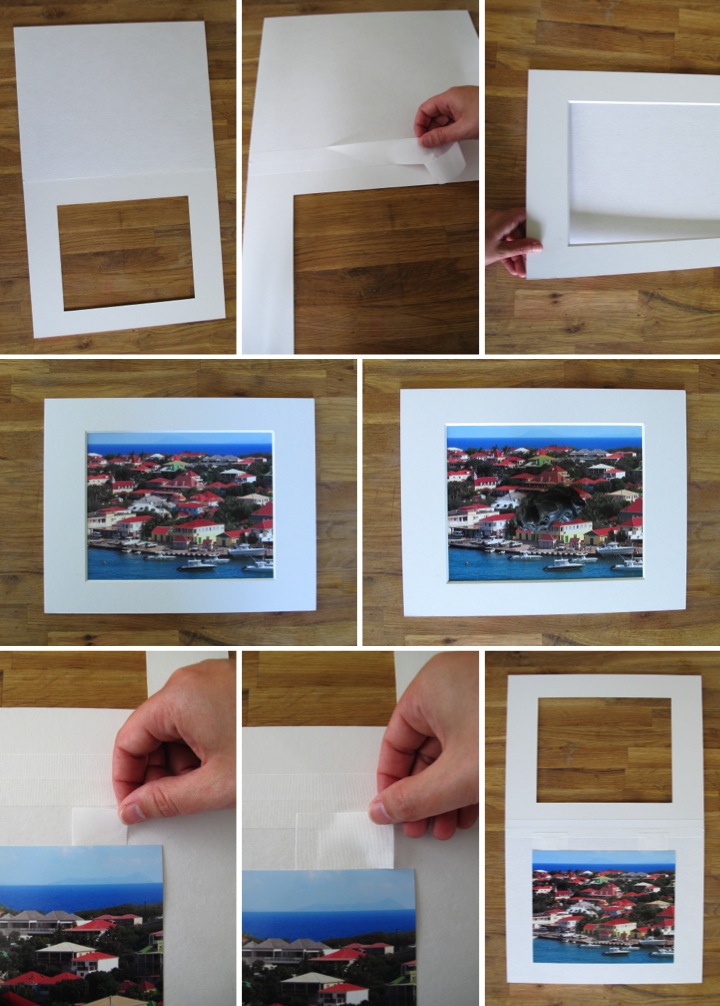
To mount a photo you need a mat board and mount board that are the same size and some linen tape. Start by laying your mount board face up with the mat board face down and align their edges. If the thicknesses of the mat board and the mount board aren't the same put something underneath the thinner one so that they are level. Cut a piece of linen tape the width of the boards and then lay it along the seam between them to make a hinge. Flip the mat board down and so that it is right side up. 
Now that you have hinged the mat and mount board the next step is to mount the photo. Place your photo under the mat board and adjust it to the position you want. Once you have it where you like it, place a paper weight on the photo to hold it in place and then flip the map board back. Cut two short pieces of linen tape. Carefully lift up the top corners and slip the tape halfway under with the sticky side up. Cut two more pieces of linen tape and then place them sticky side down over the previous pieces of tape. The picture will now be hanging from the two tape T-hinges. To complete just remove the paper weight and flip the mat board pack over the picture. Your picture is now ready to frame.