Welcome

My name is Lisa and I'm a crafty girl with wanderlust working as an engineer by day. My blog chronicles projects in my home as well as pictures and stories from my travels.

Search


Instagram

Blog Index
The journal that this archive was targeting has been deleted. Please update your configuration.
Navigation

Entries in Closet (5)

Tuesday
Dec102013

Beginning the Master Bedroom Closet Makeover

Since we got married and Frank moved in with me this summer he has been hanging up his clothes on a standing clothes rack in the bedroom. Originally our plan was to use a beautiful antique armoire to convert into a closet for him. It is enormous so we checked the measurements for everything to make sure it could get through our front door, the bedroom door and fit in the bedroom itself. What we didn't account for was the headroom in the stairway which is just a smudge too short.

So apart from figuring out a long term solution for the armoire on the first floor Frank needs some place to hang his clothes which is bringing about this closet makeover.

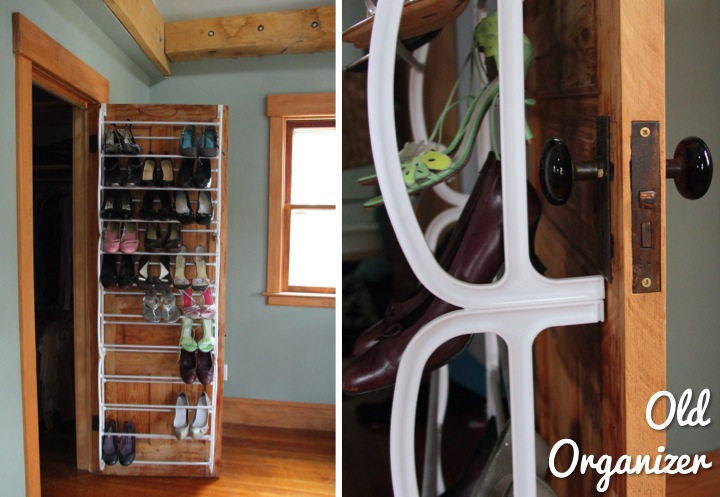
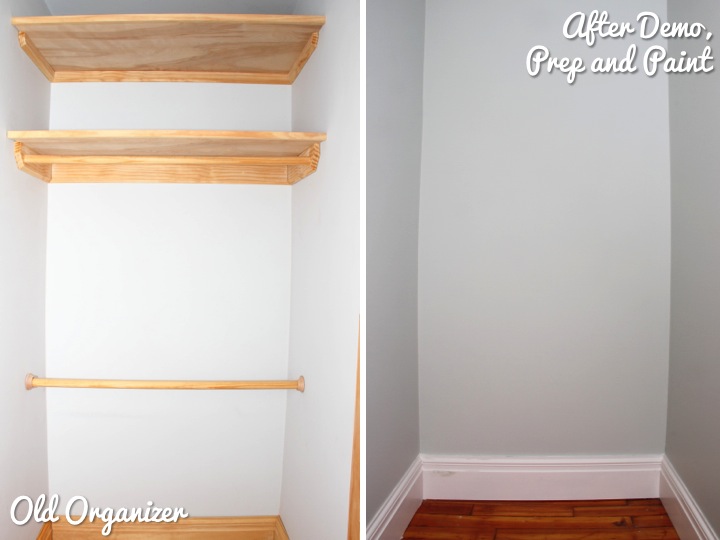
The old closet system doesn't work for a few reasons. Originally it had only one bar on each side with the shelves above. The shelves are largely useless and just gather my junk so I want to hang the rods higher. I hung a second rod on one side of the closet but because the top rod wasn't very high it works for my clothes but not for Frank who is a foot taller than me. All in all if this closet was going to work for us I needed to completely rework the organization to maximize the space for both of us.

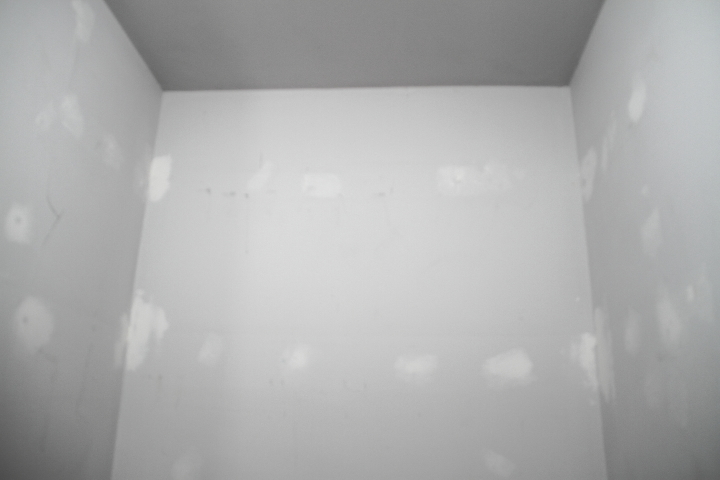
To start I set about cleaning out the closet (no easy feat with my pack rat ways!) and then demoing the existing organizers last weekend. I was as careful as I could be but the walls were pretty scuffed up and had a number of holes in the walls from where the old shelf supports were attached.

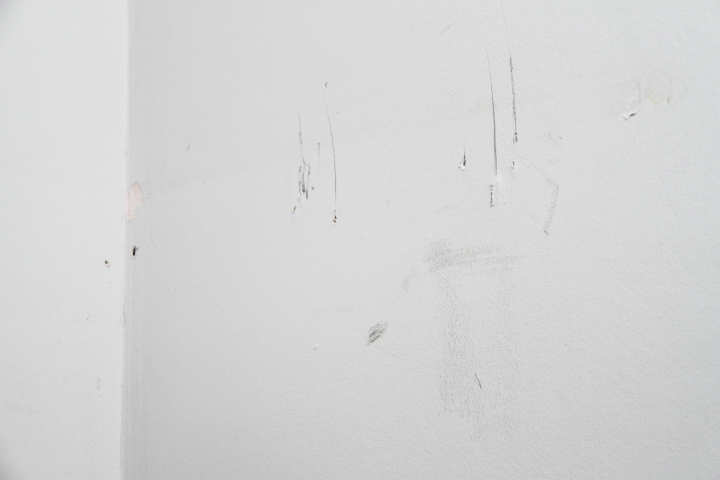
Using a putty knife, I filled all of the holes plus a few small dents the closet had acquired with some joint compound. After it had dried I applied another thin layer and then sanded everything smooth once it was dry.

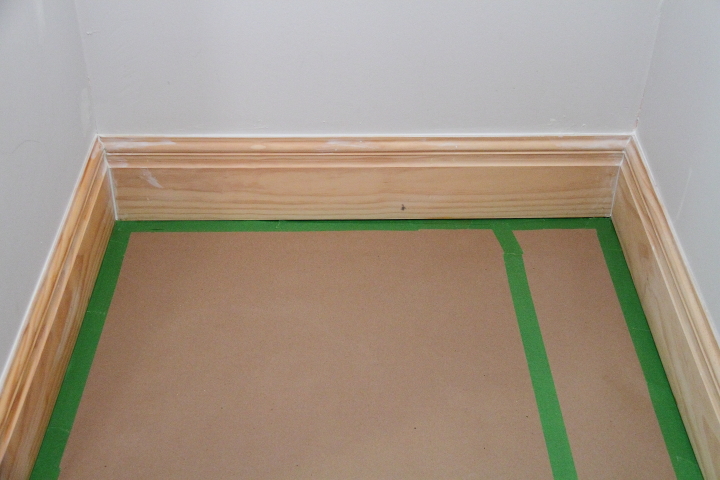
While I was at it I wanted to paint the trim white so a little prep work was required there as well. I applied a bead of paintable, sandable caulk in all of the gaps and then smoothed it with my finger.

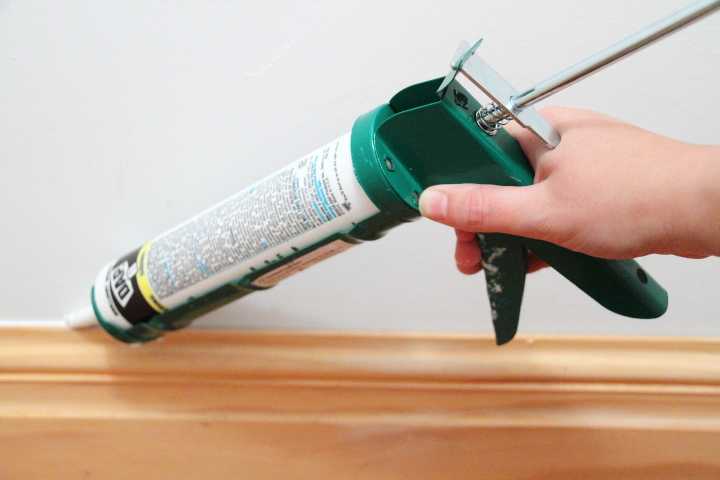
If you don't use a caulk gun very often one thing I'll mention is that right after you are done applying caulk hit the release on the back otherwise when you set it down it will slowly keep oozing out. I learned my lesson about this several years ago with a construction adhesive mishap. In case you are wondering construction adhesive is very tough to get off your hands and will turn them black. It made for a slightly awkward few days at work.

Anyway, back to the closet! With a coat of primer and two coats of Benjamin Moore's Simply White on the trim followed by two coats of Valspar's Oxygen White on the walls my closet was a fresh blank slate.

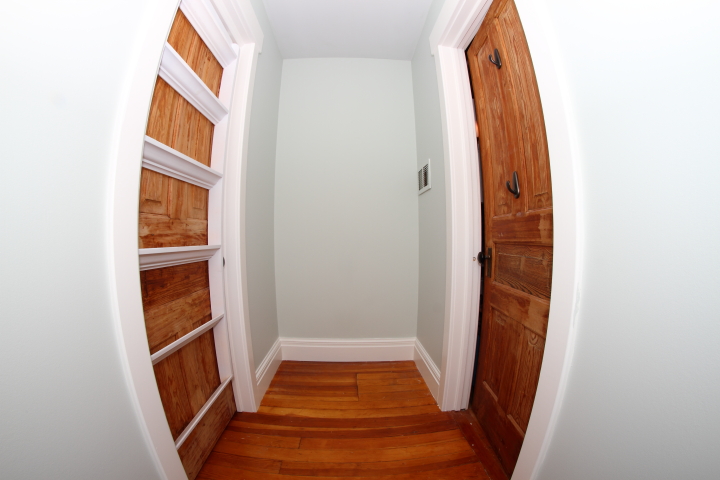
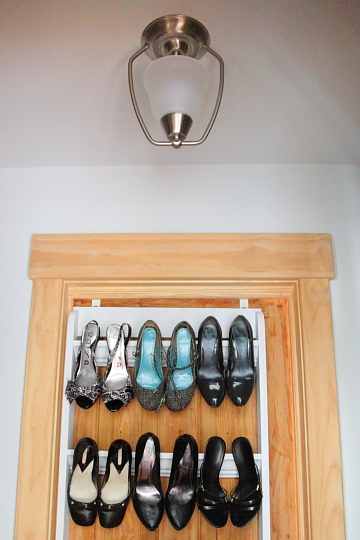
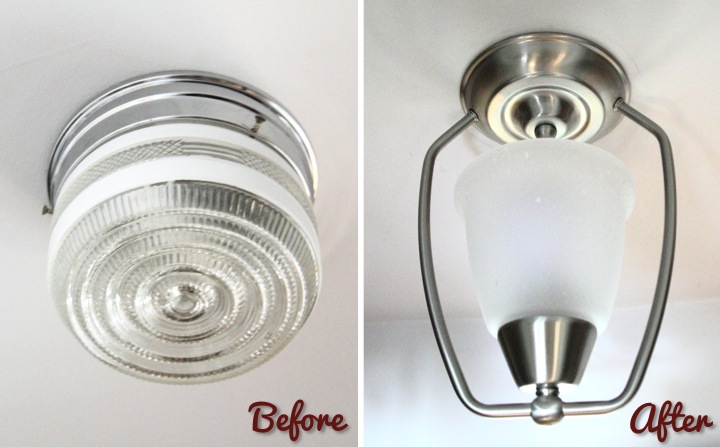
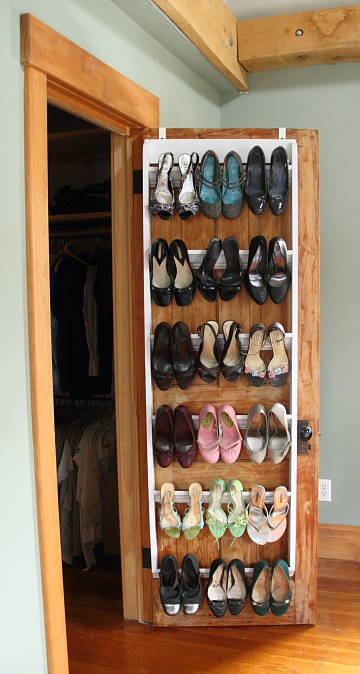
Next up I have some fun plans for the ceiling and closet light plus I'm going to build organizers that maximize the space for our needs. I can't wait to get the clothes back in the closet!

Sunday
Nov042012

New Master Bedroom Closet Light

After working on some projects for my master bedroom closet, including my laundry sorter and shoe organizer I decided it was finally time to replace the light fixture.

When I redid the electrical when gutting the main section of the house I had to purchase a ton of new light fixtures quickly. In cases where I just couldn't find anything I liked in my price range I ended up just getting a super cheap fixture from Lowes as a placeholder to pass my electrical inspection. In my closet I had a little light fixture that was only $10. While it was perfectly respectable for its purpose, I decided it was finally time to find something a little prettier.

Nice looking flush mount or semi flush mount fixtures can be really tough to find. Also, since my house is originally from the 1800s I like to have my fixtures look classic and not too modern. Add into the mix that I didn't want to spend a ton of money and it seemed like finding the right light was going to be a needle in a haystack type of problem.

Off and on I would poke around a bunch of different lighting websites looking for something that fit. Then one day I found a semi flush up light from Progress Lighting's New Bedford collection on LightingDirect.com. The fixture looked classic and the price was great, too. With a discount code I got it for under $30. The only thing I was hesitant about was the glass shade which looked a little modern. I figured that for the price it was worth the gamble and decided to go ahead and buy it.

After the new fixture arrived, replacing it was easy. I simply switched off the breaker on my house's electrical panel for the closet, removed the old fixture and disconnected the old wires, reconnected the new wires and attached the new fixture. Each fixture is different but the same basics usually apply: black wires connect to each other, white wires connect to each other and the grounding wire connects to a grounding screw on the grounding bar.

I really like the new fixture, but I was right about the glass shade not being my look. The frosted seed glass really looks modern so I am on the lookout for a vintage shade on eBay that I can replace it with. I'd like to get something with a milk glass look like my hall light shades or my bathroom light shades. I do think even with the current shade this is a big improvement toward making the closet look nicer, plus I can put in a higher wattage bulb making the closet brighter. 

Next up in my closet I need to paint the trim and maybe put some color on the walls. I also want to build some crates for the shelves so that I will actually be able to use and organize them.

Have you been doing any closet organizing or upgrading? Do you have a lot of closet space or do you have to be creative to use what you have?

Tuesday
Oct302012

DIY Crown Molding Closet Shoe Organizer for Heels

I am short but I would just love, love, love to be tall. Because of this I have a high heel addiction and wear them everyday. In fact, I am so used to wearing heels that I can run in them as fast as I can in flats. Before you are impressed, I must disclose that I am painfully slow in whatever footwear I choose. I would tell you to think tortoise slow, but that would be slander against the tortoise.

Anyway, I digress. The point of all of this is that I have a lot of heels. I also happen to live in a house that is over hundred years old built in a time when thoughts of master suites with shoe closets were not exactly on the radar. As a result I need to make the best use of the closet space that I have to store my shoe collection. 

My old solution was terrible. It was a cheap over the door organizer that had all sorts of problems. First, it stuck pretty far out from the door making it a little unwieldy to get in and out of the closet. Second, it was just flat out ugly made from cheap plastic with metal rods. It doesn't look so bad in my pictures, but it real life it was an eyesore. Third, and most importantly it covered over the inside door handle. Normally, no one would care about an inside closet handle but when I remodeled the second floor of my house I reconfigured it to expand the closet as much as I could and to make it a pass through into the master bathroom. If I want to go from the bathroom to my room I have to wrangle the door knob through my shoe organizer. It's really annoying so I tend to just leave the door open which is not the best solution. 

Several months ago on Pinterest I pinned an image of crown molding on a wall for hanging heels from an article on Houzz.com thinking it would make a great solution for me. It has languished among my many pins, but I decided to use The Pinterest Challenge hosted by SherryKatie, Carmel and Sarah to finally get around to doing something with the idea.

Unlike the pinned image, I wanted to keep my heels inside my closet instead of displaying them on the wall. Also, I didn't want to make any holes in my old solid hardwood door (yes, I know it is bad need of refinishing). On my other closet door I had previously made a laundry sorter system from hanging baskets and had used Command Hooks so that I wouldn't damage the door. Command Hooks wouldn't be an option for this project, however, since any shoe organizer would be too heavy for them. As I was taking down my old shoe organizer, I realized that the metal part that went over the door could be slipped off the rest of the organizer and would make the perfect solution for me.

With how to hang up the shoe organizer figured out I next had to tackle the frame. I needed to make it as light as possible so it wouldn't put excessive stress on the door hinges. After sketching some ideas I decided to use 1x3s for sides with a 1x4 brace at the top. I measured a few pairs of my heels and determined that spacing the crown molding shelves 12" would allow me sufficient space for things not to be too crowded and give me six shelves. I was also careful to determine the width (22-1/2") so I wouldn't have interference with my door knob.

I didn't want to have the top have a square sharp edge so I traced a design on the top of my side supports and cut it out with my jigsaw. Next, I held up the crown molding against the side rotating it until I determined what angle I wanted it to be, which ended up being 40 degrees. I measured down 66" inches from the top (12" x 5 for the spacing between the six shelves plus an extra 6" at the top), clamped the two sides together and cut the bottom at 40 degrees. I then made a mark every 12" starting from the bottom and used the trimmed off piece as a guide to mark the angle for the molding on the sides.

With my sides cut and marked, I cut the 1x4 brace and five of the shelves at 21" and an additional shelf for the bottom at 22-1/2". I made the bottom shelf the full width because I planned it to go over the supports instead of inside like the others. I wanted the brace to be well secured to the shelf so I decided to use my Kreg Jig to make pocket holes to attach it to the sides.

To attach the crown molding shelves I put some wood glue on the ends, aligned them with the marks that I made and used some brad nails to secure them. For the bottom shelf I used glue and brad nails, but placed it on top of the angled bottom. This left a little gap which I filled in with wood putty and sanded flat.

I filled in the rest of the brad nail holes, sanded the whole piece, wiped it down with a tack cloth and I was ready for paint. I kept things simple and just gave the organizer two light coats of white spray paint.

Once the organizer was dry my last step was to attach the old metal over the shelf brackets. I drilled a pilot hole for the screw, attached the brackets with 1/2" screws and my organizer was complete.


I am thrilled with how my shoe organizer turned out. Not only is it much more functional than my old organizer (I can reach the door handle!) but it is so much prettier. 

Here is a view of the old organizer and new organizer from afar. I think it looks much cleaner to have the shoes spaced out, plus my newly built organizer sticks out less than half the amount from the door as the old one making it much easier to get in about out of the closet. Also, it is needless to say that crown molding looks prettier than cheap metal tubes any day. 

Did you make anything for the Pinterest Challenge? If so, leave a link in my comments because I would love to check it out!

Sunday
Aug122012

Basket Laundry Sorter

To say that I have a laundry problem is a bit of an understatement. I let it pile up on my bedroom and closet floor and then gather it up and sort it when I have time to do the laundry. It's out of hand and I needed to do something about it.

When I was at Ikea yesterday afternoon I spotted the Nasum baskets and a light bulb went off in my head. I thought they would make a perfect laundry sorter solution for me. The single handle is perfect for hanging and when I measured them I determined that I could easily fit three on the inside of my closet door. I also thought the banana fiber texture looked pretty plus each one is about the size of a load of laundry. 

I brought three baskets home and went about making labels for them. I printed out initials for each basket: C for Colors, W for Whites and D for Dry Cleaning. I thought about tracing them and painting them on the baskets, but I wanted something removable in case I wanted to use them for something else later. I cut out the letters out from white adhesive foam and then stuck the letters on the front of the baskets.

Due to the texture of the baskets the letters are a bit bumpy but I still like how they turned out.

With the baskets labeled I turned to hanging them up on my closet door. My closet has a door to my master bath as well as my bedroom. I decided to hang them on the door that opens to the master bath so that I could toss clothes into the baskets before I hop in the shower.

I didn't want to put holes in my antique hardwood doors so I turned to using Command hooks which are removable and won't mark up or damage my door. I got some large ones in oil rubbed bronze finish and attached them to the back of the closet door. Just to make sure that I wouldn't have any issue with the hooks falling off the door I let them sit overnight before hanging the baskets. 

I love how this project turned out and I think that this new system will keep my dirty laundry off of the floor. I'm also hoping this will motivate me to keep on top of my laundry instead of letting it pile up.

How do you sort or organize your dirty laundry? Do you have a system? Do you let your laundry build up or do you keep on top of it and do it regularly?

Monday
Jul162012

Storage Ottoman Makeover For My Closet

My closet is a complete and total mess. Having enough space isn't the issue. It's a nice size for an old home with about 42" of hanging space on either side of the door. I have access to it from my room and then can walk through it to the master bathroom. Unfortunately, it is completely unorganized and I have all sorts of junk on the floor. I added a second hanging bar on one side, but that is all I have really done recently. The woodwork needs to be painted and I'd also like to paint the walls something other than white. I have a lot of shelving but because I am so short I can't reach it so it is currently wasted space.

As a first step to make my closet more usable and organized  I decided to make it easier to access my shelves. I had this little turquoise suede ottoman that I thought would be perfect to make into a step stool. I wanted to be able to move it around easily so I decided to put it on casters. I didn't want it to slip out from under me when standing on it so I bought two locking casters and two regular swivel casters.

To mount the casters I started by flipping the base of the ottoman upside down and prying off the small feet that were on the ottoman. I then placed the casters in each corner of the ottoman with the two locking ones in opposite corners. I predrilled holes and then screwed them into the base.

Now that the ottoman was rollable I decided to make the inside more useful as well. I have a lot of flip flops but no good place to store them and I thought this could be just the ticket. I used some black foam core, large cup hooks and black duct tape to make some partitions for my flip flops to hang from. I cut four pieces of foam core the width of the inside of the ottoman and 1/2" shorter than the height.

For the center I doubled up two pieces and put a piece of duct tape over the top of them to join them. I used a flip flop for a guide and determined that the hooks needed to be 2-1/2" from the top of the foam core. I then poked a cup hook into the foam core 3" from each side and 2-1/2" from the top. I repeated the same on the back side as well. I found that the hooks had a tendency to spin when I tried to hang the flip flops on them so I pulled them out, added a dab of hot glue and then replaced the cup hooks.

For the two end partitions I did the same process as above, but with a single piece of foam core and with hooks on only one side.

With all of my partitions complete I was ready to assemble everything in the ottoman. I placed the end partitions against the side and used duct tape along each edge to secure them to the ottoman. I then put the middle partition in the ottoman and taped it down as well. I finished by hanging some of my flip flops in the ottoman.

I moved my ottoman into my closet and it fit perfectly. I can also now reach my closet shelves when I stand on it which is really convenient. 

Now I need to find where the rest of my flip flops are hiding around the house and wrangle them in my new and improved ottoman.