Welcome

My name is Lisa and I'm a crafty girl with wanderlust working as an engineer by day. My blog chronicles projects in my home as well as pictures and stories from my travels.

Search


Instagram

Blog Index
The journal that this archive was targeting has been deleted. Please update your configuration.
Navigation
Monday
Mar092015

A Winter Morning in Karuizawa (軽井沢)  

On a recent trip to Japan at the end of February I decided I wanted to visit the famous hot springs town Kusatsu Onsen on the weekend. After I finished work on Friday evening I took the train to Karuizawa (軽井沢) to spend the night since it was too late to continue on to Kusatsu Onsen that evening. As long as I was in Karuizawa I decided to do a little exploring the next morning before catching my bus to Kusatsu Onsen.

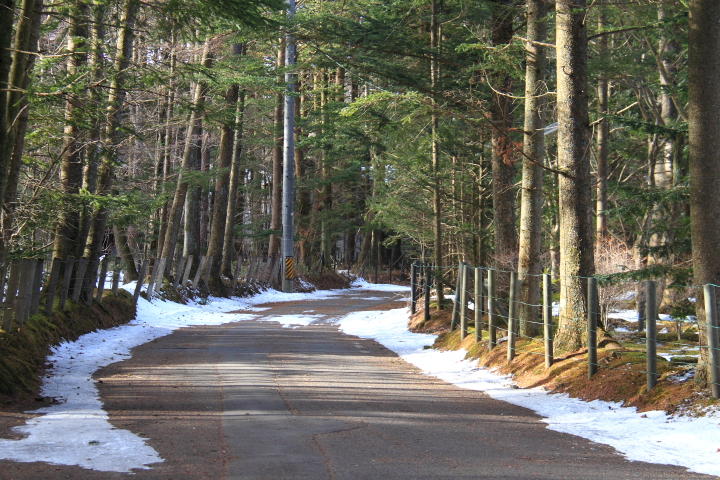
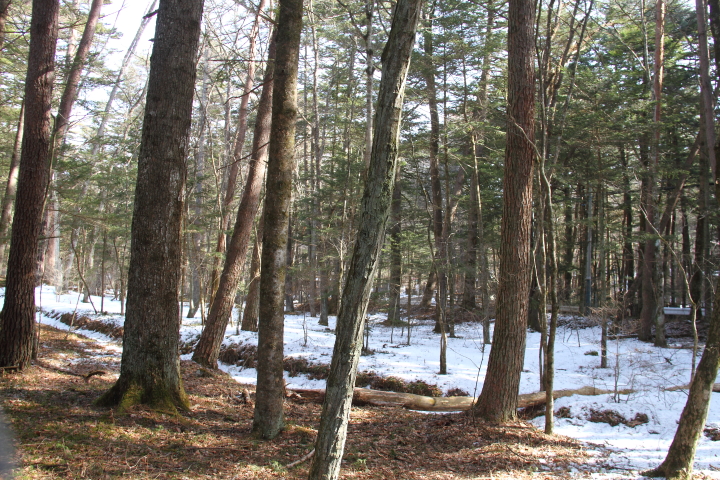
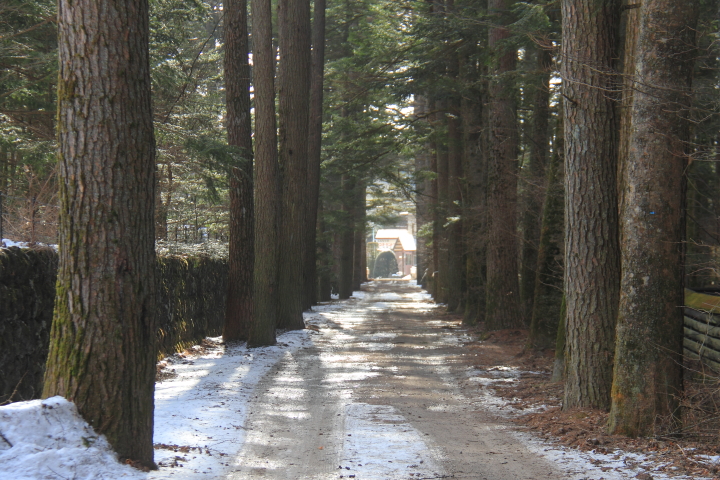
Karuizawa is known for being a tranquil place in the mountains to escape the summer heat in Japan and it seemed to be fairly quiet in the winter while I was there. As I set out walking in the morning it was really lovely strolling along the tree lined streets with remnants of a recent snow fall.

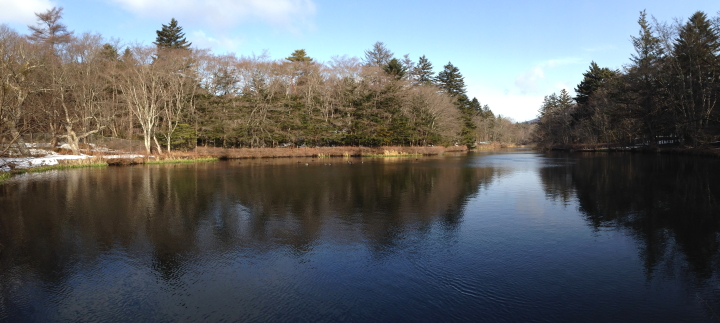
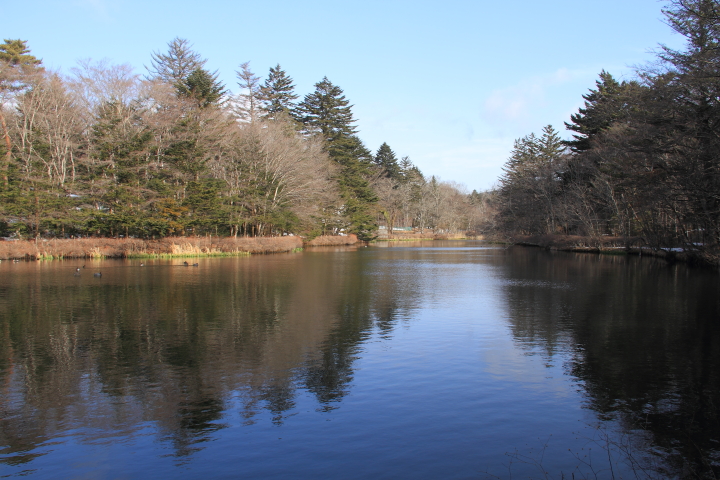
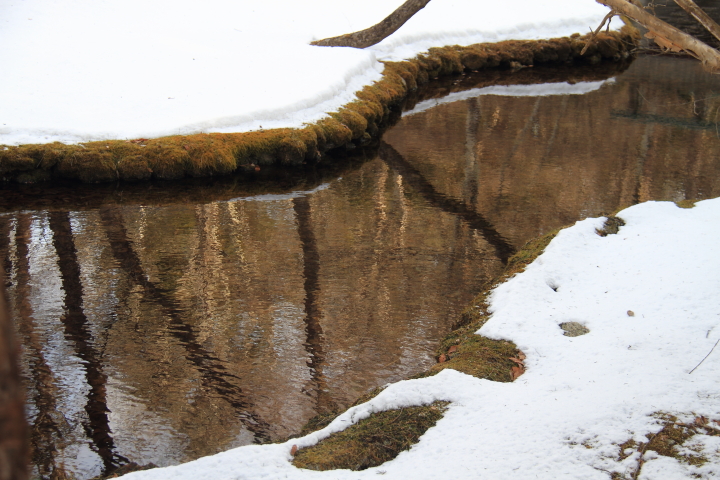
My first stop was Kumoba Pond (雲場池), which is known for its beautiful views in the autumn reflecting the colored leaves on the still water. The name Kumoba means "Cloud Place" and refers to the frequent mists that linger over the pond but while I was there the sky was bright and clear. 

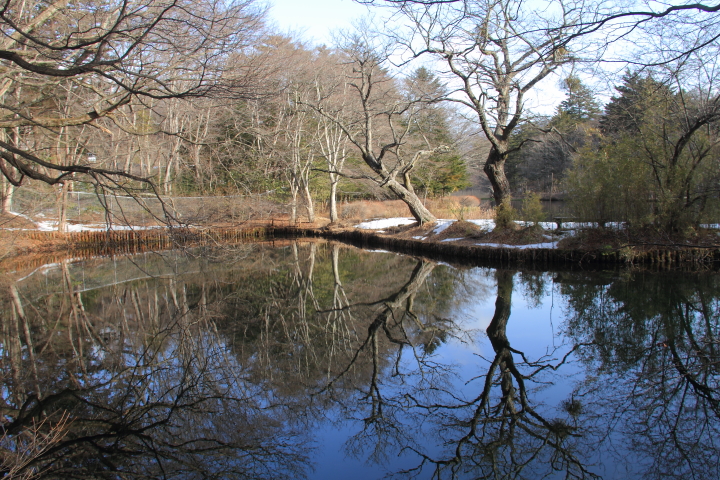
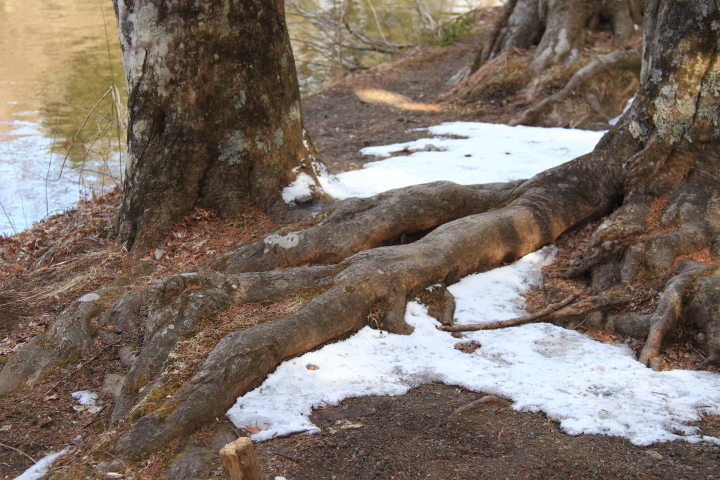
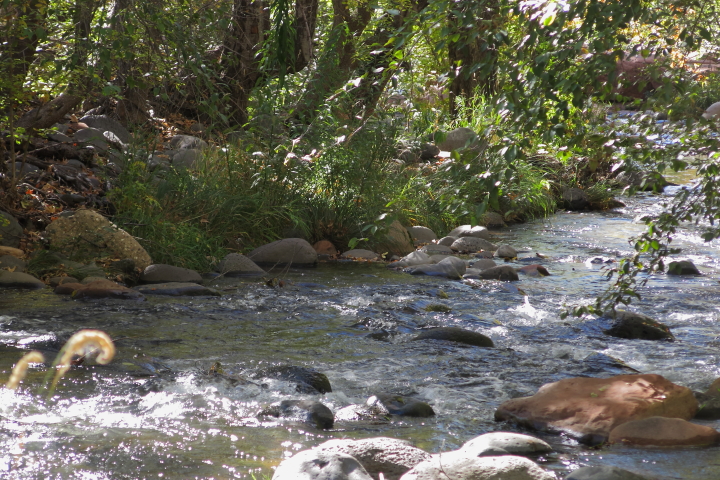
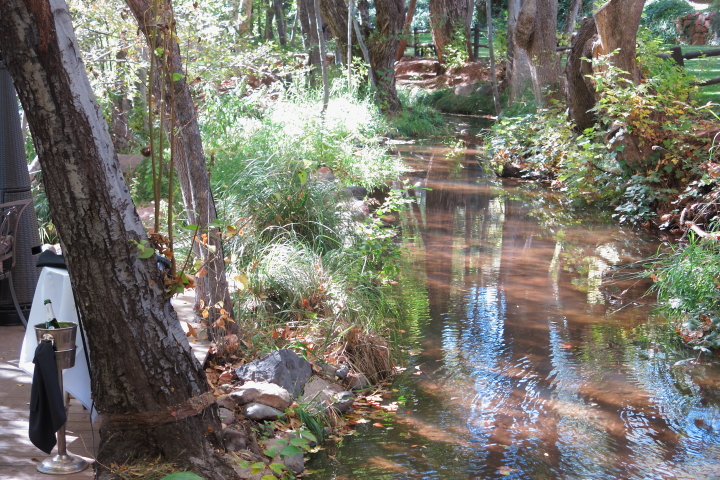
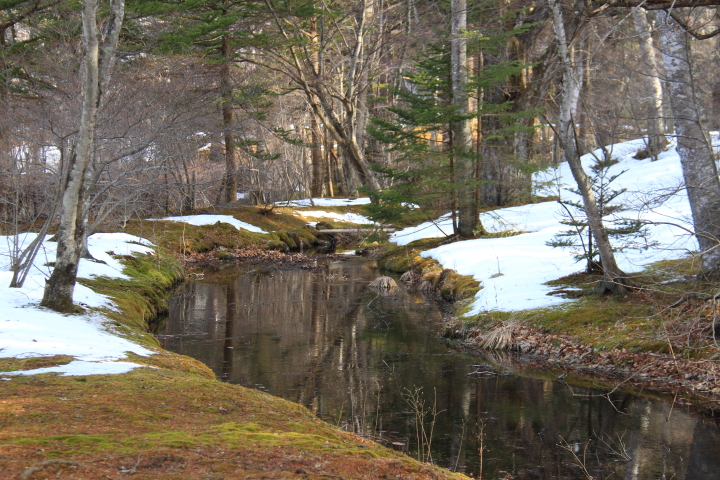
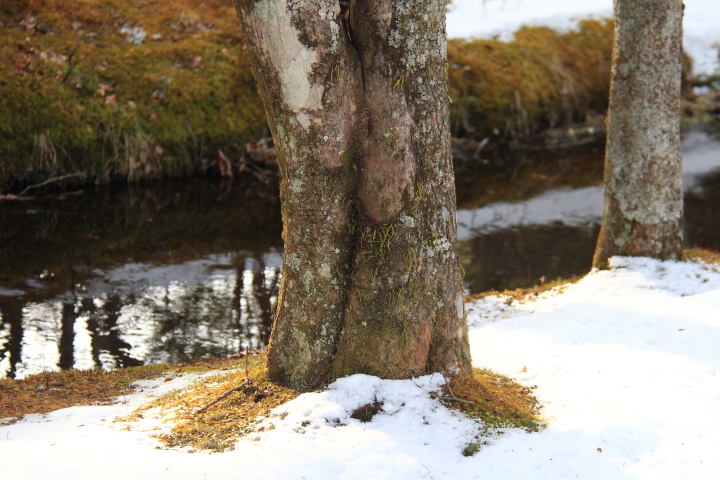
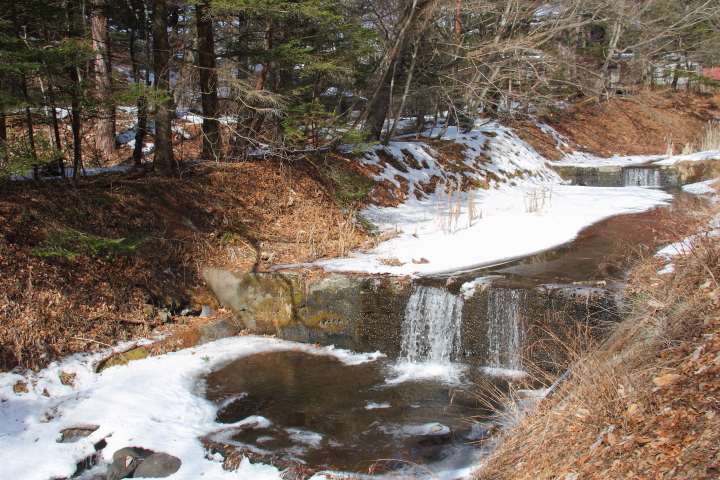
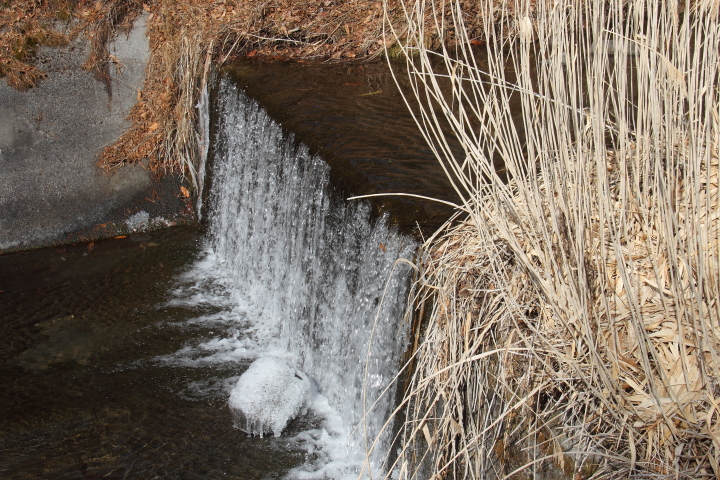
As lovely as the pond was, I found the little stream that ran beside the pond to be even more enchanting with its moss lined banks dusted with snow.

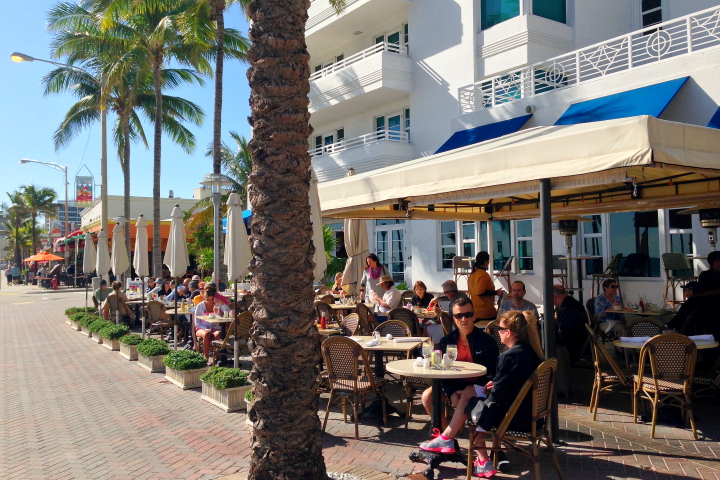
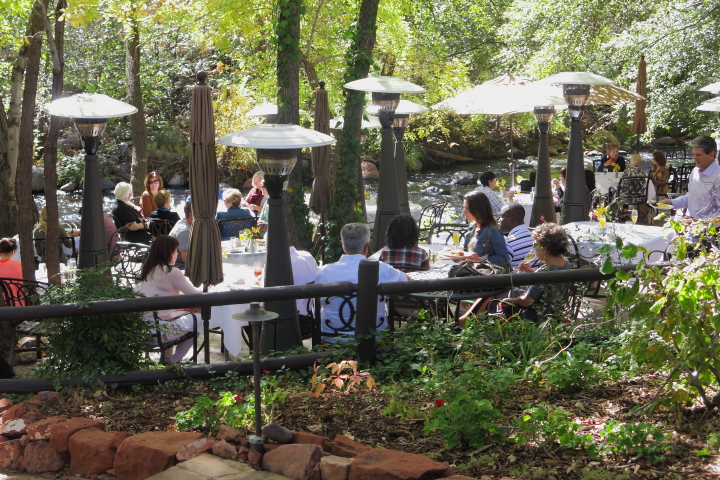
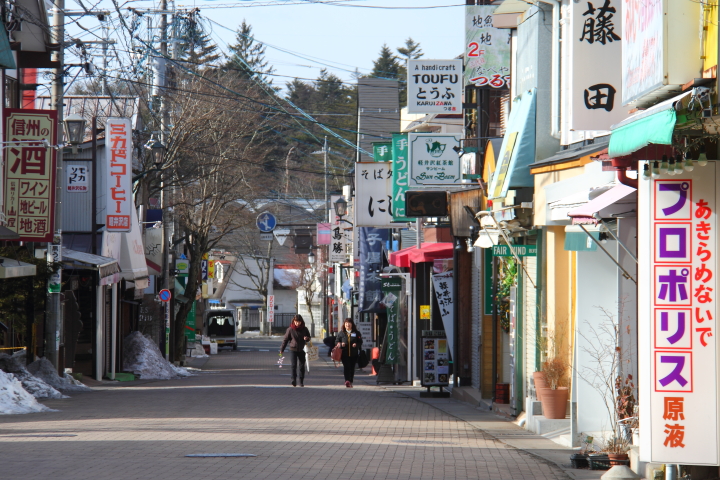
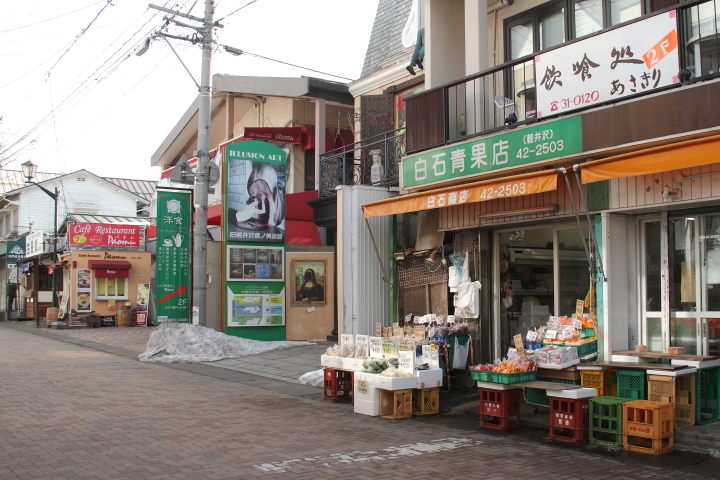
From Kumoba Pond I headed through more tree lined streets toward Kyu-Karuizawa (旧軽井沢), the old part of town. The main street through the area, Kyu-Karuizawa Ginza (旧軽井沢銀座), was fairly deserted with most shops indicating an eleven am opening time but I could imagine quite a bustling scene in the summer.

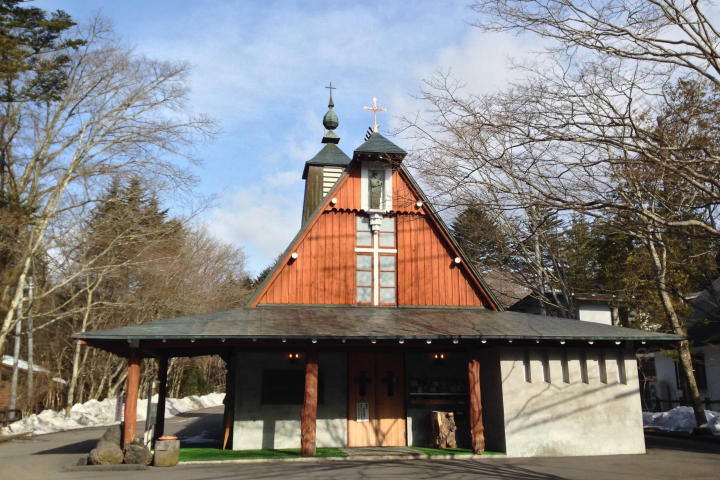
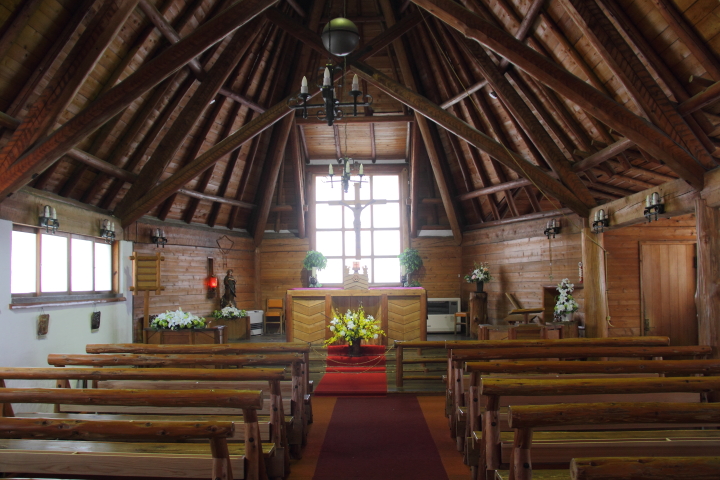
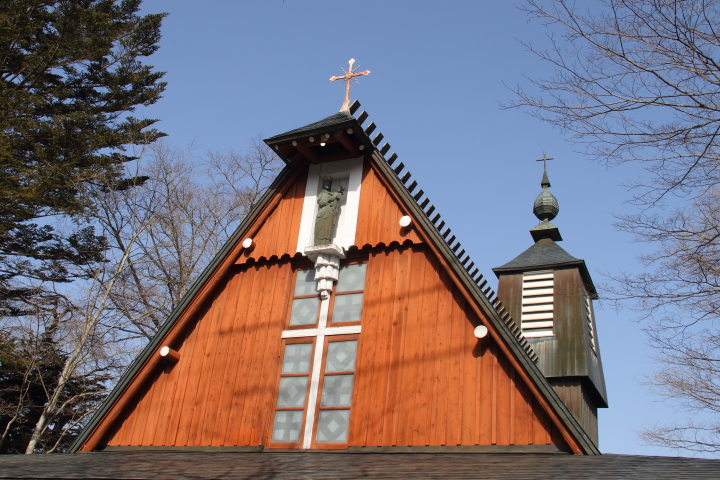
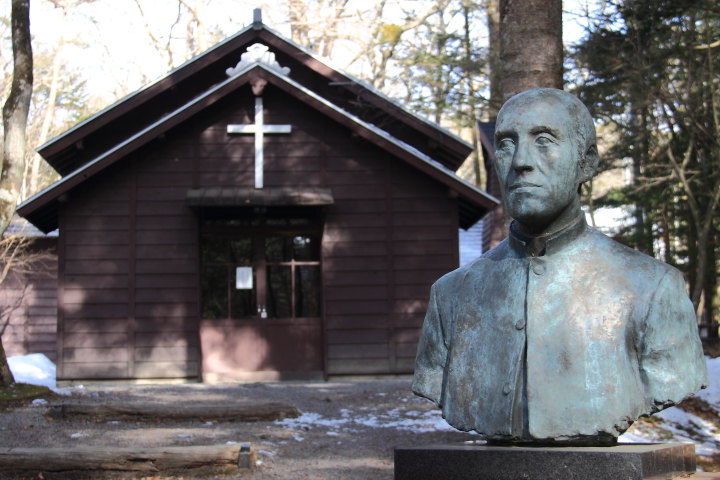
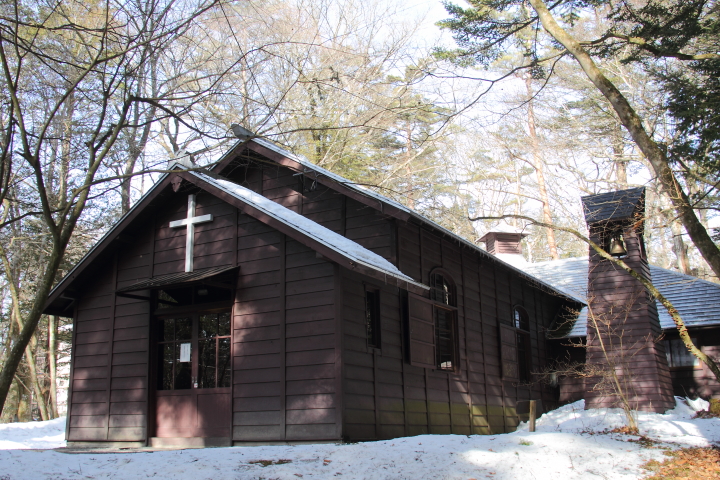
I turned off Kyu-Karuizawa Ginza to visit St. Paul's Catholic Church (聖パウロカトリック教会). Built in 1935 the rustic wood church was designed by Czech-American architect, Antonin Raymond, who had also designed a summer house for himself in Karuizawa a few years prior.

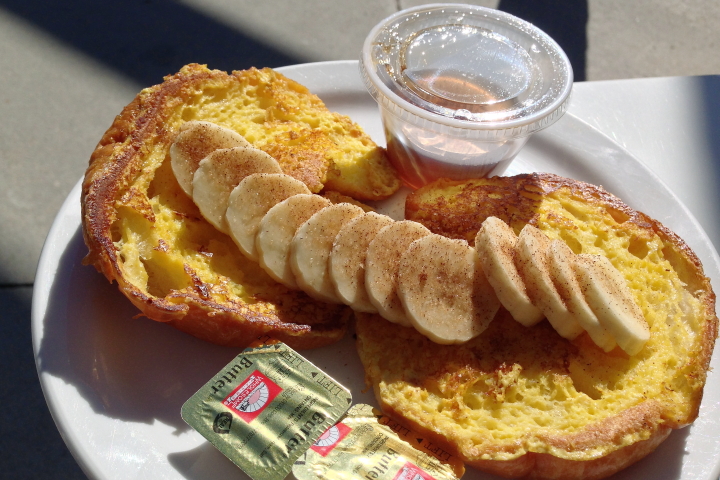
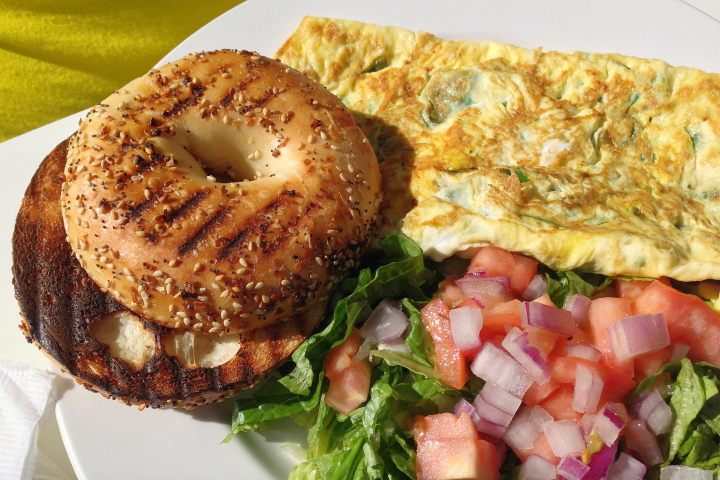
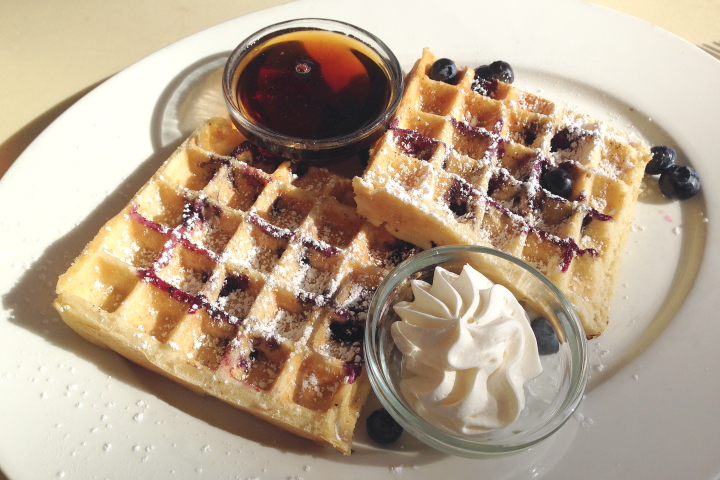
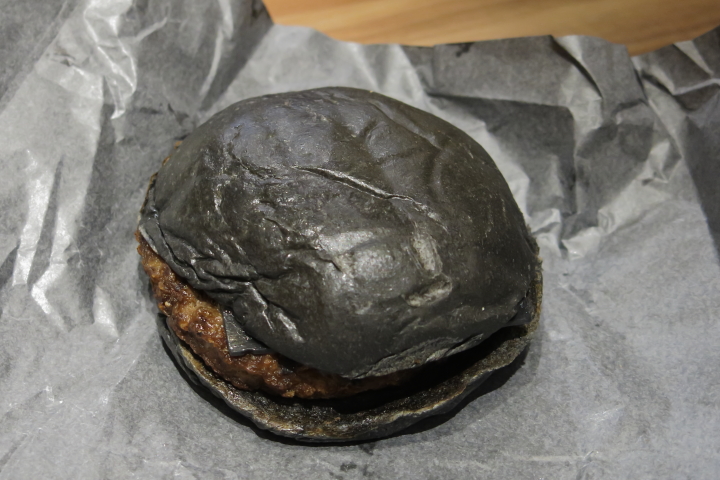
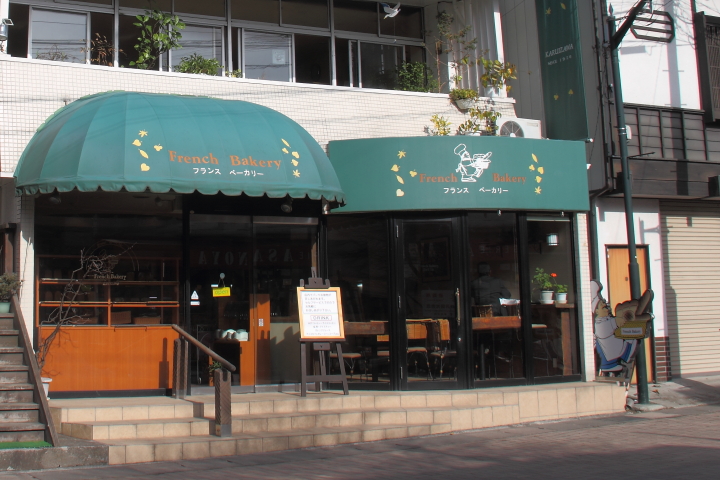
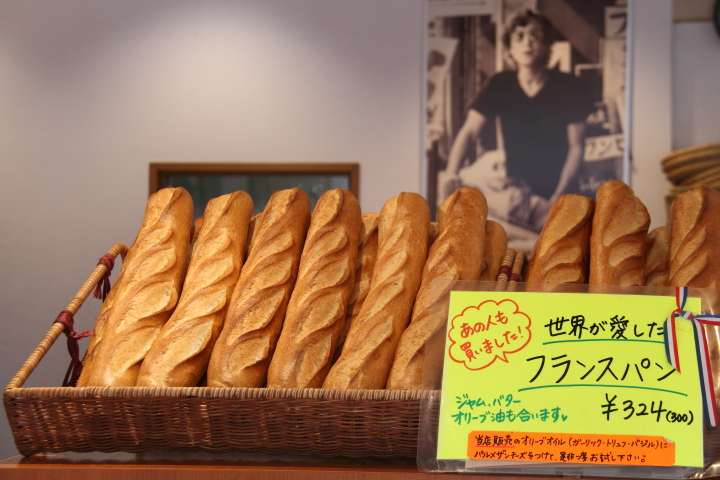
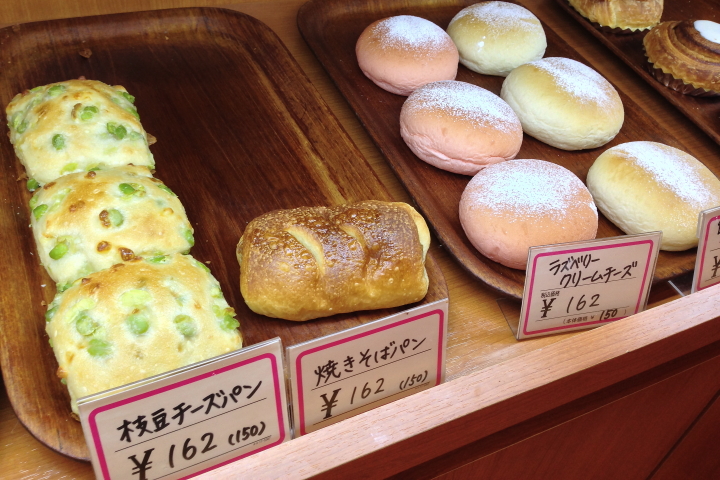
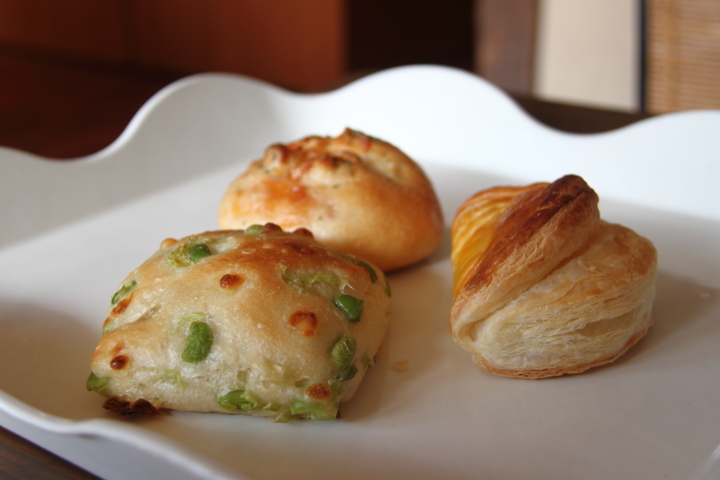
I returned back to Kyu-Karuizawa Ginza and stopped for breakfast at French Bakery (フランスベーカリー). John Lennon used to frequent the bakery when he and Yoko Ono stayed in Karuizawa and the bakery proudly displays a poster of him with their baguettes. As is typical in a bakery in Japan you pick up a tray and tongs as you enter and use the tongs to select the baked goods you would like to buy. I ate an edamame and cheese bun which I don't think is very French but was very delicious. I also couldn't resist buying an apple pastry and a bacon and cheese bun to take with me for later.

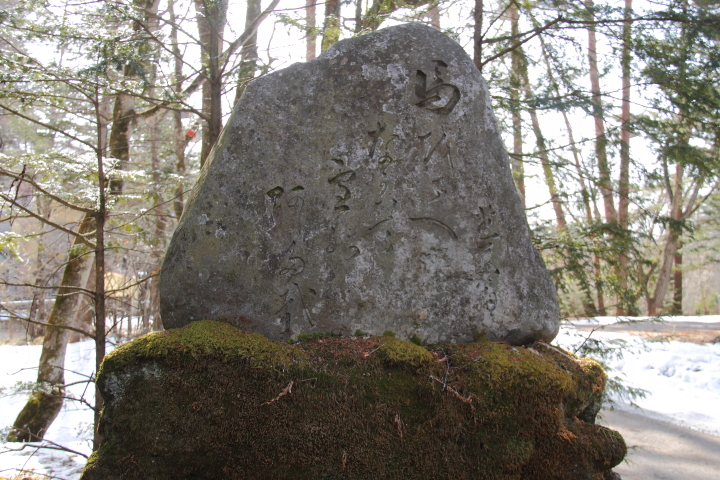
Continuing up Kyu-Karuizawa Ginza out into the countryside there was a monument to the famous poet Matsuo Basho (松尾 芭蕉) erected in 1843. It displays a haiku that Basho wrote while in the Karuizawa area that reads "馬をさへながむる雪のあした哉". Through looking at a few sources I found that while literally it means something like "even a horse gazing out on a morning of snow" the haiku conveys that on a snowy morning even a horse appears elegant.

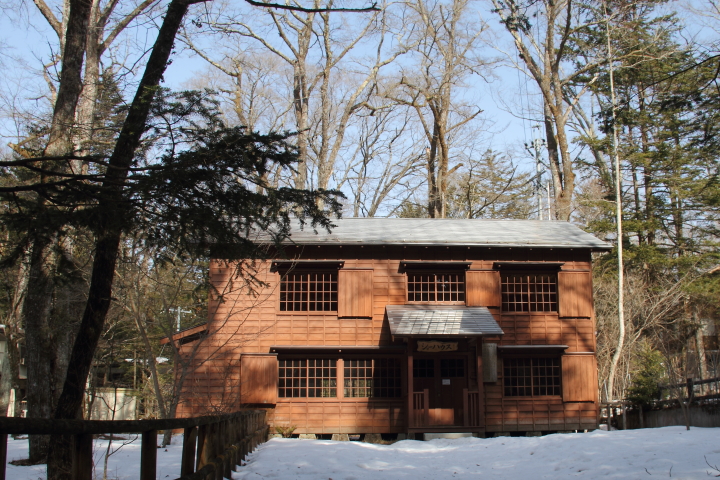
I continued along a little farther up the road to the Alexander Croft Shaw House and Memorial Chapel. Shaw was a Canadian Angliclan minister who founded St. Andrew's Church in Tokyo. He has been credited with popularizing Karuizawa as a summer resort when he visited in 1886 and subsequently built a summer home in 1888. Although the buildings were closed when I visited I enjoyed wandering around outside in the lovely setting among the forest.

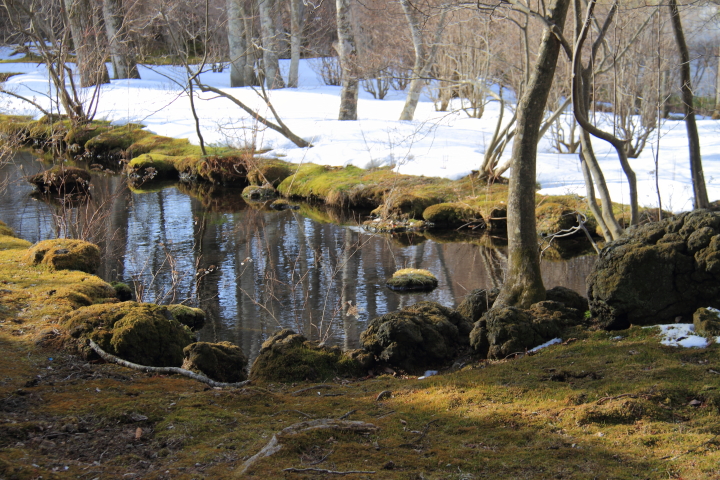
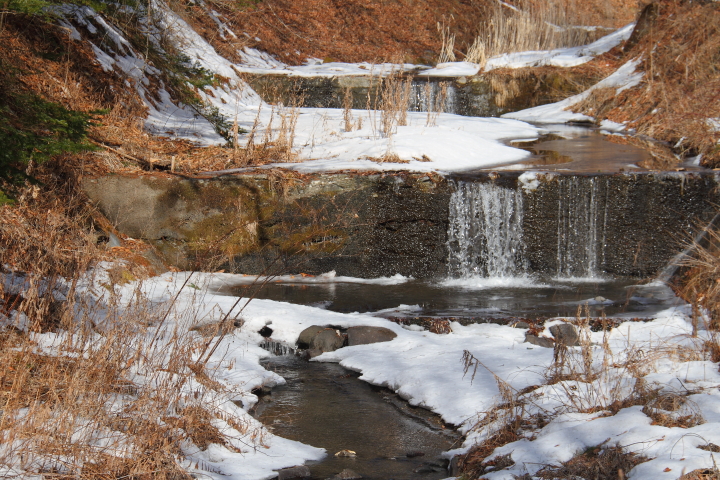
From Alexander Croft Shaw House and Memorial Chapel I headed back to my hotel to pick up my luggage. My route back took me along a pretty little creek and I couldn't resist taking a few last pictures while I was in Karuizawa.

While Karuizawa was definitely sleepy on my winter morning visit it was a lovely place to walk around for a few hours and I'm glad I had a chance to make the short stop.

Karuizawa Train Station is conveniently located on the Nagano Shinkansen line and takes about 70-80 minutes from Tokyo depending on which Asama train you take. Kumoba Pond is about a 20 minute walk northwest of the the station and Kyu-Karuizawa Ginza is about a 25 minute walk north of the station.

Tuesday
Feb032015

Customizing Curtains with No-Sew Accents

Due to a variety of factors, my sister ended up needing to move in mid-January while she was eight and a half months pregnant. Understandably she was pretty stressed about it so I took a little time off work and headed out to the Seattle for four days to help Melissa and Justin with their move.

Although they had movers, unpacking and organizing was a lot of work, but helping to set up the nursery was a lot of fun. The nursery theme was Dr. Seuss and Melissa had picked out fabric that she wanted to use when we were in Sedona together for a sister vacation in November. I had sewn a few things for the nursery in advance but I also wanted to do something special for the curtains while I was in town. Unfortunately, my sewing machine was back home and my sister doesn't have one so I got creative with some fabric, ribbon, Stitch Witchery (fusible webbing) and an iron.

I started with a pair of red curtains from Target and ironed them flat. I then cut two rectangles of the Dr. Seuss ABC Blocks Adventure Fabric that measured 1-1/2" wider than one of the curtain panels and 1-1/2" taller than the height I wanted the accent to be. I flattened out one of the curtains face up and laid one of the fabric rectangles over the bottom of it, making sure to have 3/4" edge overhanging the curtain and making sure that the bottom of a row of blocks lined up with the bottom edge of the curtain.

I cut a piece of Stitch Witchery the width of the curtain. Carefully lifting the patterned fabric I laid down the Stitch Witchery along the edge of the curtain, replaced the fabric over it and then ironed over it to fuse the fabric to the curtain.

I repeated fusing the fabric to the curtain along the remaining three sides in the same manner. Once it was secured to the front I flipped the curtain over and used the Stitch Witchery to fold the edges over the back and iron the edges in place.

To hide the unfinished edge along the top of the fabric I used more Stitch Witchery to secure a piece of turquoise ribbon over it, making sure to align it with the top edge of a row of blocks.

I repeated the same steps for the second curtain panel and in about a half of an hour I had customized my sister's nursery curtains to match her Dr. Seuss theme. I think they are a cute addition to the nursery and most importantly my sister loved them. 

Sunday
Dec072014

Thanksgiving Getaway to Ft. Lauderdale

This year our Thanksgiving plans fell through at the last minute so instead of staying home Frank and I decided to take a quick trip somewhere. In picking a spot we had two criteria: 1) someplace warm and 2) somewhere that we could get inexpensive flights. I dug around a bit and found a great deal on flights from Detroit to Ft. Lauderdale so off we went for a three day trip.

I found a good deal at the W Hotel so we stayed there for our trip. The hotel was beautiful and modern looking inside and out. Getting mimosas at check-in was a nice touch as well.


Our room was pretty with a clean, streamlined look including a nice little seating area.

The best part of the room by far was our balcony with the amazing views. It was spectacular.

The purpose of this trip was to relax, not sightsee so I decided to book a mani/pedi at Bliss Spa in the hotel. It was a nice way to start our trip.

While in town we enjoyed some great food at restaurants within walking distance of the W. For one of breakfasts we walked south to St. Barts Coffee Company. I enjoyed some delicious croissant french toast while Frank had an omelette. The food was inexpensive and the service was fast making it a good breakfast stop.

Another day we headed to H2O Café for brunch which had a nice outdoor seating area with ocean views. The food (blueberry waffles for me, an omelette for Frank) was good, but the best part was definitely the view.

We had a fabulous lunch at S3, which was conveniently located next door.

For out Thanksgiving dinner we ate at Steak 954, splurging on the amazing seafood platter. The meal was so fantastic I didn't mind not eating a traditional turkey dinner.

The boardwalk and beach along the strip where our hotel was located was really pretty and we enjoyed several lovely strolls. We were lucky to have gorgeous weather and didn't miss the cold back home one bit.

We spent a good bit of time relaxing at the pool, soaking up the sun and reading. The weather was really beautiful.

One of the neat things about the pool was the passageway that lead down a flight of stairs through the pool into the lobby. It was a really cool, unique feature.

We also enjoyed some beautiful sunset views. The beach was to the east, but to the west over the Intracoastal Waterway the sunset was quite lovely.

Our impromptu trip may have been short, but it was very relaxing and it was so nice to escape the cold Ann Arbor weather for a few days. It definitely wasn't a traditional Thanksgiving but it was a nice escape for us.

Monday
Nov242014

Relaxing at L'Auberge de Sedona

At the beginning of November my sister and I went on a long weekend getaway to Sedona. She is expecting her first little one in a few months so we wanted to have a trip together before her baby arrives. As part of our relaxing we spent a morning at L'Auberge de Sedona, which is a beautiful resort situated on the banks of the Oak Creek. We started off our visit by getting massages at the spa, L’Apothecary, located in a cute rustic building.

After checking in at the front desk we headed to the women's locker room to change into our robes. I snuck a few pictures with my iPhone when no one else was in there.

From there we headed to the sitting area where we sipped on some tea while waiting for our masseuses.

Our massages, maternity for my sister and deep-tissue for me, were fantastic. After we changed back into our street clothes we headed back to the lobby of the spa. Our masseuses left us notes with the products they had used during our massages in case we wanted to purchase them to take home.

Feeling refreshed from our massages we walked over to the L’Auberge Restaurant on Oak Creek for their Sunday champagne brunch. The setting of the restaurant was fantastic with tiered terraces overlooking the creek. My sister and I got a fantastic table right next to the water.

The bruch buffet was wonderful with a variety of delicious foods. I indulged in a mimosa while my sister enjoyed some sparkling water. I particularly loved the desserts, like the key lime cheesecake and the peanut butter mousse in a chocolate bowl.

One of the cool things about being right on the creek was watching the ducks swim by and wander up on the banks. Pictures just don't do justice to the beauty of it all.

We had a fantastic time relaxing at L'Auberge de Sedona and I would definitely recommend it to anyone visiting Sedona who is in the mood for a little pampering.

Monday
Nov172014

Pickled Beets

Growing up I have always loved pickled beets so when I saw a large basket of beets for $3.99 at Block's Farm Stand I decided I need to put some up this year. I have my grandmother's recipe that I grew up with, but to be on the safe side I used the vinegar/water/sugar/salt proportions recommended by the NCHFP but adapted their recipe to taste like my grandma's recipe by omitting the cloves and onions.

My girlfriend, Sylwia, came over and we spent a fun evening pickling the beets. It ended up taking quite a while since the basket ended up making three batches of the recipe, but at the end of the night we had 24 half pints of delicious pickled beets. It's like having a taste of my childhood in a jar.

Ingredients
- 7 pounds beets
- 4 cups vinegar (5 percent)
- 1-1/2 teaspoons pickling salt
- 2 cups sugar
- 2 cups water
- 2 cinnamon sticks

Directions
Scrub beets thoroughly and cook until tender in boiling water (about 25 to 30 minutes).

Drain the beets, discard the liquid and let the beets cool. Slip off the skins or peel them if the skins are being a little stubborn. Slice the beets into 1/4-inch slices. I used an egg slicer which worked really well.

Combine vinegar, salt, sugar, cinnamon and fresh water in a large pot and bring to a boil. Add beets and simmer for five minutes.

If you aren't familiar with canning, I cover the basics in my post about canning applesauce. Remove the cinnamon and fill jars with beets leaving 1/2-inch headspace. Pour hot vinegar solution over the beets leaving 1/2-inch headspace.

If you are at sea level (altitudes less than 1000 feet) then you will need to process pint or quart jars for 30 minutes. If you are at a higher altitude check the NCHFP processing times for pickled beets.

Thursday
Nov132014

Up and Over Mt. Rokko

In September when I was in Japan I spent a relaxing Saturday at Arima Onsen after a long work week. When evening came I needed to head back to Nagoya since I was flying home from Centrair the next day. Arima Onsen lies north of Kobe on the other side of Mt. Rokko giving me two options to get to Kobe where I needed to catch the Shinkansen back to Nagoya. I could go back the way I had come which was by a train line that went west around Mt. Rokko. The second option was to go up and over Mt. Rokko by cablecar which is what is what I decided to do.

I walked up to Arima Onsen Station (有馬温泉駅) and purchased a Rokko - Arima one-way ticket (六甲・有馬片道乗車券). The ticket includes one way on the Rokko Arima Ropeway (六甲有馬ロープウェー), on and off riding the Rokko Mountaintop Bus (六甲山上バス) and one way on the Rokko Cable (六甲ケーブル). The station was pretty desolate and only one other person boarded the aerial tramcar with me. The views as we rose up the mountain were fantastic but due to the speed we were moving the few pictures that I tried to take all turned out super blurry.

We rose from 433m above sea level to 880m, arriving at Rokko Sancho Station (六甲山頂駅) twelve minutes later.

From the station it was a short walk to the Rokko Garden Terrace (六甲ガーデンテラス) with shops and restaurants. I was intrigued by the beautifully illuminated Rokko-Shidare Observatory (自然体感展望台 六甲枝垂れ) and headed toward it.

The structure was designed by architect Hiroshi Sambuichi almost entirely from hinoki wood. In the winter the lattice structure attracts frost and in the summer ice that was collected in the winter cools down a seating area inside. It was quite beautiful to walk around inside and admire the architecture as well as the view.

While I was visiting an art installation called Rokko Meets Art was taking place on the mountain top. At various places different pieces of artwork were on display and you could walk around to see them. My favorite was Cosmic Seed by Kazumasa Taniguchi (谷口 和正) which was located inside the base of the thermal chimney of Rokko-Shidare Observatory. A metal egg shell frame was composed of words and illumated from inside casting out blurred shadows of the words. Upon looking at the sculpture up close I noticed that there were tiny birds nestled among the letters. The whole effect was really beautiful and serene.

Walking back out of the thermal chimney I took in some more of the lovely views over Kobe and Osaka Bay.

It was getting late and so I thought it was time to start heading on. I walked to the bus stop where there was quite a line waiting. When it arrived I managed to squeeze on since I didn't want to wait for the next bus. Luckily the ride only lasted fifteen minutes since I was not terribly comfortable standing up wedged in between the door and a bunch of tightly packed people.

When I got off the bus at Rokko Cable Sanjo Station (六甲ケーブル山上駅) I thought I would stop for a few last glimpses of Kobe from the mountaintop before taking the cable car down. It was a beautiful, clear night and I couldn't have asked for better weather to enjoy the view.

I headed into the station, boarded a cable car and ten minutes later I arrived at the base of the mountain at Rokko Cable Shita Station (六甲ケーブル下駅).

The view from the top of Mt. Rokko is said to be one of the best night views in Japan and I would have to agree that it was gorgeous. Although going over the mountain instead of around it took longer and was more expensive it was definitely worth it.

Monday
Nov102014

Trying Burger King's KURO Pearl in Japan 

I am not one who typically eats at a fast food chain while traveling overseas, however, I recently made an exception while I was in Japan this past September. After I had finished work for the week I had spent my Saturday at Arima Onsen and then took the ropeway over Mt. Rokko for a view of Kobe at night. I was tired and hungry, but needed to get something relatively quick since the last shinkansen train back to Nagoya from Shin-Kobe was in less than an hour. I was walking around the Sannomiya Station looking for a place to grab a quick bowl of ramen or donburi when I saw a Burger King. Normally I wouldn't have considered eating there, but I had heard that they were offering a black burger for a limited two month time and it just seemed too strange not to try.

Two black burgers were available to try, the KURO パール (KURO Pearl) the KURO ダイヤモンド (KURO Diamond). The color black in Japanese is written 黒 and pronounced kuro, so the names mean Black Pearl and Black Diamond.

The KURO Pearl featured a hamburger patty with black pepper and a black Shalyapin sauce made from garlic, soy and squid ink. The bun and cheese were also black with the color derived from charcoal bamboo. The KURO Diamond was the same with tomato, lettuce and onion added.

I decided on being a purist and went for the KURO Pearl to avoid any added color from vegetables to my black burger. The meal with fries and a soda set me back ¥750 (about $6.50 US). I chose to pair my burger with melon soda because I felt neon green soda would go well with a black burger. 

The burger came packaged in a black wrapper and when I opened it up it looked even less appetizing that the promotional photos Burger King had hanging up throughout the restaurant. I've eaten everything from raw horse to beef intestines in Japan so a little strange coloring wasn't about to deter me and I took a bite.

The bamboo charcoal that was used to blacken the bun and cheese didn't seem to me to really affect the taste. The unique flavor was primarily from the sauce (soy, garlic and squid ink) and the black pepper on the burger patty. Overall it wasn't bad, but I wouldn't say it was really great either. It just tasted like a garlicky, peppery fast food burger.

Overall, it was fun to try it but I wouldn't order it again. Although it wasn't the most amazing dinner the burger did serve its purpose of being a quick meal and I was able to get to Shin-Kobe Station with a little time to spare before the last train. 

Wednesday
Nov052014

Caramel Apple Cupcakes

Last week my department at work had its annual chili cook-off competition. I didn't enter a chili but I decided to make some cupcakes to share. Last year I made chocolate chili cupcakes and wanted to make something different this time. Fall is in full swing here so I decided to make caramel apple cupcakes.

To make the apple cupcakes I adapted Paula Deen's apple cake recipe to my preferences, like swapping out walnuts for pecans and increasing the amount of cinnamon. I also exchanged the vegetable oil for some of my homemade applesauce which is healthier and makes the cake really moist.

Cupcake Ingredients
3 cups diced cooking apples
1 cup chopped pecans
2 teaspoons vanilla extract
1 tablespoon cinnamon
3 cups flour
1 teaspoon baking soda
1 teaspoon salt
2 cups sugar
1-1/4 cups applesauce
3 eggs

Cupcake Directions
Preheat the oven to 325 F and prepare muffin pans with cupcake liners. Mix together apples, pecans, vanilla and cinnamon in a bowl.


In a second bowl, stir together the flour, baking soda and salt. With an electric mixer beat together the sugar, applesauce and eggs.


Add the dry ingredients to applesauce mixture and beat until fully combined. Fold the apple mixture into batter with a spatula or spoon.

Fill the cupcake liners 3/4 full and bake until toothpick inserted into the middle of a cupcake comes out clean, about 40 minutes.

To add a caramel component to the cupcakes I made Wilton's caramel buttercream icing and iced the cupcakes with a large star decorating tip.

The cupcakes are a great fall treat and were a big hit with my department. I am definitely planning to add this to my autumn rotation of baking treats.

Monday
Oct272014

Fall Planting

With winter on the horizon I like to have something growing in front to the house for as long as I can so I did a little fall planting a few weeks back.

I picked up a variety of mums, kale, cabbages and pansies and set to work. On my porch steps I put some large purple and burgundy colored mums in a planter and set decorative cabbages in urns in front of them.

In the front bed I planted some beautiful purple celosia in between my boxwood shrubs. I've never tried planting it before in my garden so I'm curious to see how late in the season it will keep blooming. Along the front of the bed I planted some decorative green/white and green/purple cabbages to create a border.

In my hanging baskets I planted burgundy mums and pansies. I like how the different hanging heights of the baskets look together.

In the bed that circles my tree I planted some frilly looking green/purple decorative kale in between my hostas.

I'm happy to have some flowers and greenery in my front yard for as long as I can, especially if we have another really cold winter this year. It makes coming home a bit more cheerful on a bleak day.

Friday
Oct242014

The Fence Saga Part 1: Planning

It's been seven years now since I bought my home and this year was the year to finally tackle the fence. I've hated the chain link fence that surrounded my property ever since I moved in, but when you buy a 130+ year old home with a large raccoon nest in the walls and no electrical outlets upstairs you have to set your priorities accordingly.

Just for fun here is a picture of the backyard when I bought the house and it was overwhelmed with an enormous dying tree.

My first big backyard project was a circular back patio followed by removing the tree. Last year with the new pergola and side patio that I'd been planning for years in place as well as a fresh coat of paint on the house and garage the backyard was starting to look like what I'd envisioned.

All of this work was great but it only made the old fence look even worse. I was ready to finally replace the fence this year so in May I began drawing up plans to submit an application for a building permit along with an application to the historic district. Since I live in a historic district, existing structures are grandfathered in, but if you replace something you must get approval from the historic district.

City Code Chapter 104 defines the regulations for fences in Ann Arbor based on three zones, front open space (the first 25' back from the sidewalk based on my zoning district), middle 25 feet (the 25' behind the front open space) and rear yard (remaining area behind the middle space). Since I live in a historic district I had lower limits on the heights allowed in each zone compared to a house outside of one of the historic districts with a 3' at 50% opaque fence allowed in the front, a 6' at 80% opaque fence allowed in the middle and a 6' at 100% opaque fence allowed in the back. Additionally, I had constraints on the style and materials I could use for the fence based on historic appropriateness for the neighborhood.

Operating under these rules I began planning my fence design. The back of my house fell beyond 50' from the sidewalk (meaning it was in the rear yard area) so I thought that would be a natural point to start a 6' privacy fence.

I wanted additional fencing to extend forward from the privacy fence to the front of the house. This fell in the middle space so I could have had a fence that was 6' tall and 80% opaque, but this felt like a little much for the area so I decided on a spindle fence 4' tall and 50% opaque instead. On the north side of my property I simply wanted the spindle fence to edge the property line but on the south side I wanted it to surround my vegetable/herb garden.

Here is an overhead view (I took the map from the county website) of what I was planning for my fence:

On the north side of my property I planned to rip out the chain link fence and replace it with a spindle fence with a privacy fence for the rear. I also planned to eventually put in a gate across the driveway.

On the south side I planned to have the overgrowth removed and replace the chain link fence with a privacy fence.

To block the view from the street I also planned to put up more privacy fence to connect the fence back to the house with an arbor centered on the garden.

I planned to surround the herb and vegetable garden on the side of my house with a spindle fence with a small gate at the front. Please excuse the crazy overgrown garden. I figured I would wait until the new fence went up before cleaning it up and planting for the year.

With my idea worked out I drew up a plan view of my fence and attached it to my application to the building department and historic district along with some example images of my intended fence. I submitted the application at City Hall at the end of May and it was approved at the beginning of June.

Although putting up the fence was something that Frank and I could have done we decided to hire a contractor to put up the fence and so that I could concentrate on working on our downstairs bathroom renovation. I'll leave the story off here for now but I will say that things did not end up going as planned. Stay tuned for the next installment about working with our contractor.