Welcome

My name is Lisa and I'm a crafty girl with wanderlust working as an engineer by day. My blog chronicles projects in my home as well as pictures and stories from my travels.

Search


Instagram

Blog Index
The journal that this archive was targeting has been deleted. Please update your configuration.
Navigation
Monday
Nov302015

Sake Tasting by Vending Machine in Niigata at Ponshukan

At the end of August I was back in Japan for a business trip. At the end of a long work week I was looking forward to a fun weekend of sightseeing before heading home Sunday afternoon.

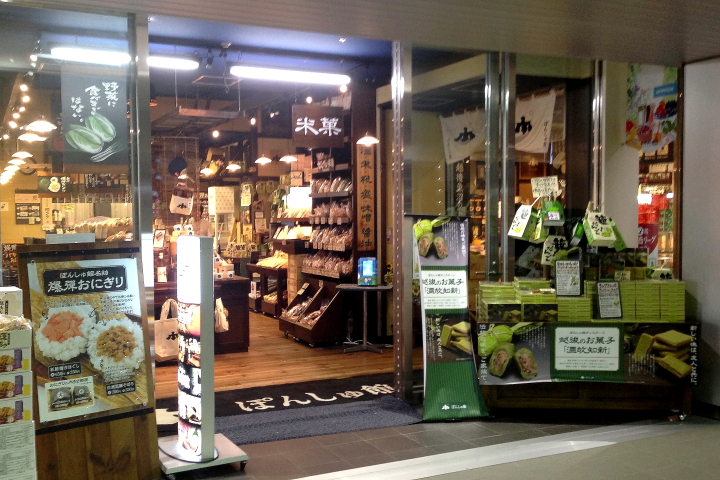
I wanted to visit Sado Island on Saturday so I planned to stay in the city of Niigata (新潟) on Friday night to be able to grab the first ferry to the island in the morning. After arriving in Niigata and checking into my hotel I decided to venture out a bit since the night was still young. In doing a little research on Niigata I had read about Ponshukan (ぽんしゅ館), which offered sake tasting. Niigata prefecture is famous for its rice and sake so it seemed like a great way to enjoy the evening.

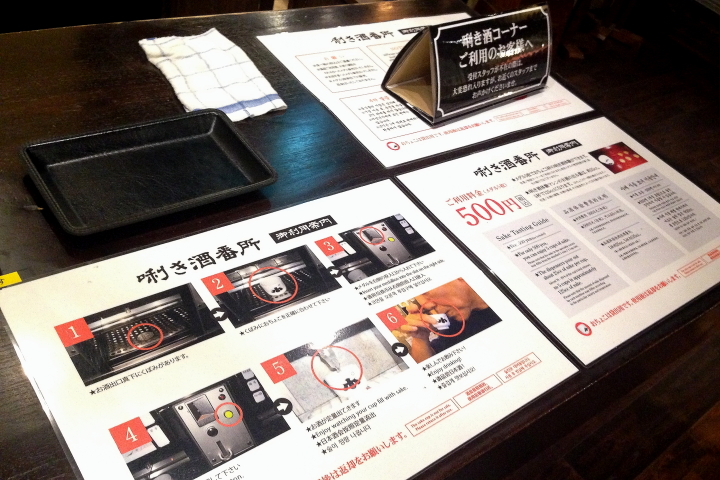
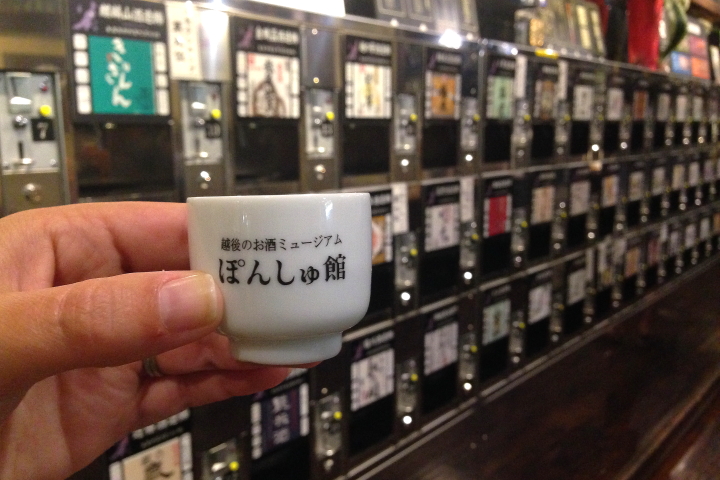
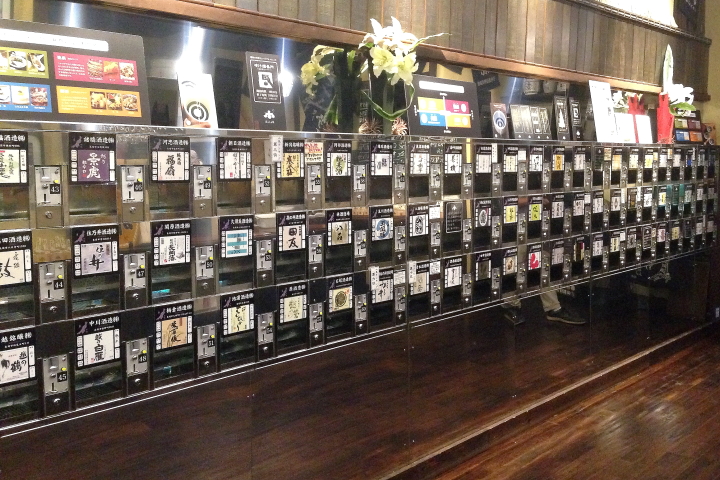
In Japan there is a vending machine for just about everything so I wasn't too surprised to learn upon arriving that the sake tasting was done by vending machine. For ¥500 (about 4 USD) I got five tokens and a little tasting cup with each tasting costing one token. 

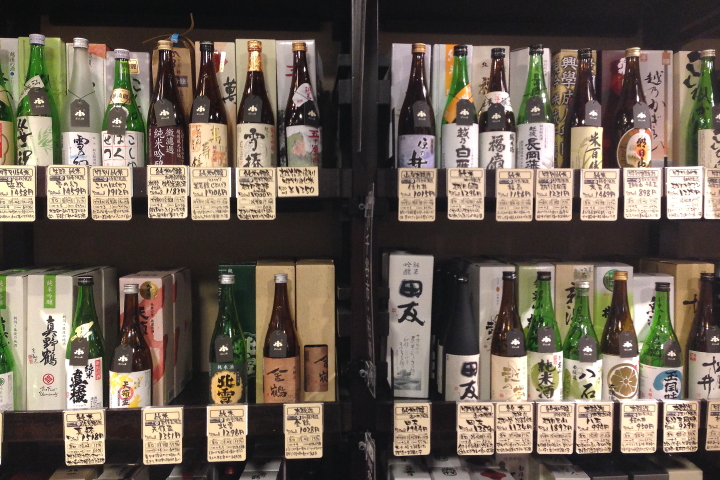
After paying my money and receiving my sake cup and tokens I was ready to start but with over a hundred types of sake from Niigata prefecture to choose from it was hard to know where to begin. Each sake had a number assigned to it for easy identification. After walking around a bit I randomly decided to try number 50 (越後長岡藩, Echigo Nagaoka-han).

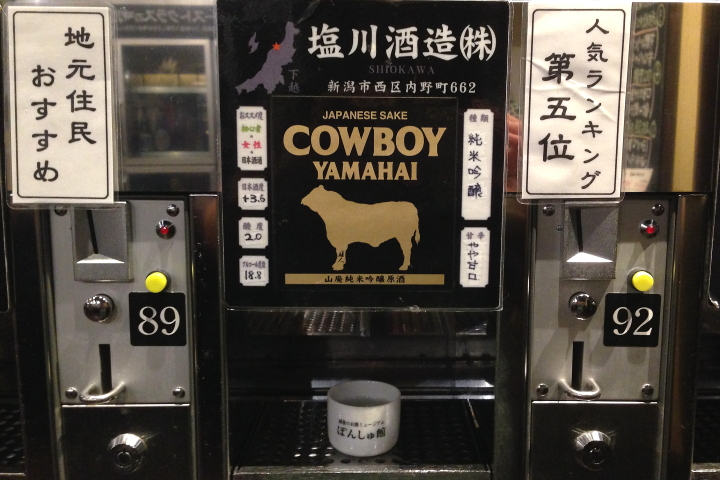
Pouring the sake was quite easy. First you place the cup so that it sits in the hole in the metal grate. After you deposit your gold token you press and hold the yellow button until the sake finishes pouring.

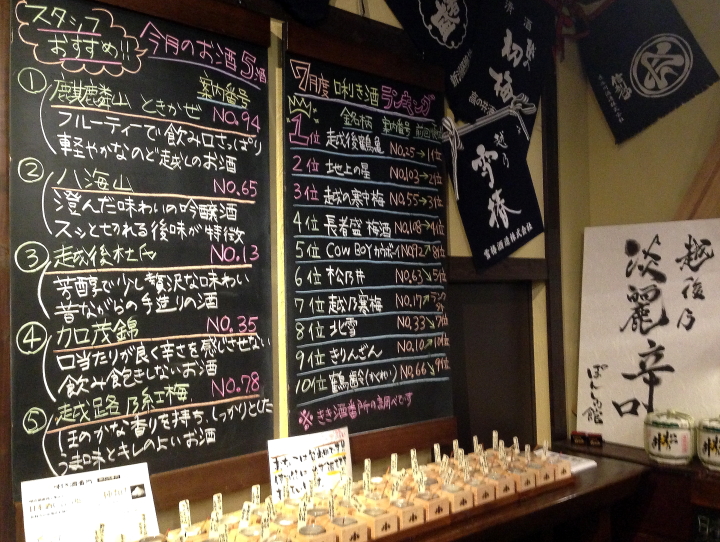
After my first tasting I noticed two huge chalkboards off to the side. The left side had staff recommendations and the right side had the top ten rankings from the previous month. I decided that this might be a better guide for my tasting and decided to try the top three ranked sakes, number 25 (越後鶴亀 Echigo Tsurukame), 103(地上の星, Chijonohoshi) and 55 (越の寒中梅, Koshi no Kanchubai).  For my last sake tasting I skiped the fourth ranking sake and tried the fifth, number 92, purely because it was called Cowboy and I couldn't resist the name.

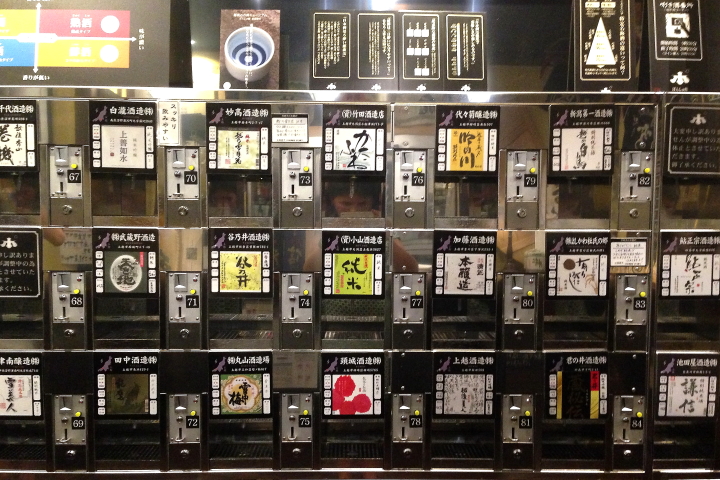
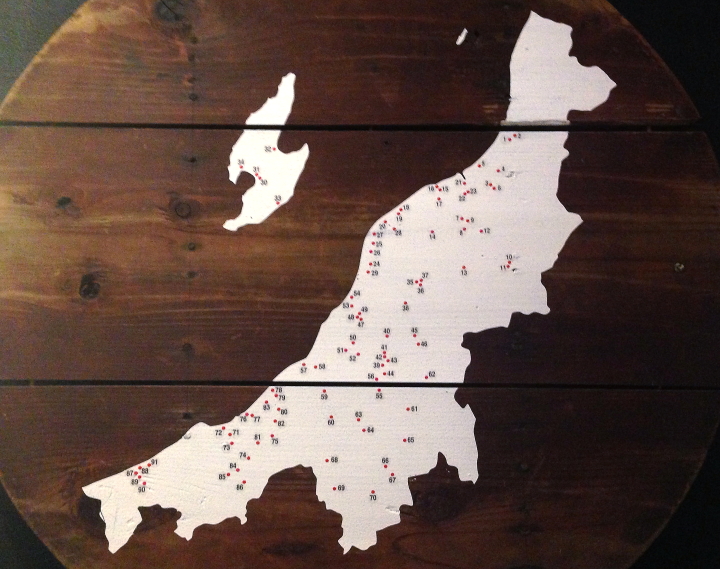
One of the neatest things about Ponshukan was that each sake vending station had a tiny purple map of Niigata prefecture on its label with a red star showing the location of the sake brewery. If the sake was a staff selection or one of the top ranked it also had a white label by it. I also thought it was cool that they had a large map of Niigata prefecture on one of the walls with all of the types of sake shown by location so that if you wanted to try something from a particular region you could identify it.

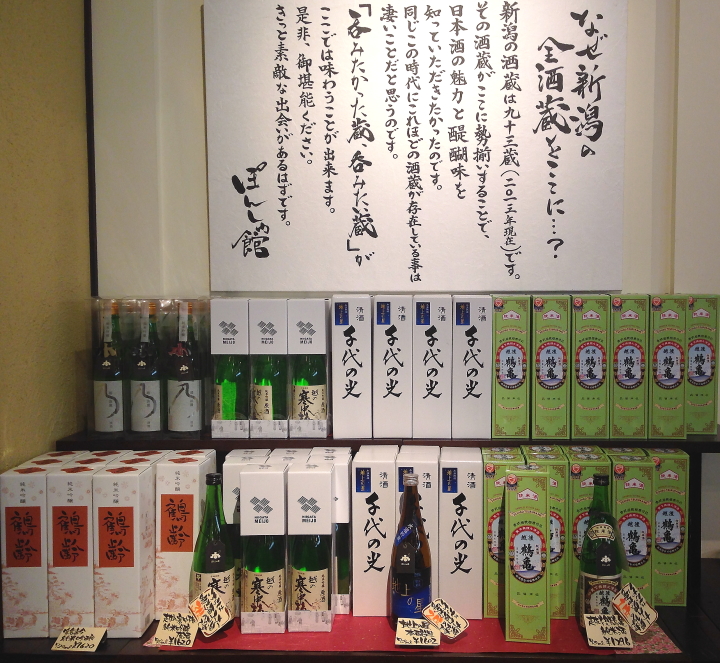
After I finished my sake tasting I wandered around the store. There was a huge selection of sake that you could purchase so I picked up a bottle of my favorite from the tasting, Echigo Tsurukame, to bring home. It was only ¥1296 (less than 11 USD) so I couldn't resist.

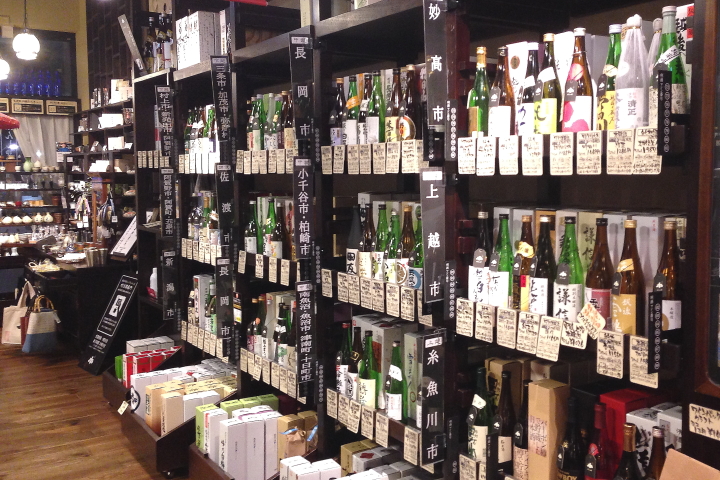
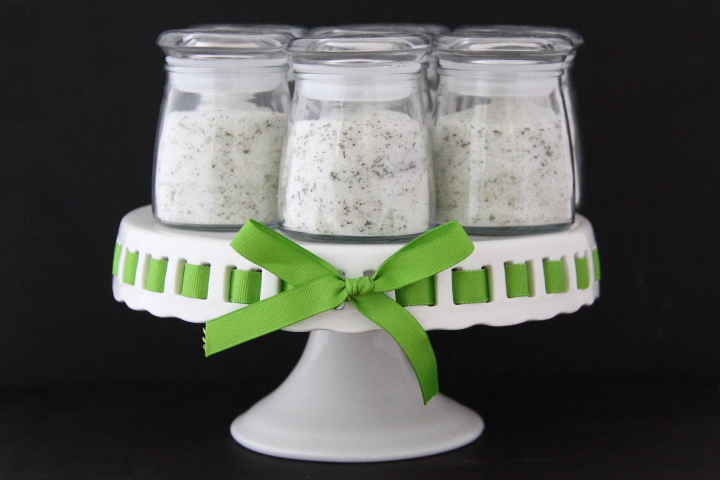
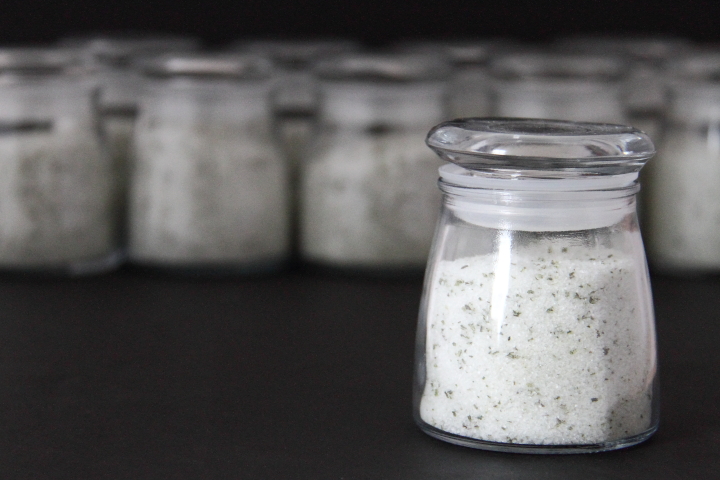
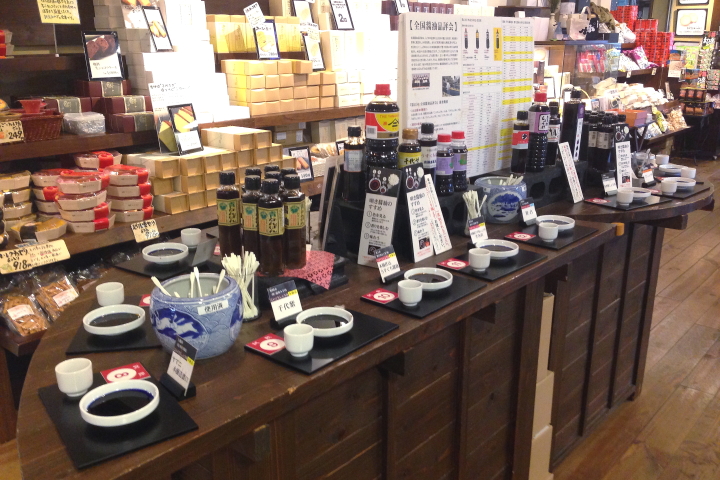
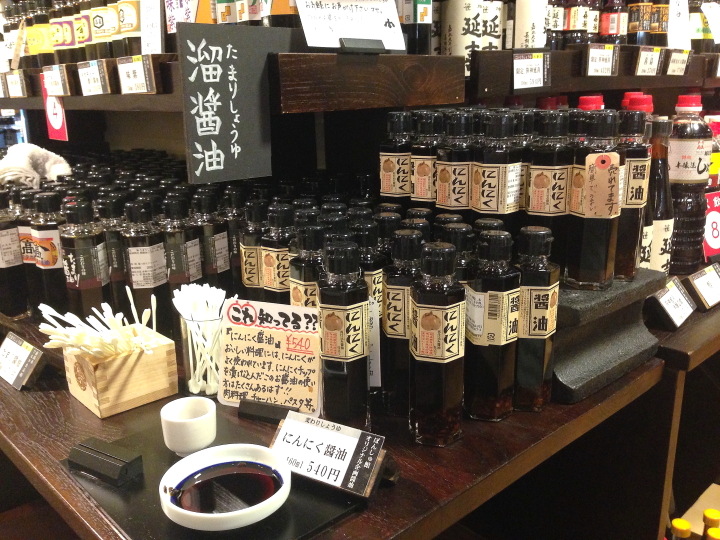
In addition to sake, the Ponshukan was full of foodstuffs made in Niigata Prefecture. They had a bunch of soy sauces that you could try and I ended up loving and buying a bottle of garlic soy sauce for ¥540 (about 4.50 USD) that was fantastic.

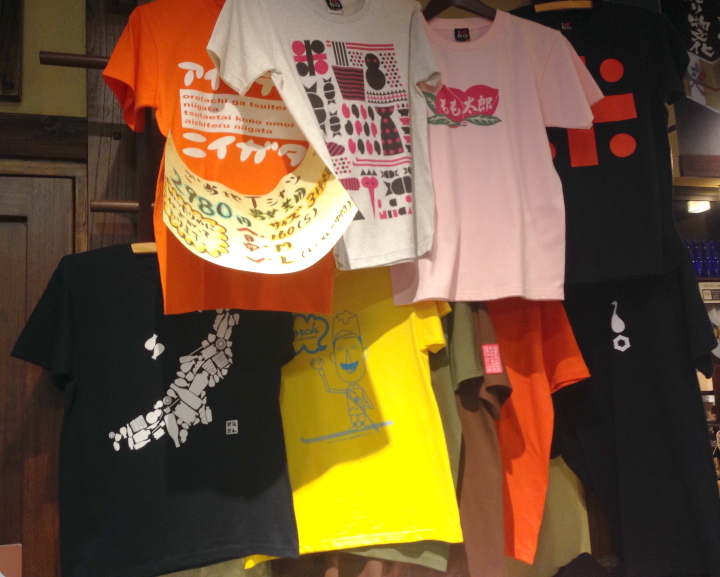
Tucked in the back were some fun t-shirts. There was a black one with a map of Niigata prefecture made out of white silhouettes of famous foods from Niigata that was just too awesome for me not to buy.

I had a great time sake tasting at Ponshukan plus I was able to bring home some fun souvenirs. It is a good half hour stop when traveling in Niigata City and I recommend it especially if you are a sake or food lover.

Ponshukan is located on the third floor of the CoCoLo Niigata West building which is just southwest of the Niigata train station. At the time of this writing the store is open from 9:00-21:00, however the sake tasting is only available from 9:30-20:30.

Saturday
Oct312015

No Bake Mini Pumpkin Cheesecakes

Happy Halloween! To celebrate I thought that I would share my recipe for no bake mini pumpkin cheesecakes. They are easy to make plus they are delicious. I made a batch to bring in for my co-workers yesterday and they were a big hit.

Ingredients
- 1-1/4 cups graham cracker crumbs
- 1/3 cup butter
- 3/4 cup brown sugar, divided
- 3/4 tsp. cinnamon, divided
- 1 package (8oz) cream cheese, softened
- 1 cup pumpkin purée
- 1/4 tsp. nutmeg
- 1/4 tsp. ginger
- 1/8 tsp. cloves
- 1 pint whipping cream
- whole pecans (optional for garnish)

Graham Cracker Crust
- Use food processor or rolling pin to create fine graham cracker crumbs
- Melt butter and pour into bowl with graham cracker crumbs, 1/4 cup brown sugar and 1/4 teaspoon cinnamon
- Mix up ingredients with a fork and measure out equally into small dishes
- Press crust into the bottom of small dishes to form bottom crust

Pumpkin Cheesecake Filling
- Mix together cream cheese, 1/2 cup brown sugar, 1/2 tsp. cinnamon, nutmeg, ginger and cloves
- In a separate bowl, whip the whipping cream to stiff peaks and then gently fold it into the pumpkin mixture and top with a pecan for garnish
- Spoon pumpkin cheesecake filling on top of crusts and refrigerate for at least three hours before serving

Tips and Tricks
- You can use canned pumpkin puree, but I prefer to make my own from sugar pumpkins
- For reference I used 2oz square dessert cups for my mini cheesecakes

Thursday
Oct152015

Picture of the Day: Walking Through the Siq

Petra, Jordan
03.31.2015 

Monday
Oct122015

Autumn Outdoor Dining with Tips for Weeknight Entertaining

Between business trips and personal travel I haven't spent a lot of time at home this summer and haven't had a chance to enjoy our backyard as much as I would have liked. With winter on the horizon I decided to capitalize on the beautiful fall weather and a light work week to do a little backyard entertaining on a Thursday night at the end of September.

When you work full time, entertaining on a weeknight can be a bit of a challenge but with a little bit of planning it is totally doable and a fun way to break up the work week.

When I get home the first thing I always do is set the table. I like to arrange everything, including my serving dishes, and save the cooking for right before my guests arrive to make sure the food is hot. I love this flour sack linen table cloth because it has a little texture to it and I don't need to iron it. A navy runner grounds the center of the table and a few ceramic pumpkins on the ends are a festive seasonal nod.

For the place settings I love to mix and match for a casual look. I used a plain white dinner plate with a handmade butter plate that I bought in Seto along with a small blue and white bowl that I purchased in Tokyo. For a fall look I used my yellow linen napkins. Cloth napkins always look fantastic and to make it easier on myself I always fold and lightly iron them right after I wash them so I have them ready to pull out of my linen cabinet for entertaining.

For flowers, I always pick up something from the grocery store when I shop for the dinner party ingredients. Here I combined two grocery store bouquets, one of greenery and one of sunflowers, in a blue enamel ware pitcher.

I also couldn't resist picking up some mini white pumpkins from the grocery store which I tucked into the blue and white bowls at each place setting.

With the table set, I started cooking. Menu planning is important for weeknight entertaining in order to be sure that you can prepare everything quickly and easily and not stress yourself out. My go to weeknight entertaining menu is a pasta dish with a salad and a baguette.

To make the meal seasonal, I made Martha Stewart's Orecchiette with Butternut Squash and Sage using some sage from my garden. It is easy to make, looks beautiful and tastes like autumn which made it a perfect dish for the evening.

For the salad I used a base of baby kale topped with dried cranberries, goat cheese and pecans and paired with a pomegranate basalmic vinaigrette dressing. If I entertain on the weekend I like to make everything from scratch because I love to cook, but for a weeknight I take a few shortcuts to make it easier on myself. As an example, for this meal I bought already cubed butternut squash from the produce section for the pasta and pre-washed baby kale mix for the salad plus I bought the salad dressing instead of making it. All combined those three shortcuts probably took out 45 minutes of prep time for me and made the meal doable after work.

Little touches always finish off the table for me. I like to put out water in a carafe or pitcher with sliced up lemons and decant my salad dressing into a cute little carafe or dish. It only takes about five extra minutes but it makes the table look more festive and put together.

I also love to have an herbed compound butter to go with the bread. They are easy to make and a great way to use up extra herbs from your garden or cooking. I like to prepare them and keep them in the freezer to pull out when needed.

By keeping a limited menu and doing a few small things that had a nice visual impact I was able to be ready for my guests in about an hour and a half with a beautiful and delicious table of food. With everything finished before my guests arrived I was able to relax and enjoy the rest of the evening with them. Cheers!

Thursday
Oct082015

Picture of the Day: Mountain Reflections on Sognefjord


Sognefjord, Norway
04.21.2014 

Monday
Jun152015

Strawberry Rhubarb Pie

Summertime means fresh fruit is in season which obviously means it is time to make pie. One of my favorites is the classic strawberry rhubarb pie. It is my grandfather's favorite and I grew up loving to eat it with him as a special treat.

Ingredients List
- 3 cups rhubarb, cut into 1/2" cubes
- 3 cups strawberries, sliced
- 1 cup sugar
- 3 Tbsp. corn starch
- 1 tsp. cinnamon
- 1/2 tsp. salt
- 1 large egg, separated
- 1 teaspoon water
- Large granule sugar (optional)
- Double pie crust pastry

Directions
- Cut the rhubarb and place it in a bowl with the strawberries
- In a separate small bowl stir together the sugar, corn starch, cinnamon and salt
- Pour sugar mixture over rhubarb and strawberries, tossing filling to coat the fruit
- Roll out half of the pastry and line the bottom of a pie plate with it, trimming off excess
- Roll out remaining half of the pastry
- Add filling to the pie plate and then top with pastry using lattice crust or other vented style top
- Whisk egg white and water together to make egg wash glaze
- Brush glaze on pie and sprinkle with large granule sugar if you like
- Bake for 20 minutes at 425° F, turn heat down to 350° F and back another 35-40 minutes until the crust is golden and the filling is bubbling

Tips and Tricks
- I make my own crust but you can also use store bought
- To make your pastry easier to deal with, keep it in the refrigerator until you are rolling it out
- To prevent your crust from browning too much, wrap it in tin foil for the first 20 minutes of baking

If you are interested, check out my apple pie recipe, my mixed berry pie recipe, my blackberry rhubarb pie recipe and my recipe for making pie crust from scratch


Thursday
Jun112015

Sunrise Hot Air Balloon Ride Over Luxor

One of the best things that Frank and I did while we were in Luxor was to go for a sunrise hot air balloon ride. Having arrived the night before on an evening flight from Cairo the aerial view was a fantastic first introduction to the area before we started exploring the sights.

We were picked up from our hotel a little after four am and shuttled to a dock on the Nile. On board we enjoyed tea while we were ferried to the West Bank.

After arriving on the West Bank we were driven to a large field where the hot air balloons were being inflated. It was a beautiful and fascinating process to watch.

Once our balloon was ready we climbed into the basket and got safety instructions from the balloon pilot. We did a little practice of how to crouch and hold the basket straps for the landing and then we were off. The lift off was so gentle that it was hard to even notice until we saw the ground receding away from us.

We started by floating over the ancient ruins on the West Bank. We had fabulous views of the Valley of the Kings, the Temple of Hatshepsut and the Ramessuem.

We continued floating over the West Bank enjoying views of the fields and town.

One of the most fascinating things was to watch the farmers at work in their fields in the early morning before the day became too hot. While we were in Egypt it was sugar cane harvest season and we saw smoke plumes rising from fires in the fields below. To make harvesting easier the sugar cane fields are set on fire to burn off the leaves while leaving the stalks intact.

We continued floating along over the Nile to the East Bank. The sunrise was lovely and we had great views over the town as well as Luxor Temple and Karnak Temple.

After about an hour in the air it was time to land. When the pilot directed us we got into our crouched landing position. We lightly bounced off the ground once before finally coming to a stop in a field that had recently been harvested.

The last thing I would ever be accused of is being a morning person, but getting up before the crack of dawn was completely worth the experience of the balloon ride. It was my first time in a hot air balloon and I would love to do it again.

Wednesday
Jun032015

Lately....

Things have been a bit of a blur for me lately. In a six week span I visited four countries, four states and had been on seventeen flights. Add some very long work days and a lot of spring yard work into the mix after I finally got home and needless to say things have been a little crazy. I have so much to share and plan to start posting again soon with life settling down a bit. In the meantime I thought I would share collages of my Instagram pictures from my recent travels.

New York, London, Madaba, Jordan's Rift Valley...

Kerak, Petra, Saqqara, Mephis, Giza, Cairo...

Luxor, Valley of the Kings, Esna, Cruising on the Nile, El Kab, Edfou...

More Cruising on the Nile, Djebel Silsileh, Kom Ombo, Aswan, Rome...

More Rome, Vatican City, Los Angeles...

More Los Angeles, Palos Verdes, Redondo Beach, Seattle...

Seattle, Phoenix, Tonto National Forest...

...and home!

Tuesday
Mar172015

Mint Oreo Truffles for St. Patrick's Day

Happy St. Patrick's Day! I wanted to make some St. Patrick's Day treats to bring into work for my co-workers today but I had a TV conference for work last night so I didn't get home until after eight. Since I had no intention of staying up too late I had to make something on the simple side so I decided to make some mint oreo truffles which don't require any baking. 

Ingredients List
- 1 package of mint oreos (30 oreos)
- 6 oz. cream cheese
- 1/2 teaspoon mint extract
-
Dark Green and Vibrant Green Candy Melts
- Green sprinkles and non-pareils

Directions
Pulse oreos in food processor until they are finely ground.

Add cream cheese and mint extract to oreos and pulse food processor until mixture is fully combined. Form mixture into equal size size balls, place on a a tray covered in parchment paper and place in the freezer for at least one hour.

Place candy melts into a small microwave proof bowls or glasses that are tall enough to dip one of the truffles into it. Microwave them for 60 seconds and then stir. If some lumps still remain microwave another 30 seconds and then stir until smooth. Dip truffles into the melted candy and then place back on parchment paper. 

While the candy coating is still wet add sprinkles for a festive touch. Once the candy coating has cooled and hardened you can stack the truffles on a serving plate or package them in treat bags.

Tips and Tricks
- To make even sized balls I used a small ice cream scoop to measure out equal amounts of oreo mixture.
- If the mixture is too soft or sticky to shape into balls, place it in the refrigerator for a few minutes.
- If your melted candy starts to cool making dipping difficult, just put the bowl back in the microwave for a few seconds until it is smooth again.
Wednesday
Mar112015

Rosemary Sea Salt 

A few months back I made a large batch of rosemary sea salt. It is a great way to use up any rosemary that you have in your herb garden at the end of the growing season and adds something special to your pantry for your cooking. There are a variety of methods out there that you could use but below is the method that works for me.

Ingredients List
- 1/2 cup fresh rosemary leaves
- 4 cups sea salt, divided

Put the rosemary leaves and one cup of sea salt in a food processor.

Pulse the food processor until the rosemary leaves are finely mixed into the salt.

In a bowl combine the rosemary mixture with the remaining three cups of sea salt.

The salt and rosemary mixture will be damp from the moisture in the rosemary leaves so to dry it out, spread it on a a baking sheet and bake it for about half an hour on low heat (200˚F, 95˚C).

After letting the mixture cool, break up any salt that has clumped together and store in jars.

The rosemary sea salt makes a great gift and Frank and I have also have fun using it in our cooking. Enjoy!