Welcome

My name is Lisa and I'm a crafty girl with wanderlust working as an engineer by day. My blog chronicles projects in my home as well as pictures and stories from my travels.

Search


Instagram

Blog Index
The journal that this archive was targeting has been deleted. Please update your configuration.
Navigation
Thursday
Oct162014

Overloaded

Lately I've been feeling overloaded. Work has been crazy with a lot of long hours (nothing says work life balance like rocking out at work on a Friday night past midnight) and I feel like I've been almost permanently out of town with business trips to Charlotte, Japan and Northern Kentucky and a personal trip to New York squeezed in. Although I've made time for some fun during my free time on my work trips, overall I'm feeling a bit exhausted and depleted and looking forward to being at home for a bit. I have a lot to catch up on...

Thursday
Sep112014

9/11 Memorial  

As the United States remembers the terrible events that happened on this date thirteen years ago, I wanted to honor today by sharing my visit to the National September 11 Memorial.

Frank and I went to the Memorial last year while we were in New York during the "Interim Operating Period" when construction on nearby World Trade Center projects surrounded the Memorial. Because of this we had to have ticket reservations and wait in line to enter, however as of May of this year visitors can freely enter the Memorial Plaza during its open hours from 7:30 a.m. to 9 p.m. daily.

The main feature of the Memorial is two enormous waterfalls and reflecting pools which stand in the location of the original twin towers' footprints. The design was intended to symbolize the loss and void left by the terrorist attacks with the sound of the rushing water drowning out the city noise to create a reflective atmosphere. 


The most haunting aspect of the memorial is the bronze plates that surround the pools inscribed with the names of the victims of the 2001 and 1993 attacks on the World Trade Center. You can't help but feel overwhelmed by the devastation and loss of life as you walk around the pools looking at the names. Seeing the words "and her unborn child" after a woman's name was particularly gut wrenching. Visitors left remembrances for loved ones by placing flowers in their names and the park staff honors the victims by leaving them a white rose on their birthdays.

The Museum was dedicated and opened to the public in May of this year, but was still under construction when Frank and I visited.

Among the grove of over 400 swamp white oaks in the Memorial Plaza stands a special callery pear tree known as the Survivor Tree. It was found severely damaged in the rubble of Ground Zero in October 2001 and after its recovery was planted at the Memorial in 2010 serving as a living symbol of perseverance and rebirth.  

Visiting the Memorial was profoundly sad. I have the deepest gratitude to the people who serve our country and my heart goes out to all those whose lives were shattered on that terrible day.

Monday
Aug252014

S'mores Pudding Dessert Cups

Yesterday my group from work got together to have a barbecue. I signed up for making a dessert, however my oven just broke and we don't have a repair technician coming out for a week so I needed to make something that used just my cooktop. Making a pudding seemed like an obvious choice and I though s'mores would be good for a barbecue. Making s'mores inspired pudding is nothing new, but I decided to make my own version using my favorite graham cracker crust and chocolate pudding recipes. 

Ingredients
- 1-1/4 cups graham cracker crumbs
- 1/2 cup butter (1 stick), divided
- 1/4 cup brown sugar
- 3/4 tsp. cinnamon, divided
- 1/4 cup cocoa
- 2 cups sugar, divided
- 1/4 tsp. salt
- 3 Tbsp. cornstarch
- 2-1/4 cups milk
- 3 tsp. vanilla, divided
- 1/4 tsp. cream of tartar
- 2 egg whites, room temperature
- 1 Tbsp. light corn syrup
- water 

Graham Cracker Crust
- Use food processor or rolling pin to create fine graham cracker crumbs
- Melt 1/3 cup of butter and pour into bowl with graham cracker crumbs, brown sugar and 1/4 teaspoon cinnamon
- Mix up ingredients with a fork and measure out equally into 24 dishes, about 1 Tablespoon each
- Press crust into the bottom of each dish to form bottom crust and refrigerate 

Chocolate Pudding
- Mix together cocoa, salt, cornstarch with 2/3 cup sugar and 1/2 tsp. cinnamon in a saucepan or small pot
- Gradually whisk in milk
- Over medium heat, continuously whisk mixture until it begins boiling
- After whisking for one minute while boiling, remove from heat and stir in remaining butter (2-2/3 Tbsp) and 2 tsp. vanilla
- Evenly divide pudding among the 24 dishes and return dishes to refrigerator 


Marshmallow Fluff Topping
I included the ingredients for the marshmallow fluff topping in the list above for ease of shopping and gathering ingredients, since I used a marshmallow frosting recipe that I found online, I will let people click over for the directions. It was very delicious, however I found the consistency quite soft, so I am more inclined to classify it as a marshmallow fluff instead of frosting. After letting it cool down a bit I piped the topping over the pudding with a large swirl.

To garnish the dessert cups I used some Hershey's miniatures with pieces of graham crackers. To get clean cuts of graham crackers I have found that using a serrated knife works the best.

I think the s'mores pudding dessert cups turned out well and they were really delicious. Definitely a fun treat for a party!

Tuesday
Aug122014

A New Light for My Studio

The overhead light that I had in my studio wasn't really working for me anymore (it wasn't enough light to effectively work in there at night) so I had been looking for something that I could replace it with. When I was at the ReStore in Ann Arbor I stumbled upon a pendant light for five dollars that I picked up.

I brought it home, taped off the electrical wires and socket and then gave the fixture three light coats of oil rubbed bronze spray paint.

I paired the fixture with a vintage glass shade that I bought on eBay and hung it in the room.

I really love the glass shade and I think that the simple pendant fixture works well with it.

Unfortunately, my new light was in a very messy studio. This past weekend I spent a lot of time cleaning and organizing it with some new storage solutions. I hope to have it finished up later this week to share it.

Wednesday
Jul302014

Still Tiling...

When I last left off with sharing my bathroom tiling exploits I had finished the back wall of the shower enclosure along with the shampoo/soap nook. From there I proceeded to start working along one of the walls. I lined up my ledger board snugly under the bottom tile on the back wall, placed a level on top, adjusted the ledger board until it was level and then screwed it into the wall.

From there I set about tiling up the side wall just as I had the back wall. Once I got to the chair rail I used my 45 degree miter attachment (which came with my saw when I bought it used) on my tile saw to cut the miter for the corner on both pieces and set them in place.

Tiling the field tile with no special cuts actually proceeded fairly quickly.

My intention was to tile the shower enclosure up to the ceiling and stop the tile around the rest of the room at the chair rail. To make sure that my line was straight at the end of the shower enclosure I used a level to align a piece of painters tape plumb along the wall. I then used this as my guideline for the tiling.

With the slanted ceiling I had to make some tricky cuts so I bought a new attachment for my wet saw, a 90 degree protractor. I am sure that a professional might have a better way of setting it but I simple held it face back to the wall snugly up to the ceiling and the adjusted the arm until it was parallel with the top row of the tile I had laid. This seemed to do the trick and I was able to use the protractor to cut the correct angle on the top of the tiles.

On the second row of tiles that needed to have the angle cut I had a slice of a tile that was smaller than a full tile. In order to cut that tile I used a scrap tile against the protractor followed by the tile I was intending to cut. By doing this I was able to get a clean cut on the small tile slice. If I had just lined it up against the protractor the blade of the saw would have hit the metal of the protractor instead of continuing through the scrap tile.

Next, I needed to provide a finished edge to the shower surround. Since the regular bullnose tile was a little too wide for my tastes, I used bullnose tile that I trimmed down to the width of the liner bar (the same way that I did for the border of the nook) to create a clean edge. In order to keep the slender pieces in place I used painters tape to hold them in place until the thinset cured.

With one side wall completed I can start to see how the bathroom is going to shape up. It is a very laborious process with about 500 tiles laid on the walls so far, but I think it is going to look fantastic when it is done. I just need some more free time to devote to it!

For other related posts about this bathroom renovation check out the history of my downstairs bathroomfixtures for my bathroom renovationplumbing in the downstairs bathroominstalling the floor tile underlaymentinsulating the ceiling, installing the vapor barrier for the shower, installing drywall and cement board, tiling a vintage mosaic border, mudding, taping, sanding and painting, taping the cement board joints and tiling part 1. If you are interested in my completed master bathroom renovation check out master bathroom renovation recap. 

Friday
Jul252014

A Few Kitchen Updates

It has been a long time since I posted anything about my kitchen and since over the past few months I've made several changes I thought I would share.

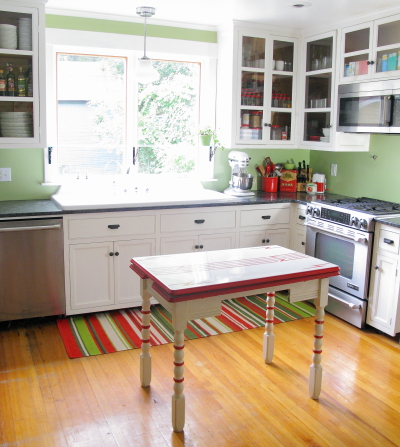
First up was swapping out the vintage red and white enamel topped table that I had been using as a kitchen island. Let me just say that I love that table. I think it is fantastic. Since I stand at a towering 5'2" it is perfect for me as a work space plus it is super cute. My husband, however, had some differing opinions. He's a foot taller than me and it was way too low for him to comfortably use as a prep area in the kitchen, or as he would say the table was designed for munchkins.

Marriage is all about compromise (plus for selfish reasons I love having him make me dinner and thought removing any impediments to that would be in my best interest) so I had planned on building an island after we got married. Unfortunately, I have way more plans than time, so although I still intend to build a fantastic island that Frank will love the reality is that is likely a few years down the road. With that in mind I set about searching for something that would work better for us, but not break the bank.

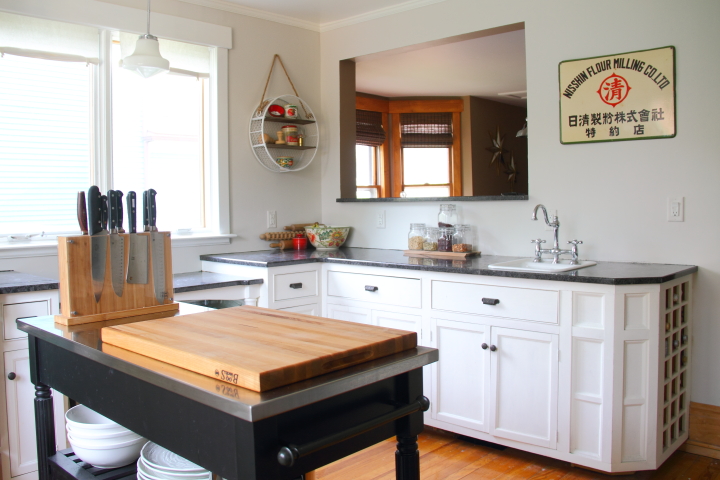
I had no idea that kitchen islands were so dang expensive. Everything I seemed to like was about $1500 which was way more than I wanted to pay. Eventually I found a black kitchen cart with a stainless steel top on Overstock. At $368.99, it was still more than I would have liked to spend but it was the best option and by far the least expensive of anything I had found and I ended up ordering it in March.

When it arrived while Frank was out of town on a business trip I was excited to put it together and surprise him when he came home. Of course as I started putting it together I discovered that the two locking casters were missing and both side panels were broken. After some frustration I was able to get the replacement parts for the island a week later.  At this point I had become pretty annoyed with the kitchen cart so Frank, who had since returned home, kindly assembled it. 

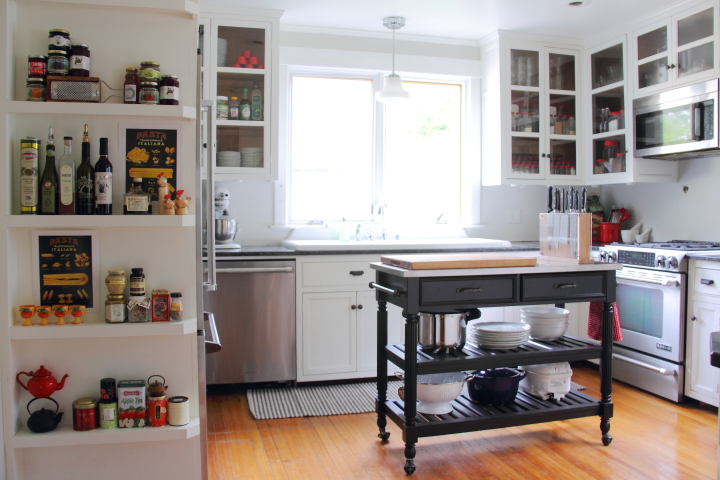
In the end it has been pretty awesome. It is a great height for Frank to use as a prep space and I still have my lowered baking center to use when I am working on making something. I also like that the black color ties in with the black granite and the stainless top matches the appliances. The only thing I am not a fan of is the weird handles on the drawers. They have a strange cross hatch pattern on them, which is hard to see in the picture. Someday I will swap them out, but that is a minor thing to do down the road.
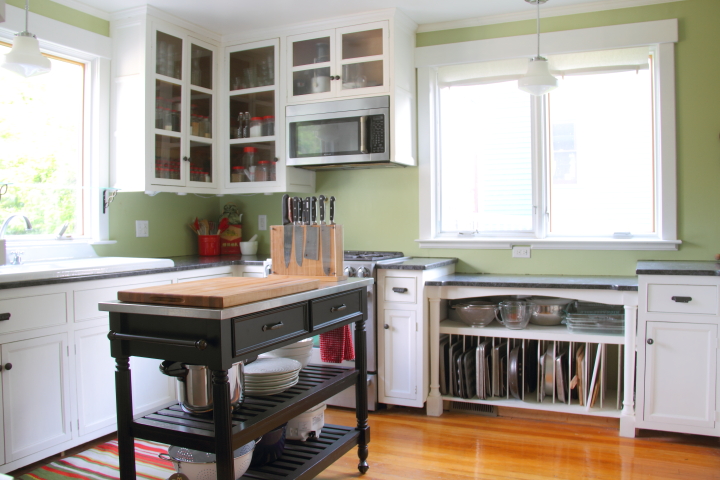
After we got back from our Scandinavia trip in May, Frank was off to Japan for work. I decided while he was gone that I should paint the kitchen. This is what happens when I am left to my own devices. The color has been a pretty green since I remodeled it when I first bought the house, but I was growing a little tired of the color. Additionally, the green was a little jarring with the macchiato color of the living/dining room that you could see through the pass through.
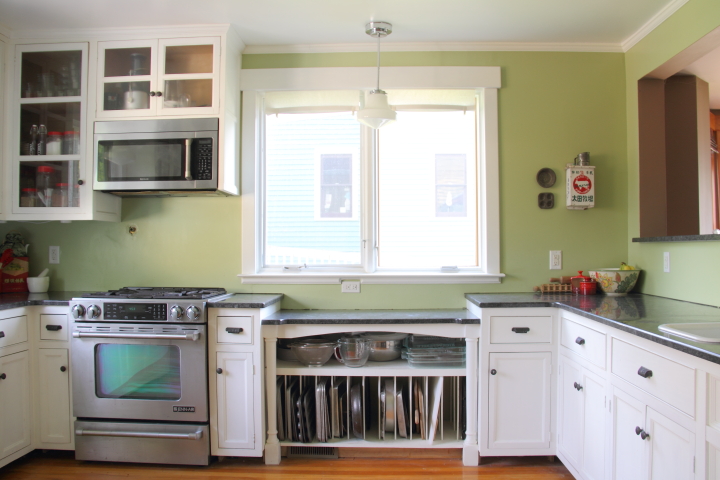
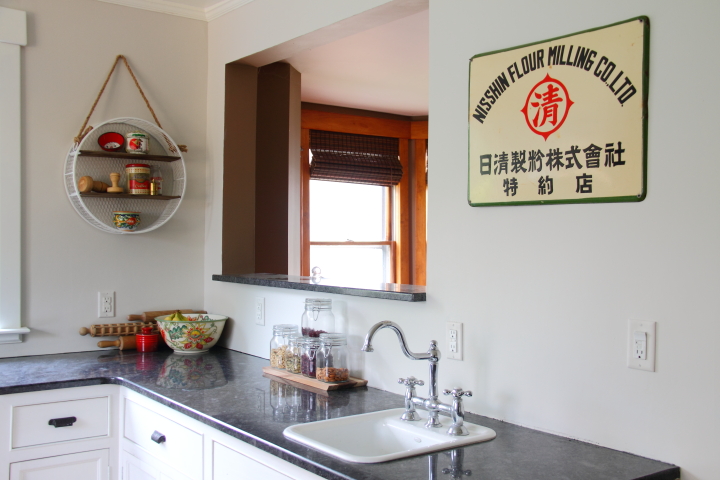
I wanted something lighter as well as a neutral and settled on Benjamin Moore's Pale Oak. Two coats of paint later and my kitchen was transformed.
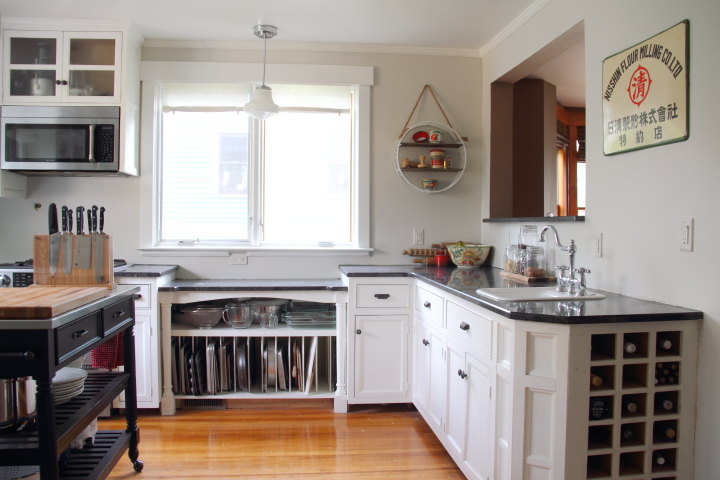
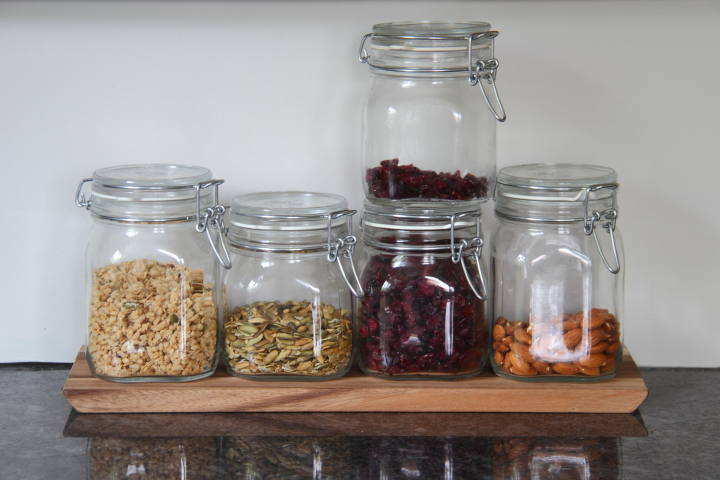
With the fresh paint color on the walls there were a few more changes as well. While Frank and I were on our Scandinavian vacation most of the hotels we stayed at had a muesli bar as part of the buffet breakfast. We loved it and decided that we should make our own small version at home. Frank found the jars and filled them up with goodies and I found the wood tray at HomeGoods to stack them on.
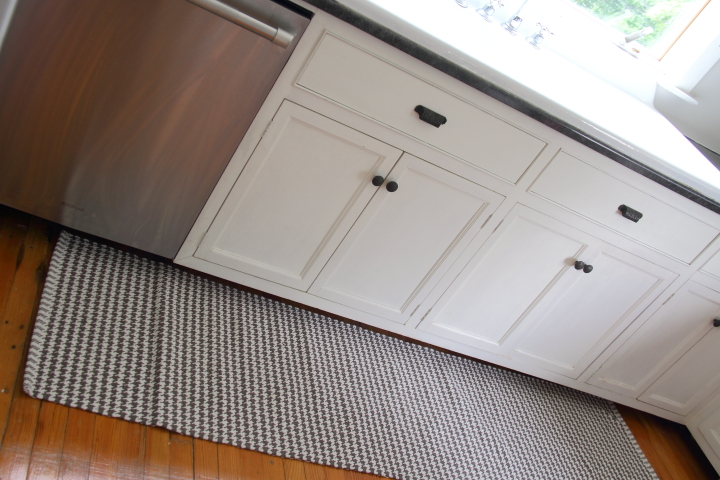
The old red, white and green rug that I had been using in front of the sink had seen better days, plus with the new wall color I wanted something different so I replaced it with a hounds tooth check runner that I found at Target.
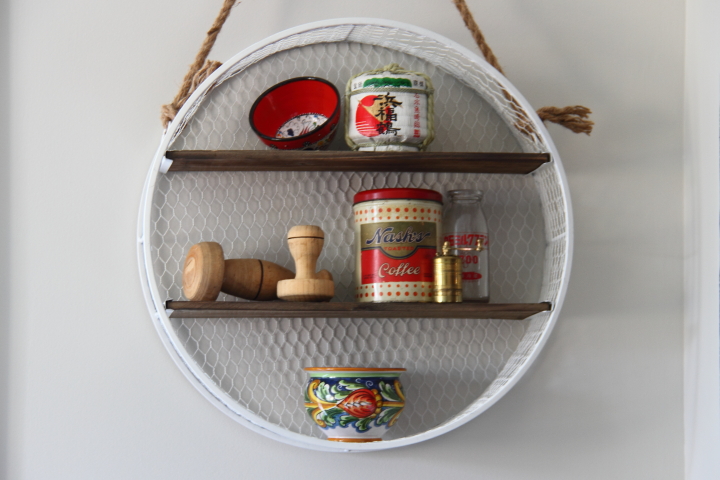
On the wall next to the window above the baking center I hung another HomeGoods find. I loved the mix of the white wire with the wood slats and rope hanger. On the top shelf I have a little bowl that I picked up at the Grand Bazaar in Istanbul paired with some sake I bought in Japan. The second row has two pestles that I bought at the Chichicastenango Market in Guatemala, my great-grandmother's coffee can, an antique milk bottle that I bought at the Osu Kannon Flea Market my last day living in Japan and a tiny brass spice mill I bought in Turkey. On the bottom sits a hand painted bowl that I bought with Frank when we were in Positano, Italy two years ago. 
Overall I am really happy with the kitchen updates. They aren't the biggest changes but to me it really freshens up the space and makes everything seem so much brighter.
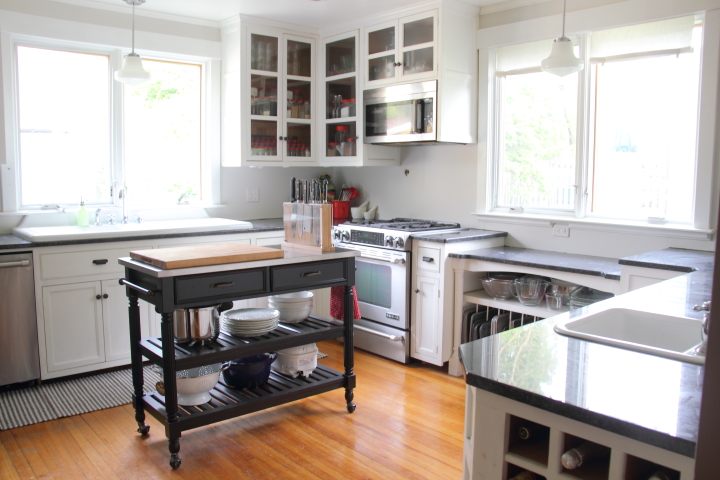
Still on my to do list in here is to sew some cafe curtains for the windows and add a subway tile backsplash, but I really need to finish tiling the downstairs bathroom before I even begin to think about that...

Wednesday
Jul232014

Nagoya Oktoberfest (名古屋オクトーバーフェスト)

When I was in Japan last week my trip would not have been complete without an evening at Nagoya Oktoberfest. I know that you are likely thinking 'German beer in Nagoya?' 'Oktoberfest in July?' but honestly it is a really fun time and a great place to hang out and relax with friends.

Nagoya Oktoberfest began in July 2011 and my first time going was in 2012. The pictures in this post are a combination from that summer as well as this one. Stretching over two plazas in Nagoya in Sakae, Oktoberfest consists of huge tents filled with picnic tables ringed by German beer and food stalls and a stage for some German entertainment.

First off, I have to say that I love the logo. Oktoberfest in Japanese is "オクトーバーフェスト" and they turned the "ーバー" into two hands clinking beer mugs. Very cute and very Japanese!

If you are at Oktoberfest you can get wine or soda if you would like, but why would you when there are over 40 German beers available from 10 different breweries. All the beer is served in glassware individual to the brewery. To get a beer you pay for the beer plus a ¥1,000 (about $10 USD) deposit for your glass. If you go back to that same brewery's stall for another beer they will swap out your glass and you just pay for the beer. At the end you return your glass and get your deposit back. The tricky part is that you have to return the glass to the correct brewery stall since each one has different glasses. It's not a big deal but wise to make a note of before you start drinking.

In addition to beer there is a wide variety of wurst, sauerkraut and other German food that you can enjoy. I did also see among other things available edamame and churros, which I thought would make for quite an interesting pairing with wurst.

At the far end of the plaza, a stage is set up with dancing and music that is fun to watch and enjoy made up of both German and Japanese performers. You haven't seen anything until you've watched a Japanese guy dancing in lederhosen.

Both summers that I went to Nagoya Oktoberfest I had a great time catching up with friends who still lived in Japan as well as other friends who happened to be back in Japan at the same time as me. With the laid back atmosphere and German beer you can't go wrong on a summer evening in Nagoya.

Nagoya Oktoberfest is held in Nagoya at Hisaya Odori Koen Hisaya Plaza (久屋大通公園久屋広場) and Angel Plaza (エンゼル広場) which you can access by a short walk from either the Sakae Subway Station on the Higashiyama Line or the Yabacho Subway Station on the Meijo Line. Oktoberfest lasts for two and half weeks in the middle of July, open from 11:00-21:00 on Saturday and Sunday and 15:00 - 21:00 on weekdays. This information was accurate at the time of writing, but please confirm prior to visiting in case time or location has changed.

Tuesday
Jul222014

Jefferson Market and Our Wedding Cake

One of the things that I love about my neighborhood is Jefferson Market. It is a little bakery around the corner from my house, a throwback to the days when the neighborhood was peppered with small businesses among the homes. 

On Saturdays and Sundays Jefferson Market is open for brunch from ten until one. People from all over the neighborhood pour into the small bakery and seating both inside and outside quickly fills up. Frank always gets the same thing when we go, a Mount Rushmore Plate (a fantastic hash brown and egg scramble) with a side of bacon.

I, however, usually opt for one of the specials. Every month there are two new specials, one savory and one sweet. I've enjoyed everything from brie stuffed French toast to strawberry rhubarb pancakes to root vegetable hash.

When Frank and I got married last year we decided that of course we should order a cake from Jefferson Market. They offer a fantastic selection of cake flavors and fillings.

We tried a bunch of samples and really enjoyed them all, finally settling on black magic cake with salted caramel filling and buttercream icing. 

I ordered the cake and dropped off a few succulents and some navy ribbon for them to decorate the cake. When I picked up the cake I quickly snapped the picture of it below and they helped me pack up the cake for the drive up north.

Unfortunately, this is the best picture that I have of the cake at our reception, which is a shame, but it was really delicious and everyone loved it.

Since we had a tiny wedding of only fourteen guests, we served the bottom tier at the wedding and took the top tier home to freeze for our anniversary.

This past Sunday marked a year since our wedding so of course we started the day by heading over to Jefferson Market for brunch. I got one of the specials, banana walnut pancakes, while Frank ordered his standby Mount Rushmore plate with a side of bacon.

We didn't do much the rest of the day due to the fact that on my flight home from Japan on Friday I had managed to contract a nasty cold, but we did thaw out our wedding cake and enjoy a slice of it together in the evening. Honestly, I was pretty surprised that it tasted so good after a year in the freezer. 

I can't believe that a year has past since Frank and I got married. Among other things it has been a busy year for us traveling: Domincan Republic for our honeymoon, New York in the fall, Arizona and Atlanta over the winter break, Las Vegas in January, Florida to see my grandparents and go to Tigers Spring Training in February, Indianapolis for the NCAA Regional Final, our extended trip to see Norway, Sweden, Denmark, Estonia, Finland with a stop in Amsterdam this spring plus several business trip for us both including Japan, Chicago, Las Vegas and Seattle for him and twice to Japan plus Charleston, LA, Arizona, Kentucky and Northern Michigan for me. While we've had a ton of fun traveling together we've also enjoyed our time at home going to our favorite places and working on our home renovations. We both love living in Ann Arbor and taking full advantage of all the amazing things our little town has to offer together. The year has flown by quickly for us and I hope that we have many more like this one ahead...

Thursday
Jul172014

Kehi no Matsubara (気比の松原) 

This past week I've been in Japan on a work trip. I'm actually writing this at the airport about to head back to the states. Although I had a lot of long work days, I did squeeze in a bunch of fun over the past weekend. One of those things was visiting Kehi no Matsubara (気比の松原) in Fukui Prefecture on Saturday morning.

I took the train to Tsuruga and then walked about 40 minutes to get to Kehi no Matsubara. Along the way I passed though a cute small shrine, Matsubara Jinja (松原神社),  nestled among some pine trees.

Approaching Kehi no Matsubara I walked through the lovely pine grove on the way to the water.

It was blistering hot outside so most of the Japanese visitors were enjoying the view from the shade of the trees or in pop-up beach tents.

The view was really spectacular with the pine grove along the water. Over 17,000 trees line the shore on Tsuruga Bay.

I walked down to the water to put my feet in. Honestly, it was not the most fun beach to walk on since it was very coarse pebbles instead of sand. I did think it was pretty neat that just a week and a half earlier I was walking in the surf on the opposite side of the Pacific Ocean.

The extreme heat was getting to me (it was about 90 degress and very humid) so I walked around in the shade of the pine grove for a little bit and then decided to take a taxi back to the station.

If you find yourself in Fukui, I think that Kehi no Matsubara is worth a stop for the view, but due to the rocky beach maybe not the best spot for a beach day and swimming.

To get to Kehi no Matsubara you can take a bus to Matsuba-cho from JR Tsuruga train station and get off at Kehi no Matsubara stop. I walked from Tsuruga station and taxied back which is also an option.

Monday
Jul072014

Griffith Observatory 

Last Tuesday while I was in LA on a business trip I finished up work at seven pm. Since I am not one to go to my hotel without some sightseeing fun I decided to visit Griffith Observatory on Mount Hollywood. I had been there a few times before over the years and it is a great place to go for a view over the city.

It was a beautiful evening and it seemed that quite a few other people had the same brilliant idea as I did which meant that I ended up having to park a mile away from Griffith Observatory on Western Canyon Road. Unfortunately, I had just come from work so I was sporting a dress and heels which was not prime attire for hiking up a curving mountain road. I am not known for being deterred by inappropriate footwear (Exhibit A: Hiking up Mount Warning in broken flip flops) so of course I headed off toward the Observatory anyway.

Along the way I had a lovely view of the Hollywood sign as the sun was low in the sky.

Twenty minutes (and quite a few pictures) later I was at Griffith Observatory. Construction on the beautiful Art Deco building began in 1933 and was opened to the public in 1935.

I headed up the stairs to the observation terraces to check out the view. One of the telescopes was open to the public, but the line was incredibly long so I settled for looking out at the horizon instead of peering up into the sky.

I watched as the daylight faded and the city streets below lit up. The view was really quite beautiful.

After the sun set I headed inside to check out the exhibits. There were so many neat displays relating to astronomy and our universe. One of my favorites was a periodic table with actual samples of the elements. I honestly could have wandered around forever but it was getting late and I needed to get to my hotel.

At this point it was pitch black outside. Other sensible people had flashlights with them however I was not so well prepared. Be advised that walking a mile back to your car in the dark with no flashlight wearing four inch wedge heels is not a good idea nor for the faint of heart. 

In the end I got back to my rental car safe and sound with no twisted ankles. Was my unprepared visit a smart thing to do? Decidedly not. Was is worth it? Absolutely.

Griffith Observatory is located at 2800 East Observatory Road in Los Angeles. Admission to the building is free, however there is a fee for planetarium shows. Griffith Observatory is open 10:00 a.m. - 10:00 p.m. on Saturday and Sunday, 12:00 p.m. - 10:00 p.m. from Tuesday through Friday and closed on Mondays.

Page 1 ... 2 3 4 5 6 ... 98 Next 10 Entries »