Welcome

My name is Lisa and I'm a crafty girl with wanderlust working as an engineer by day. My blog chronicles projects in my home as well as pictures and stories from my travels.

Search


Instagram

Blog Index
The journal that this archive was targeting has been deleted. Please update your configuration.
Navigation

Entries in Backyard (8)

Monday
Oct122015

Autumn Outdoor Dining with Tips for Weeknight Entertaining

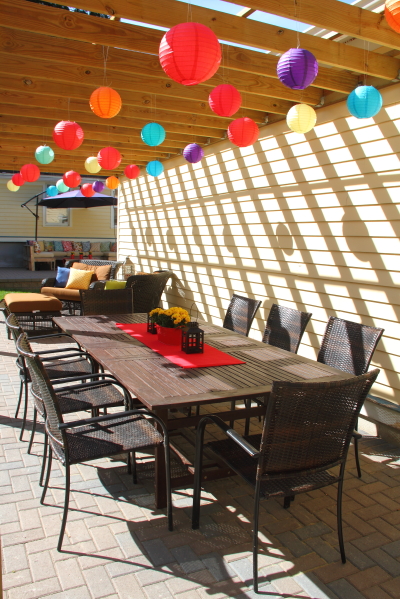
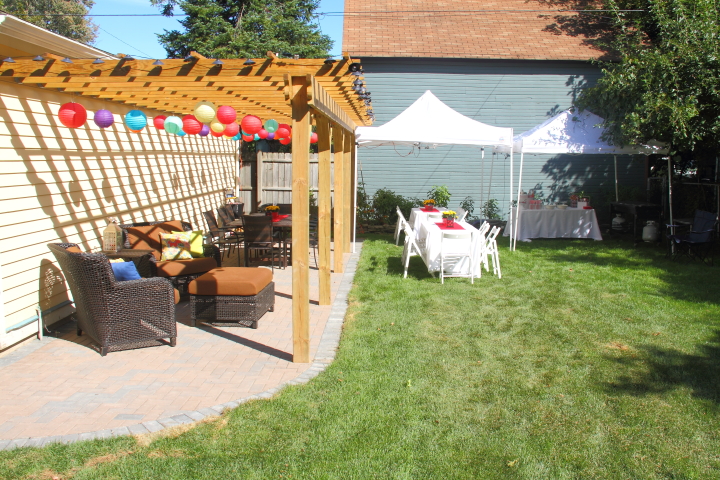
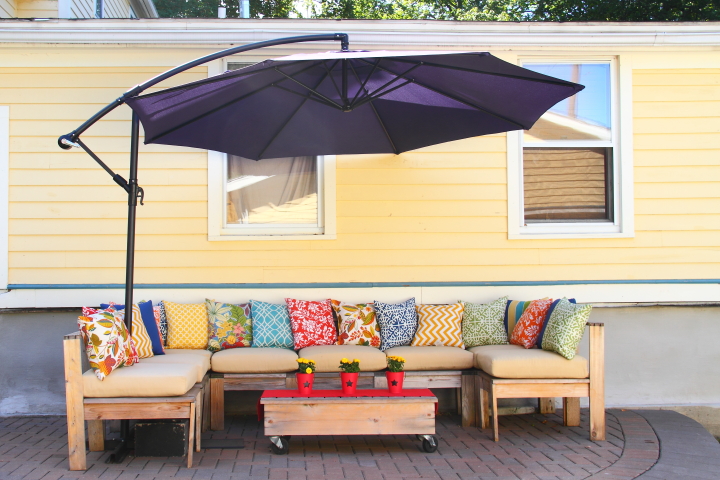
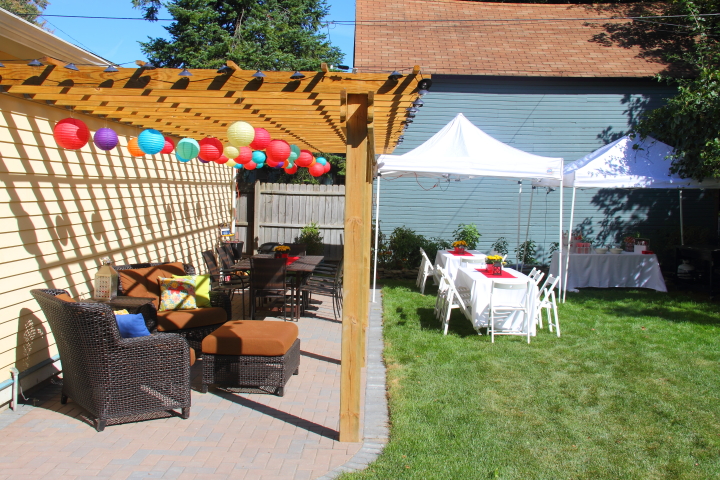
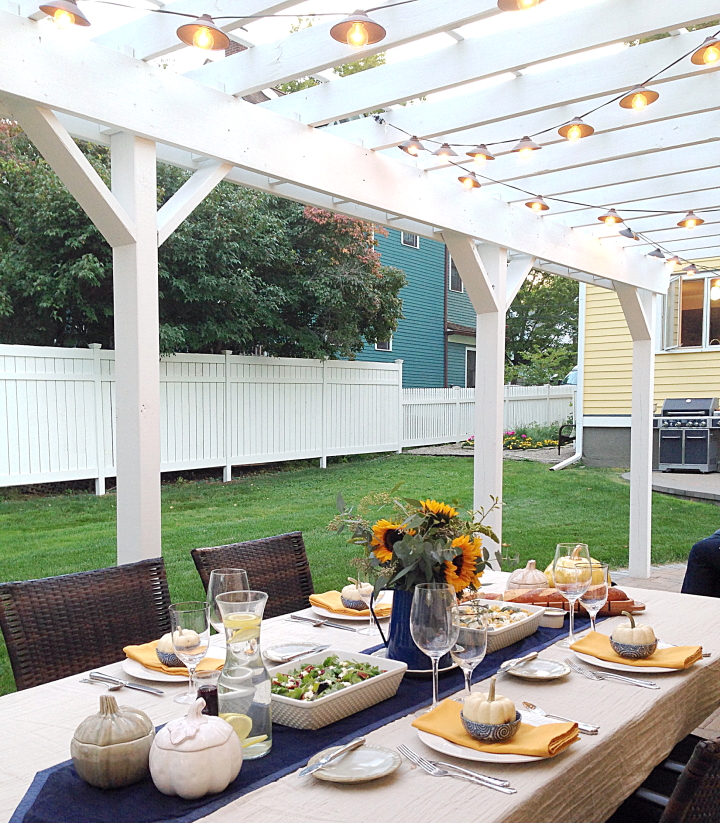
Between business trips and personal travel I haven't spent a lot of time at home this summer and haven't had a chance to enjoy our backyard as much as I would have liked. With winter on the horizon I decided to capitalize on the beautiful fall weather and a light work week to do a little backyard entertaining on a Thursday night at the end of September.

When you work full time, entertaining on a weeknight can be a bit of a challenge but with a little bit of planning it is totally doable and a fun way to break up the work week.

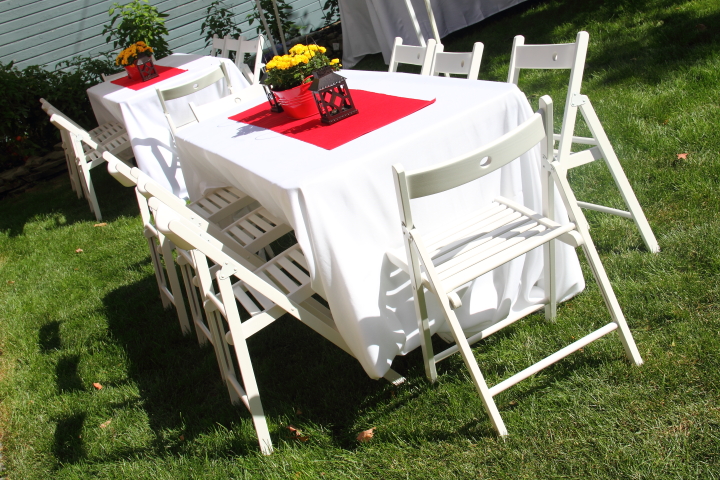
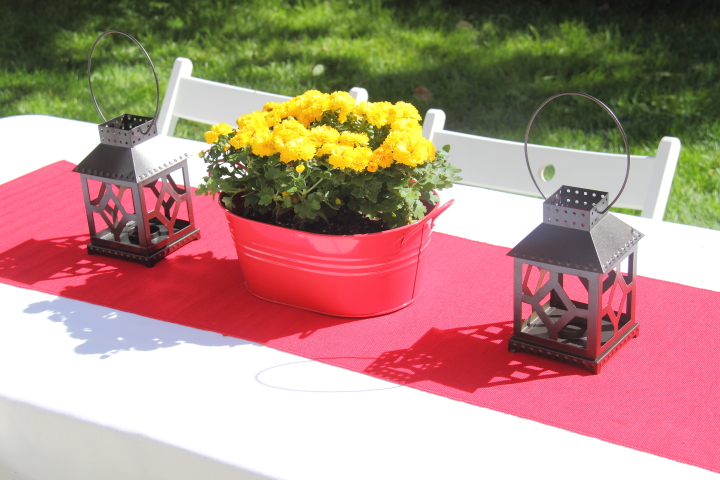
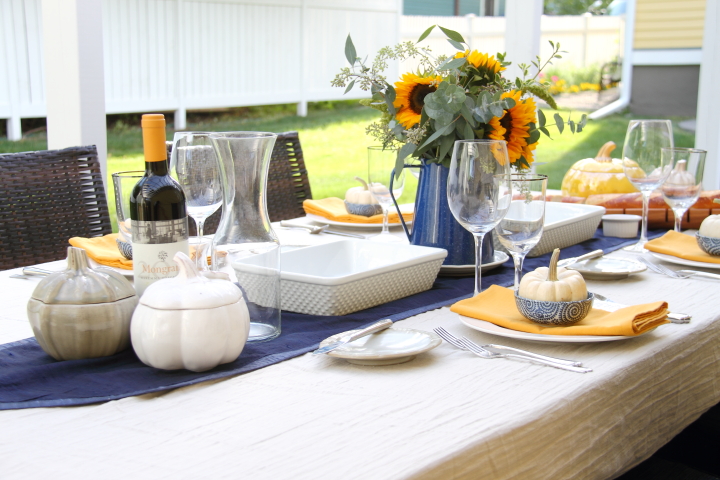
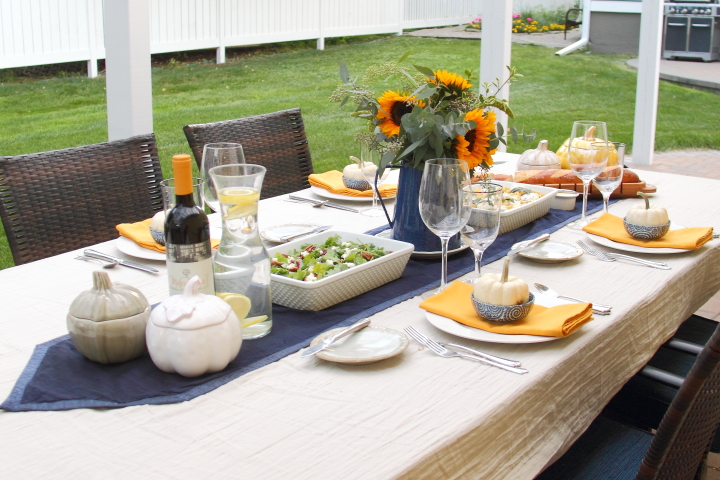
When I get home the first thing I always do is set the table. I like to arrange everything, including my serving dishes, and save the cooking for right before my guests arrive to make sure the food is hot. I love this flour sack linen table cloth because it has a little texture to it and I don't need to iron it. A navy runner grounds the center of the table and a few ceramic pumpkins on the ends are a festive seasonal nod.

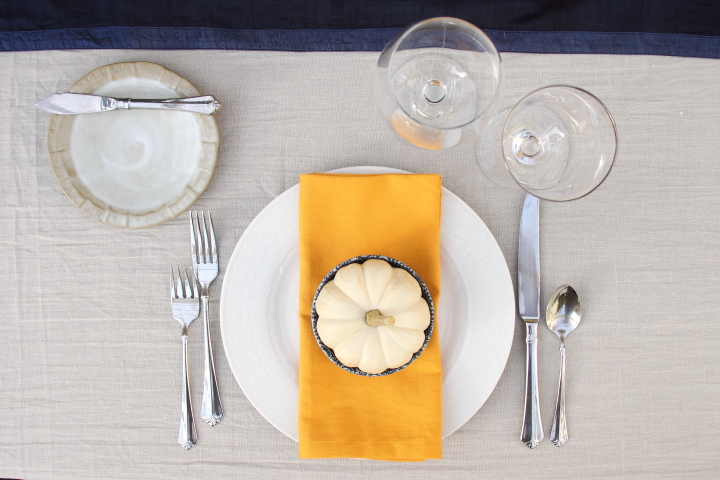
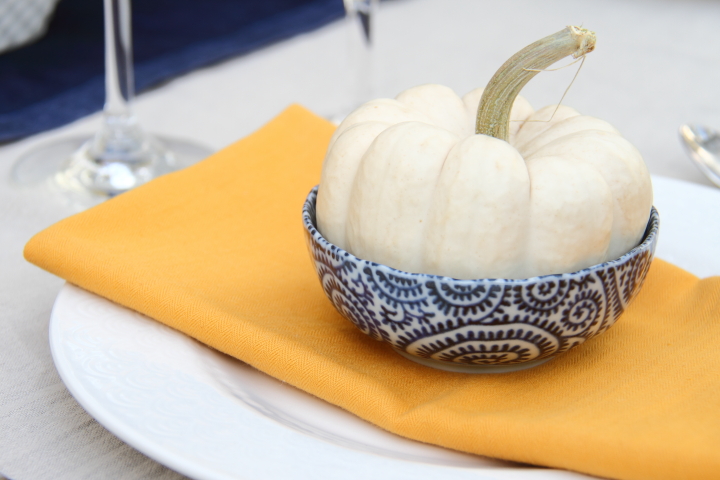
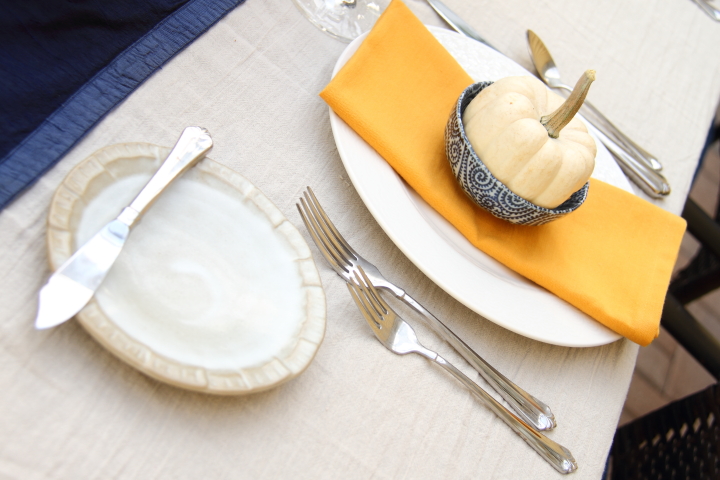
For the place settings I love to mix and match for a casual look. I used a plain white dinner plate with a handmade butter plate that I bought in Seto along with a small blue and white bowl that I purchased in Tokyo. For a fall look I used my yellow linen napkins. Cloth napkins always look fantastic and to make it easier on myself I always fold and lightly iron them right after I wash them so I have them ready to pull out of my linen cabinet for entertaining.

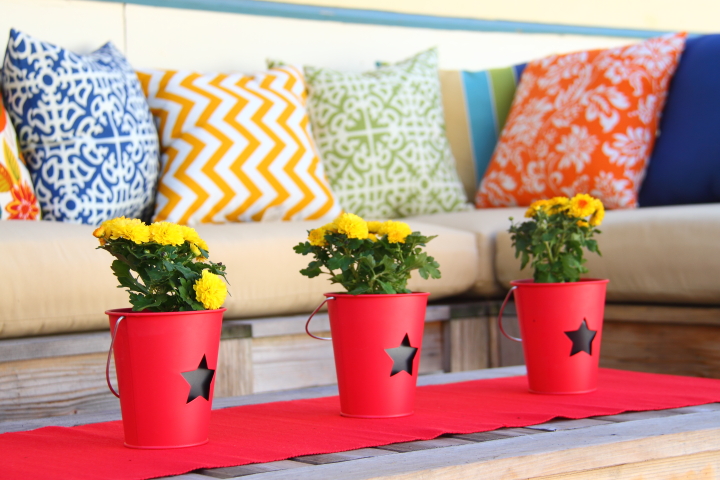
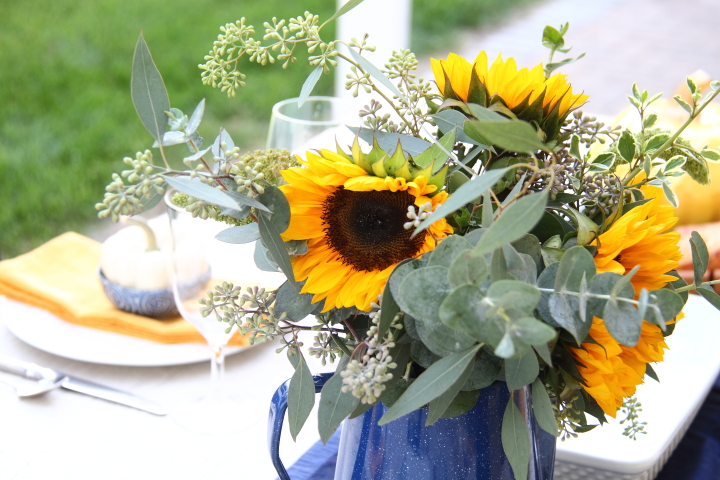
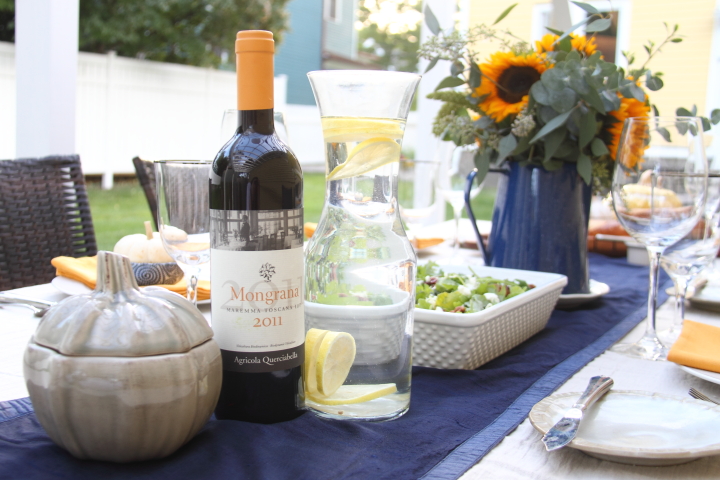
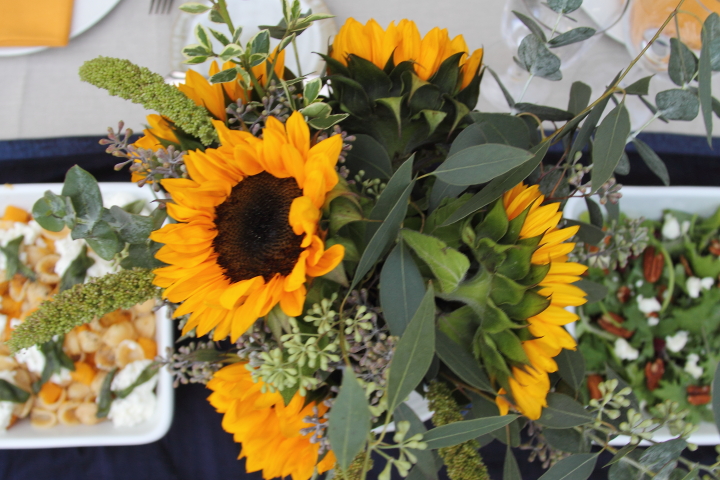
For flowers, I always pick up something from the grocery store when I shop for the dinner party ingredients. Here I combined two grocery store bouquets, one of greenery and one of sunflowers, in a blue enamel ware pitcher.

I also couldn't resist picking up some mini white pumpkins from the grocery store which I tucked into the blue and white bowls at each place setting.

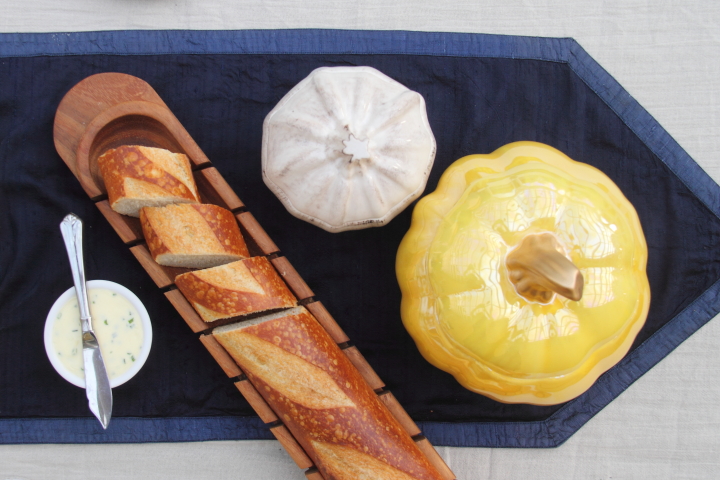
With the table set, I started cooking. Menu planning is important for weeknight entertaining in order to be sure that you can prepare everything quickly and easily and not stress yourself out. My go to weeknight entertaining menu is a pasta dish with a salad and a baguette.

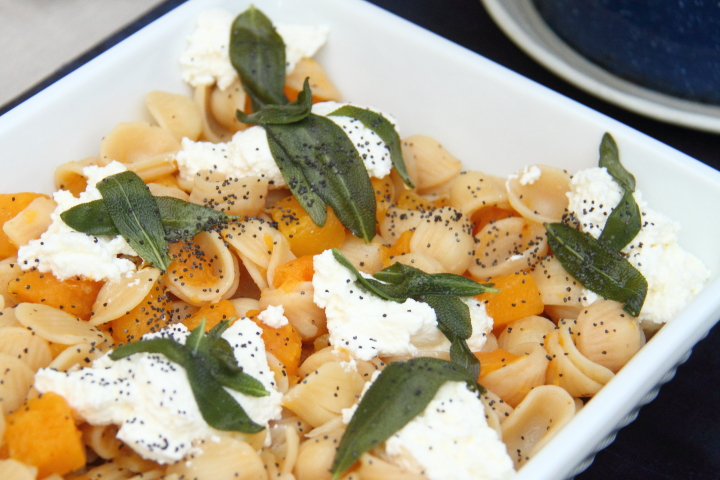
To make the meal seasonal, I made Martha Stewart's Orecchiette with Butternut Squash and Sage using some sage from my garden. It is easy to make, looks beautiful and tastes like autumn which made it a perfect dish for the evening.

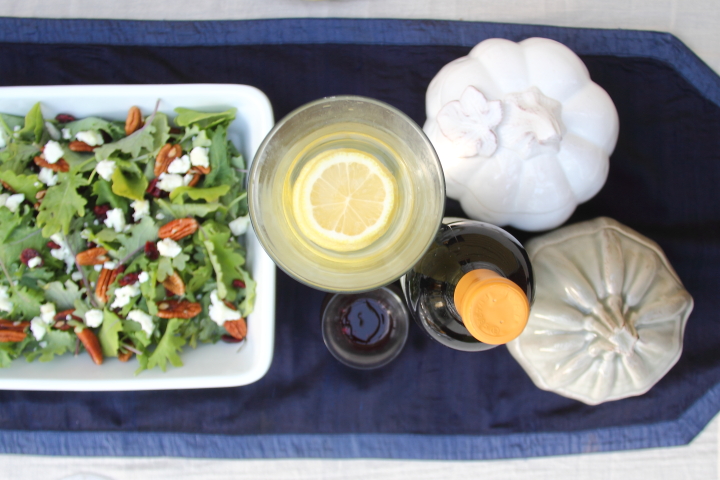
For the salad I used a base of baby kale topped with dried cranberries, goat cheese and pecans and paired with a pomegranate basalmic vinaigrette dressing. If I entertain on the weekend I like to make everything from scratch because I love to cook, but for a weeknight I take a few shortcuts to make it easier on myself. As an example, for this meal I bought already cubed butternut squash from the produce section for the pasta and pre-washed baby kale mix for the salad plus I bought the salad dressing instead of making it. All combined those three shortcuts probably took out 45 minutes of prep time for me and made the meal doable after work.

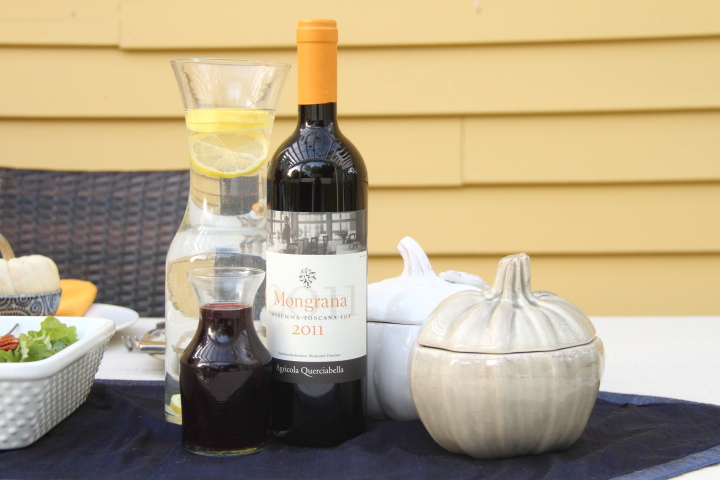
Little touches always finish off the table for me. I like to put out water in a carafe or pitcher with sliced up lemons and decant my salad dressing into a cute little carafe or dish. It only takes about five extra minutes but it makes the table look more festive and put together.

I also love to have an herbed compound butter to go with the bread. They are easy to make and a great way to use up extra herbs from your garden or cooking. I like to prepare them and keep them in the freezer to pull out when needed.

By keeping a limited menu and doing a few small things that had a nice visual impact I was able to be ready for my guests in about an hour and a half with a beautiful and delicious table of food. With everything finished before my guests arrived I was able to relax and enjoy the rest of the evening with them. Cheers!

Friday
Oct242014

The Fence Saga Part 1: Planning

It's been seven years now since I bought my home and this year was the year to finally tackle the fence. I've hated the chain link fence that surrounded my property ever since I moved in, but when you buy a 130+ year old home with a large raccoon nest in the walls and no electrical outlets upstairs you have to set your priorities accordingly.

Just for fun here is a picture of the backyard when I bought the house and it was overwhelmed with an enormous dying tree.

My first big backyard project was a circular back patio followed by removing the tree. Last year with the new pergola and side patio that I'd been planning for years in place as well as a fresh coat of paint on the house and garage the backyard was starting to look like what I'd envisioned.

All of this work was great but it only made the old fence look even worse. I was ready to finally replace the fence this year so in May I began drawing up plans to submit an application for a building permit along with an application to the historic district. Since I live in a historic district, existing structures are grandfathered in, but if you replace something you must get approval from the historic district.

City Code Chapter 104 defines the regulations for fences in Ann Arbor based on three zones, front open space (the first 25' back from the sidewalk based on my zoning district), middle 25 feet (the 25' behind the front open space) and rear yard (remaining area behind the middle space). Since I live in a historic district I had lower limits on the heights allowed in each zone compared to a house outside of one of the historic districts with a 3' at 50% opaque fence allowed in the front, a 6' at 80% opaque fence allowed in the middle and a 6' at 100% opaque fence allowed in the back. Additionally, I had constraints on the style and materials I could use for the fence based on historic appropriateness for the neighborhood.

Operating under these rules I began planning my fence design. The back of my house fell beyond 50' from the sidewalk (meaning it was in the rear yard area) so I thought that would be a natural point to start a 6' privacy fence.

I wanted additional fencing to extend forward from the privacy fence to the front of the house. This fell in the middle space so I could have had a fence that was 6' tall and 80% opaque, but this felt like a little much for the area so I decided on a spindle fence 4' tall and 50% opaque instead. On the north side of my property I simply wanted the spindle fence to edge the property line but on the south side I wanted it to surround my vegetable/herb garden.

Here is an overhead view (I took the map from the county website) of what I was planning for my fence:

On the north side of my property I planned to rip out the chain link fence and replace it with a spindle fence with a privacy fence for the rear. I also planned to eventually put in a gate across the driveway.

On the south side I planned to have the overgrowth removed and replace the chain link fence with a privacy fence.

To block the view from the street I also planned to put up more privacy fence to connect the fence back to the house with an arbor centered on the garden.

I planned to surround the herb and vegetable garden on the side of my house with a spindle fence with a small gate at the front. Please excuse the crazy overgrown garden. I figured I would wait until the new fence went up before cleaning it up and planting for the year.

With my idea worked out I drew up a plan view of my fence and attached it to my application to the building department and historic district along with some example images of my intended fence. I submitted the application at City Hall at the end of May and it was approved at the beginning of June.

Although putting up the fence was something that Frank and I could have done we decided to hire a contractor to put up the fence and so that I could concentrate on working on our downstairs bathroom renovation. I'll leave the story off here for now but I will say that things did not end up going as planned. Stay tuned for the next installment about working with our contractor.

Monday
Jun232014

Creating a Berry Patch Behind the Garage

The small strip of land behind the garage has always been a hot mess. When I bought the house it was a jungle of overgrown black raspberries with poison ivy lurking along with other weeds. I had tried to unsuccessfully clear it out with nothing but a bad case of poison ivy for my troubles and ended up hiring someone to do it for me. Of course, the next summer everything was back with a vengeance. Since I didn't learn my lesson the first time I tried tackling it myself with the same itchy results and ended up hiring to have it cleared out again. Unfortunately, I wasn't so clear about the fact the black raspberries were keepers and to my dismay it was all wiped out. Last summer Frank put several bags of mulch down to keep the weeds and poison ivy at bay but this year I wanted to have a more permanent solution as well as plant some berries again.

We started by cleaning out all of the random things that had been stashed behind the garage and getting rid of the few weeds that had popped up again. Frank rototilled the dirt and then I spread it with a rake to level things out.

Next, I evenly spaced out our berry plants (4 raspberry and 4 blackberry) along the garage and planted them.

To define the berry patch border we decided to use black composite edging. I rolled it out on the patio, weighing it down with bricks to flatten it. Once we were ready to install it, I attached a stake to the edging every four feet.

Frank dug a shallow ditch where we wanted to place the edging and then I put the edging in place, hammering in the stakes and backfilling and tamping the soil down around it.

I definitely wanted to keep weeds at bay so I spread a bunch of mulch around the berries and laid out a sheet of landscape fabric on the pathway we were creating.

The biggest part of the project was filling in the path with nearly a square yard of marble rocks. Frank used a wheelbarrow to move all of the rock and then after he dumped it I spread it out with a rake. It was pretty exhausting but I love how it looks.

We finished off the project by putting down some more mulch along the fence and laying down a piece of sod. I think it looks great and in the three weeks since we did this it has remained gloriously weed and poison ivy free. The plants have been growing and some of the blackberry bushes have several young berries on them. I'm not expecting many berries this year but I have high hopes for the years to come.


Monday
Dec162013

Fresh Coat of Paint for the House (Plus New Gutters!)

When I first got my house back in 2007 one of the first things I did was replace the rot on the house and get some paint on the exterior. The back had never been painted when the wood clapboard had been replaced and I was afraid of further rot if it didn't get painted before the winter came. It was pretty scary! Here's what it looked like when I bought it.

At the time I originally painted the house one of my neighbor's homes was white and one was blue so I thought that yellow would be a nice color so I picked a scheme with Valspar's Oatlands Yellow for the house with Chef White for the trim. For some added a color I painted the accent a teal color with a bright turquoise for the ceiling of the porch. Here are how things looked a few years ago after painting.

Fast forward a few more years and things have been looking a little sad. The paint had faded and some issues with the gutters caused some rot that needed to be fixed. It was time to repaint and give the exterior a little TLC.

First up I needed to figure out my new house colors. In general I loved the color scheme that I had but I wanted some deeper, more vibrant shades of what I already had. I picked up a few test colors from the paint store and tried them out on the garage.

On the left was Benjamin Moore's Concord Ivory and the right was Marblehead Gold. Based on swatches I had been leaning toward the Concord Ivory but once it was on the garage I knew the vibrancy of Marblehead Gold was the winner. In the end to go with the Marblehead Gold on the siding I choose Soft Chamois for the trim and Narragasett Green for an accent. I also decided that to paint the concrete foundation a dark grey color, Cromwell Gray. For the porch ceiling Frank really didn't like the bright turquoise that I had originally painted it since he thought it was a bit feminine so I chose a more subdued dusky color with Aegean Teal.

Time was running out fast to get things finished before the cold weather hit so Frank and I decided to hire a local painter to complete the wood repairs and paint. We chose the painter that we did because he was going to sand by hand and paint with a brush which would be more gentle on our wood siding and be in keeping with the period of our 1800s house. He also painted our neighbor's house and did a beautiful job, plus he gave us a great quote for the job.

First up our painter sanded and primed all the spots with loose paint.

Our painter started by painting the front of the garage so we could make sure that we liked everything before he continued. Here's a shot of the corner so you can see the old and new colors together. Needless to say we loved the difference.

As time went by and more and more paint went up we knew we had made a great decision about not only the colors but also our painter.

After the painting on the house was complete our painter painted the concrete foundation. Below is a picture before and then after the foundation was painted. As a side note this access door was used to bring produce into the basement when the side wing of the house was a local grocery store.

With the painting wrapped up at the beginning of November the gutters needed to be addressed. Not only were they undersized but they had seams, didn't slope properly toward the downspouts and had unneeded bends all of which you can see in the picture below.

Frank got a few quotes for seamless 6" gutters with 4" downspouts before we settled on a contractor. Amazingly they got installed at the end of November in just one day.

In the few weeks since then I haven't had much of a chance to get some pictures of the house during daylight hours (that whole engineer thing takes up a heck of a lot of my time) until now when we have seven inches of snow on the ground. Here is what it looks like today.

I love how the colors turned out and it really gives the house a facelift. My favorite part is how vibrant the new yellow is. In the past the pale yellow really looked bleak in the winter but this yellow is so bright and cheerful in the snow. Nothing exemplifies this more than the way the garage looks in the snow filled back yard.

I think Frank's favorite part is the new porch ceiling color since he absolutely hated the bright turquoise (which I loved!) that I had painted it before.

This project wraps up our outdoor projects for the season, but upcoming I would like to add shutters to the house, a wood fence to replace the chain link one in our backyard plus we really need to stain the pergola. To 2014!

Monday
Sep162013

Backyard Celebration Party

Since Frank and I had a tiny wedding this summer with only sixteen people we decided that it would be fun for us to have a casual barbecue in our backyard to celebrate our marriage with some of our local friends. We hosted the party this past Saturday after the Michigan vs. Akron football game.

Since Frank was busy with preparing for the tailgate before the game (he made a bunch of delicious pizzas with his Pizza Kettle) I worked on doing some party set up on game day before heading to the tailgate later and then left the game at half time to finish getting things ready. The game was pretty ugly with Michigan barely pulling out a win so I was actually glad to have an excuse to head home.

Last time I shared about our backyard on the blog we only had the cuddle set under our new pergola. Since then we added a dining table that I found on Amazon as well as a set of eight outdoor wicker chairs that I got at an end of season sale at Meijer. This provides us with a nice permanent outdoor dining area that we made use of for the party.

For some decoration I dressed up the pergola by hanging a bunch of paper lanterns in different sizes and colors. I used fishing line to tie the lanterns to the pergola in random spots and slightly different heights. I thought it added a festive touch to the yard.

We were expecting a lot of guests so we set up two pop up tents and some additional seating in addition to our permanent backyard furniture. 

I used two white table cloths to cover a few of Frank's tailgating tables and set out white Terje folding chairs from Ikea. In the center of each table I laid out red Marit table runners. For center pieces I put out red metal bins with yellow mums flanked by lanterns. Both the red bins and lanterns were from the Target One Spot purchased last year. The lanterns were a light brown but I spray painted them oil rubbed bronze. Now that the party is over I plan to plant the mums in my front garden beds.

I also did a little decorating with the seating area on the patio behind the house setting out another table runner and more mums.

When Frank got back from the game he fired up the grill and made hot dogs and hamburgers. I had found red fast food baskets which I lined with red checked wax paper to serve them up.

In addition to the burgers and hot dogs I set up a table next to the grill with other food and some drinks.

I put out condiments in small carafes which I placed atop pillar candle holders that I found on sale at Target and spray painted silver. I also had small bags of Cracker Jacks that I set out in a silver mesh bin. I popped some pop corn and put it out on the table in red and white stripped popcorn boxes.

The night before I made a few salads for the party including rosemary potato salad, pasta salad with feta, oregano, bell peppers, tomatoes and olives and a salad of spring greens with pecans, bleu cheese, dried cranberries and raspberries.

I also made buttermilk chocolate cupcakes that I iced with buttercream frosting and topped with sprinkles and maraschino cherries.

For drinks I had sangria in a pretty drink dispenser that Frank and I got as a wedding gift as well as some flavored sparkling lemonades and cokes on ice. To keep the sangria cold I cut up orange slices that I had frozen the night before. For fun I set out red polka dots and red striped straws with the glasses.

The barbecue was a lot of fun and we ended up having over sixty guests. It was so nice to hang out with everyone and finally break in our new side patio and pergola with a party.

Monday
Jul082013

The Pergola is Up!

The pergola is finally up! The guy that we hired was back logged with work so he wasn't able to come out until last week. I was out of town so Frank snapped this picture for me when he first got the posts up.

Here is what it looks like as of today.

I really love it! A few more things need to be done, like placing the removed bricks back in place and reseeding the lawn where it was regraded for the patio. I also plan on staining the pergola an opaque white, but the treated wood needs some time to dry out before I can do that. I'm so excited to see the backyard coming together. For reference, here is what it looked like less than two month ago.

I can't wait to get this all done!

Tuesday
May282013

New Back Patio

After getting the stump removed from my backyard I moved on to my next step of my backyard plans for this summer, having a patio put in along the side of the garage.

I like to do a lot of things around my house, but I decided to hire out the patio and pergola. When I was a struggling student my time was worth nothing so I would always do everything myself. As I've grown older my time has become valuable, especially as I always have more on my plate and ideas in my head than I have time to do.

In determining if I want to tackle a project myself I consider whether I will save money doing it myself and if it is something I think I will have fun doing. If the answer to both is no then I will hire it out.

Regarding the patio, I did a lot of research for the first patio I had put in on the back. When I calculated the costs for me, including equipment rental, I wasn't going to save money and it would have taken me all summer which meant I would have had to delay other projects that I was excited about working on. I ended up hiring a local landscaper and within a week the back patio was complete, allowing me to enjoy it all summer.

For this second patio, I hired the same contractor to have matching pavers laid down along the side of the garage. They started by excavating along the side of the garage. Some of the excess dirt was used to help even out the grade of the backyard.

They then put down a base of crushed stone and fine gravel to create a flat, stable base for the patio. After lots of tamping and leveling the surface was ready for the pavers.

The pavers were put in using a herringbone pattern for the field and then a concrete border was put in to stabilize the patio and keep it anchored. After brushing sand into the cracks between the pavers the patio was complete. 

I love how the patio turned out and it is huge, extending 10 feet out and nearly 40 feet deep. Next up is the pergola and then repairing the lawn. I'm really excited about how the backyard is shaping up and I think it will make a fun space to spend the summer.

Saturday
May112013

Stump Removal: Take Two

Earlier this week I wrote about taking down the large white maple in my backyard, but still needing to deal with the remnants of the stump. I have been planning to add another patio to my backyard so when I was speaking with the guy that I had put in my previous elevated patio on the back of my house I asked him if he had any recommendations about getting rid of the stump once and for all. He did, I made an appointment and as of the morning the stump is now happily gone!

Here is the view of my backyard from my upstairs window at 7:55 this morning with the remnants of the stump still making a little hill in the middle of my back yard.

By 8:10 the stump and the surrounding roots which has also reached the surface were on the way to annihilation.

By 8:45 the stump was ground down to about 5" below the surface of the grass so that we can reseed or sod and have a flat lawn. In place of the stump we have a sizeable hill of wood chips and dirt. 

I am so excited and happy to have the stump gone and I can't believe I didn't have it taken care of earlier. My plans for the the backyard are now to fix the lawn in the area where the stump was and add a large patio to the side of the garage with a pergola over it. The garage is 32 feet deep and I think I'm going to make the patio 10 feet wide so it will be quite sizeable and a great place to relax this summer. Below is my poorly drawn rendition of what I am planning.

I'm planning to grow wisteria to climb up the pergola which will add a bit of shade to the backyard now that the maple tree is gone. The patio and pergola will also balance out the space between the side of my garage and my neighbor to the rear's garage. I'm really looking forward to making some more steps to completing the backyard and have a chance to enjoy it this summer.