Welcome

My name is Lisa and I'm a crafty girl with wanderlust working as an engineer by day. My blog chronicles projects in my home as well as pictures and stories from my travels.

Search


Instagram

Blog Index
The journal that this archive was targeting has been deleted. Please update your configuration.
Navigation

Entries in Yard (3)

Wednesday
May082013

Square Beadboard Garden Planter

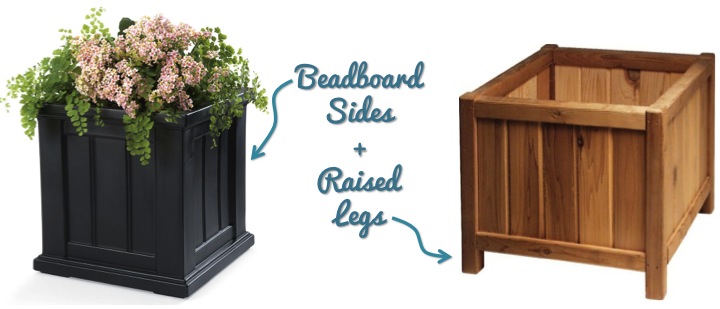
With spring here I have been wanting to spruce up my front yard and I had an inkling to try building a garden planter for myself for my front porch steps. On my Yard and Garden Pinterest board I had pinned a few planters that I drew some inspiration from. I liked the beadboard sides from the planter I pinned from Plow and Hearth and the legs that raised the planter off the ground that I pinned from the Simply Planters

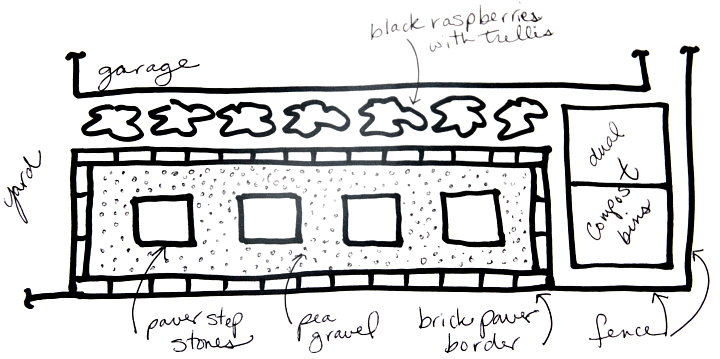
After doing a little sketching I came up with a design that I liked that also fit the space that I was planning on putting the planter on my front steps. I have shared my supply and cut list, but it would be very easy to resize the dimensions if you wanted to make a bigger planter.

Supply List:
1 - 2x2 @ 4 feet long
1 - 1x2 @ 8 feet long
1 - 1x3 @ 8 feet long
1-1/4" pocket hole screws
Brad nails
Wood glue

Cut List:
4 - 9" x 9" pieces of beadboard for sides
8 - 1x2 @ 9" for side supports
3 - 1x3 @ 9-3/8" for bottom slats
4 - 1x3 with 45° mitered ends @ 9" (measured from short side), 14" (measured from long side) for top 
4 - 2x2 @ 11-1/2" for legs

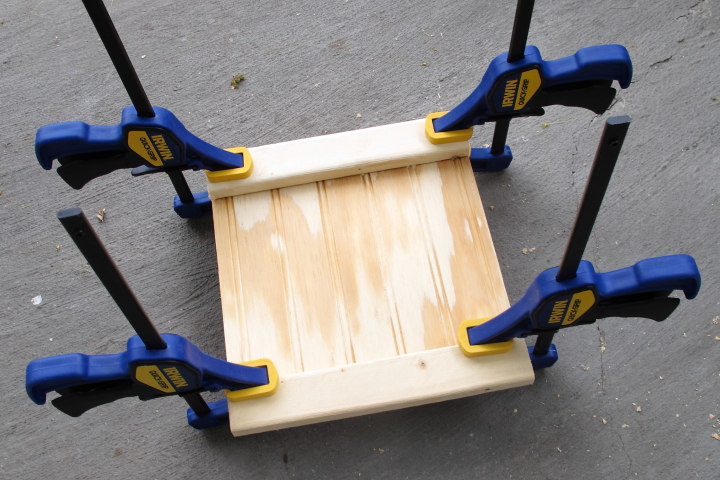
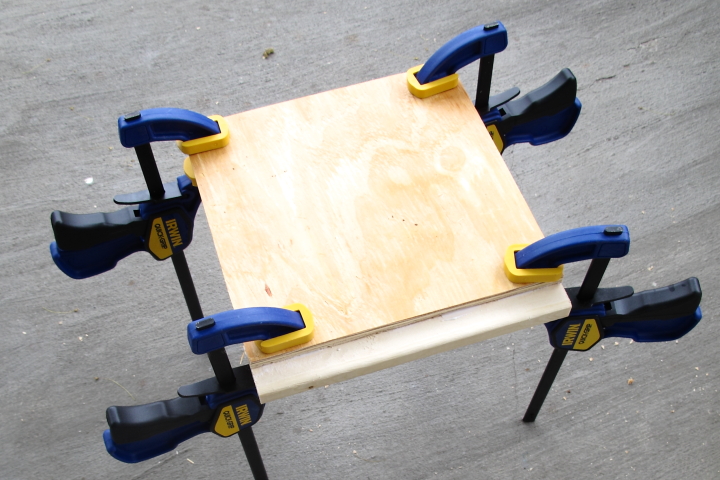
To start I put some wood glue on the back of the side supports and attached one to the top and bottom of each piece of beadboard.

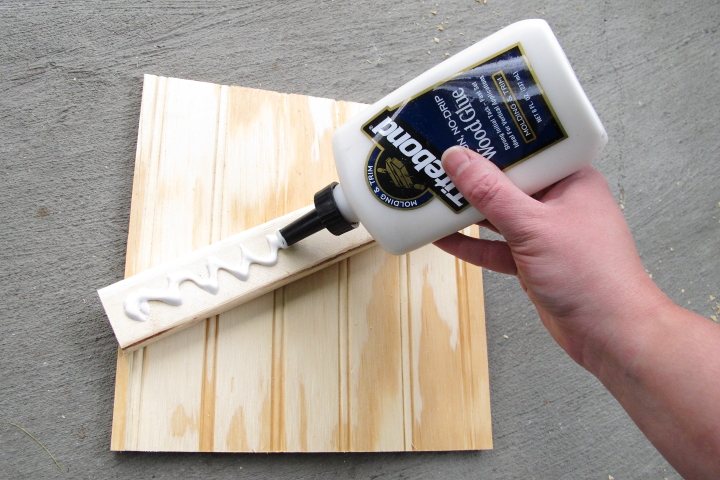
I aligned the top support flush with the top of the beadboard and the bottom one I overhung by 3/4" which left me space to attach the bottom slats later. I then clamped the supports to the beadboard while the glue dried.

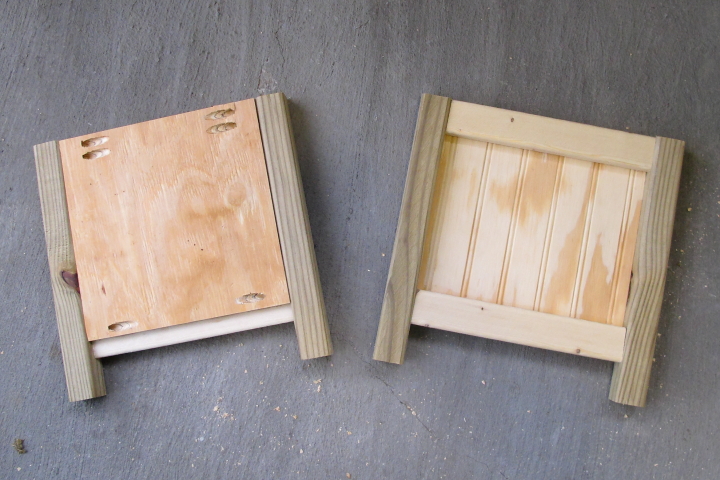
Next, I used my Kreg Jig to drill pocket holes on both sides at the top and bottom of each side beadboard piece. For two of the sides I attached the legs with pocket hole screws, aligned flush with the top.

I then attached the two remaining sides to one of the sides with legs using pocket hole screws.

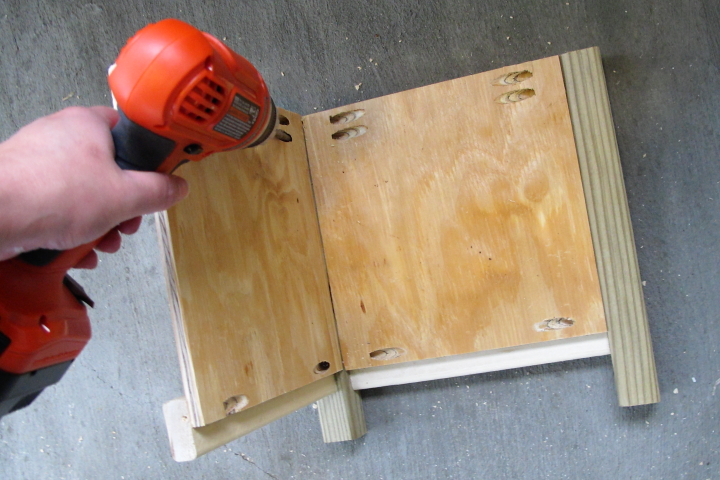
I then attached the last side to complete making the box of the planter.

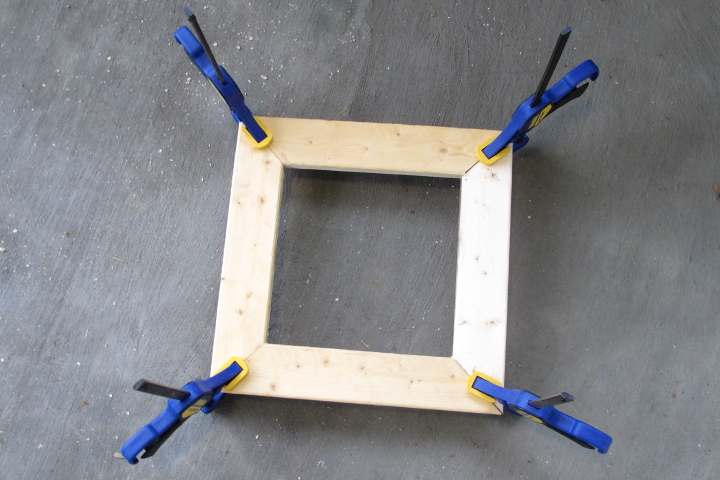
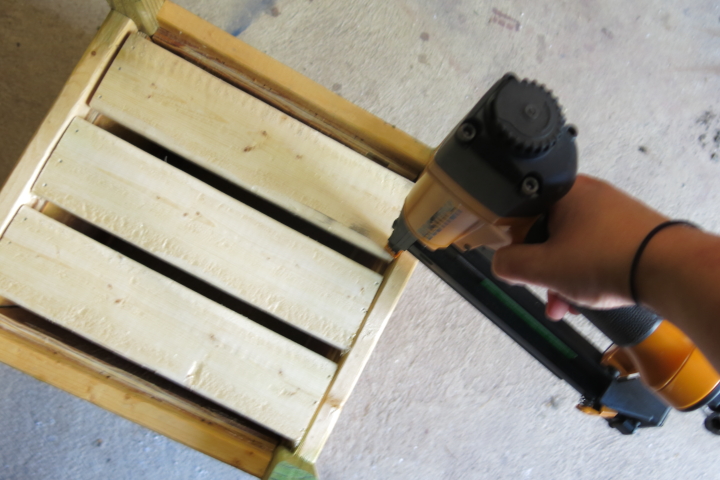
To make the top I put some wood glue on the mitered ends, clamped it all together into a square and then used my nailer to add a few brad nails to tack it together.

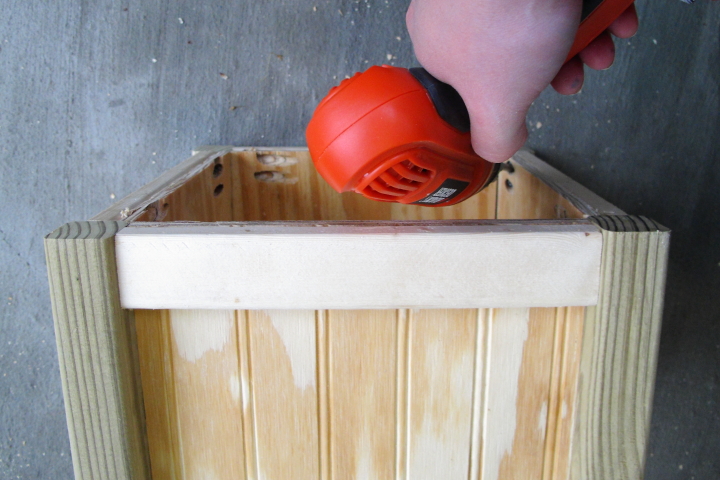
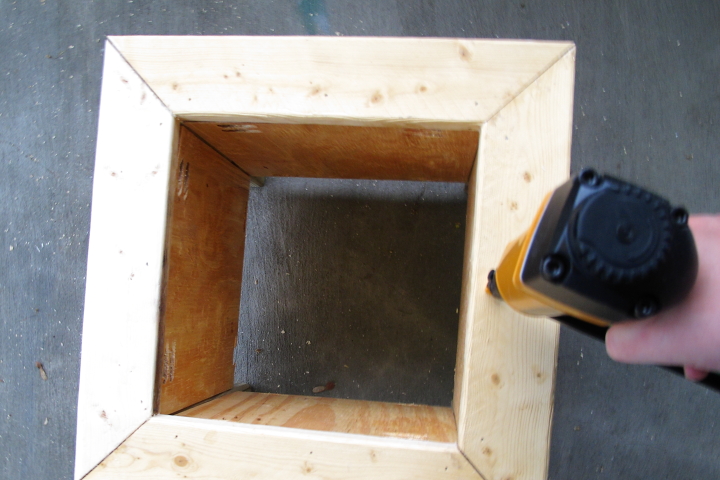
After the glue dried, I used a bit more wood glue and my nailer to attach the top to the planter box.

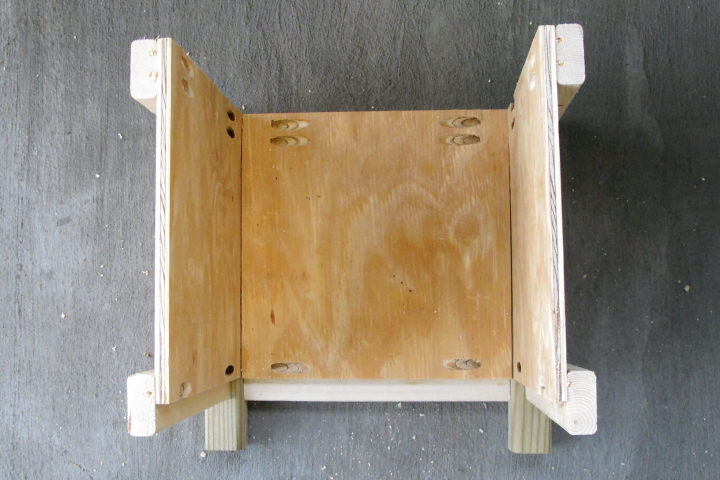
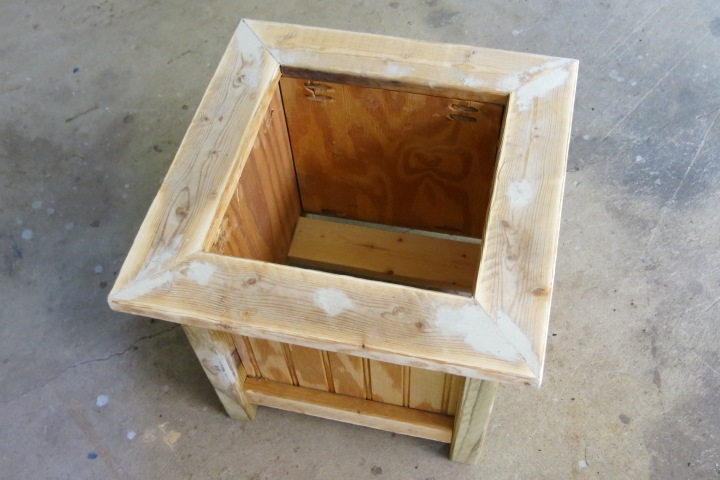
I then flipped the planter upside down and attached the bottom slats with some wood glue and my nailer. I left spaces between the slats for drainage.

I used wood filler to fill in the nail holes and imperfections and then sanded the whole piece smooth.

I wiped the planter down with a tack cloth and then painted it with a few coats of Valspar's Duramax Paint and Primer in Everglade Deck.

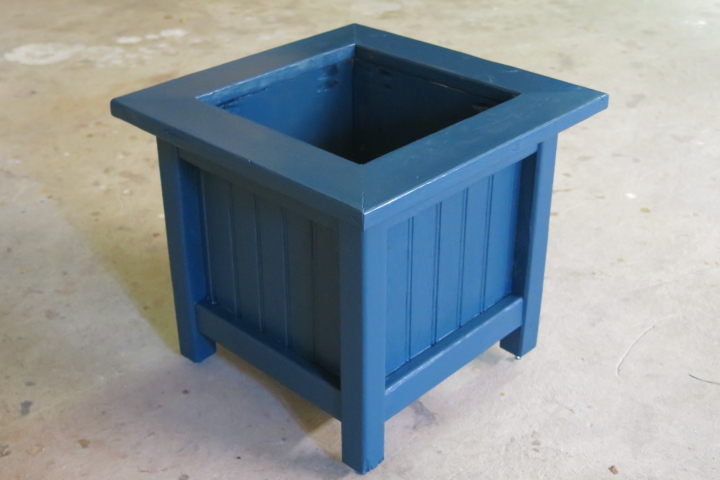
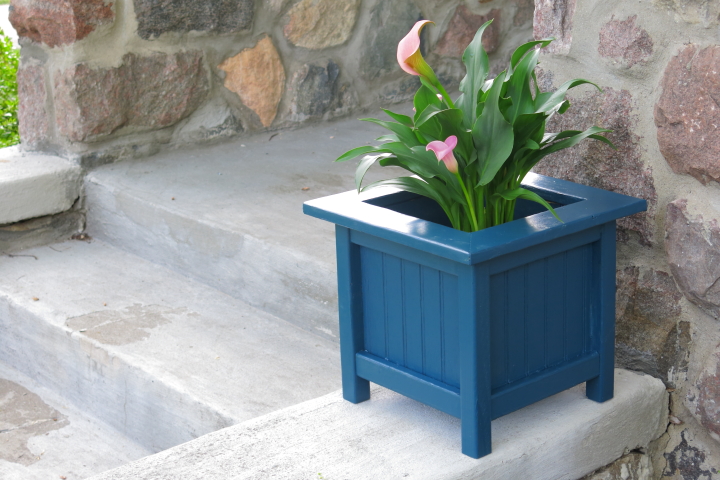
Once the planter was dry I was excited to get planting but I didn't have any potting soil so I just placed a potted calla lily in the planter for now. Before I do put potting soil in the planter I plan to line the bottom with some landscaping fabric so that water can drain out between the slats but the soil wouldn't fall through.

I'm really happy with how my planter came out and think it will add a little fun to my front porch. With this turning out successfully, I think I will have to make a second one to have a matching pair.

Note: I am posting as part of the Pinterest Challenge hosted by Young House Love, Bower Power, Sparkle Meets Pop and Red Bird Blue. If you posted anything for the challenge, please share your link with me!

Tuesday
May072013

Goodbye Tree

When I bought my house there was an enormous tree in the middle of my backyard. While I love the two large trees in my front yard, this tree was not doing much for me.

My main problem with it was that it was not healthy and was continuously dropping large branches into the backyard and the roof of my garage. I was nervous that it would eventually do some damage to my garage or even worse to my house and I wanted to get it removed.

From a secondary standpoint, my backyard had effectively no sunlight because the tree was so large it shaded everything. The yard was constantly full of debris dumped down from the tree and I had a hard time getting the grass to grow decently.

Getting a large tree taken down is no inexpensive task. I got a few quotes and then found a guy that would do it for half the price, but didn't grind down the stump. I figured that I could find someone to grind down the stump for much less so in November of 2011 I had the tree removed.

I had fun periodically taking a peek at the progress from my upstairs back bedroom. There was a ton of branches and wood, filling up their trailer a few times over. After two days my tree was finally gone.

At the end, I was left with this very large stump, smack dab in the middle of my back yard.

I hired a guy to grind down the stump for a great price in April 2012 and was excited to reclaim my yard.

Unfortunately, he finished up while I was out and he left it so that it was a little higher than the grass around it. I was unhappy with that because if I covered it with dirt and grass it would make a little hill in the middle of my backyard which I definitely didn't want.

I was really frustrated, so much so that I just left it alone all last summer and didn't deal with it. This summer I need to get it addressed. My backyard is not very evenly graded so I may just try to take care of everything at one time, but I am not sure.

On the positive side, I do love how opened up my yard is without the tree and the backyard grass has become much more lush. Eventually, I will make it something respectable back there...

Friday
Nov162012

Taming My Black Raspberries

When I was a kid we had all sorts of cane berries in our backyard grown from cuttings taken from my great-grandmother's farm. I loved eating them and would commonly snack on them right off the bushes. In the morning I would often head out to the backyard with my cereal bowl to top it with fresh raspberries or blackberries. At the peak of the season there were so many berries that my sister and I would harvest them so that our family could freeze them for winter.

With my berry loving history I was delighted to discover when I bought my house that the previous owners had planted black raspberries behind the garage. Truth be told it is not the best location for them due to limited sun, however they seem to really thrive back there. I really enjoy the berries and over the years I have eaten them fresh, included them in mixed berry pie and combined them with red raspberries to make jam. They are such a wonderful summer treat.

Sadly, however, due to neglect from the previous owners and also from me they had become completely overgrown and weeds were taking over. It was so bad that I could only pick berries on the outside of the bushes.

This year I decided to do something about it. I spent a Sunday afternoon early this summer starting to clean the area out. I didn't make a big dent but I was happy to be making some progress. That happiness was shortlived however because I woke up the next day with a huge rash on my arms, likely from poison ivy or something similar. It was awful! I felt like my arms were on fire. I had to keep my arms slathered in calamine lotion and keep taking Benadryl to make it even somewhat bearable. Six months later I still have some faint scars on my arms from this. Needless to say, operation "Tame the Black Raspberries" was quickly aborted.

Even though I decided I wasn't going to clean it out myself it still needed to be done. When I scheduled to have my gutters cleaned out this fall I decided to ask if he would also clean out the area behind the garage. He always charges me really great prices and even if he didn't it would have been worth it simply to not have to mess with it. As an aside if you are looking for yard work in the Ann Arbor/Ypsilanti area, let me know and I will give you his contact information. I wasn't sure when he would make it over, but this week on Wednesday night I came home and it was all cleared out! Here is a photo of how it looked all overgrown at the beginning of this summer and now.

It looks a little desolate now and I still need to do a bit of weeding amongst the canes but I am so excited to finally be able to take control of this space. I have some great plans for it this summer. I want to build a lattice for the berries to keep things orderly and under control. Along the right side I want to level the ground and cover it with pea gravel and pavers to create a walkway next to the berries for easy picking. Finally in the back I plan to build a dual compost bin for myself. I think it will look cute and make good use of this currently wasted space in my yard.

Have you ever let any plants get out of control in your yard? Do you have any summer gardening or yard plans for next year that you are thinking about now?