


Michigan Tailgate: Block M Drink Table
 Sadly, this past Saturday was the last Michigan home football game of the year. I didn't make a cake this week (I was just way too busy with work) so I thought I would share another tailgate project that I made for the tailgate a few weeks ago: a Block M drink table.
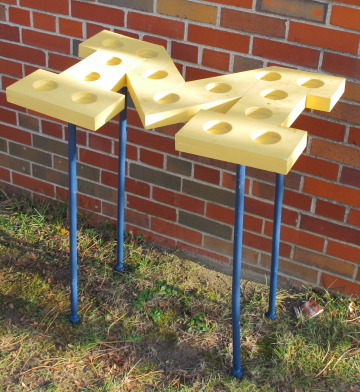
Instead of setting up drinks on the tops of coolers I thought this would be a fun addition to the tailgate. I decided to use the Michigan logo and colors (Maize and Blue) to come up with something that could easily travel to our tailgate site.
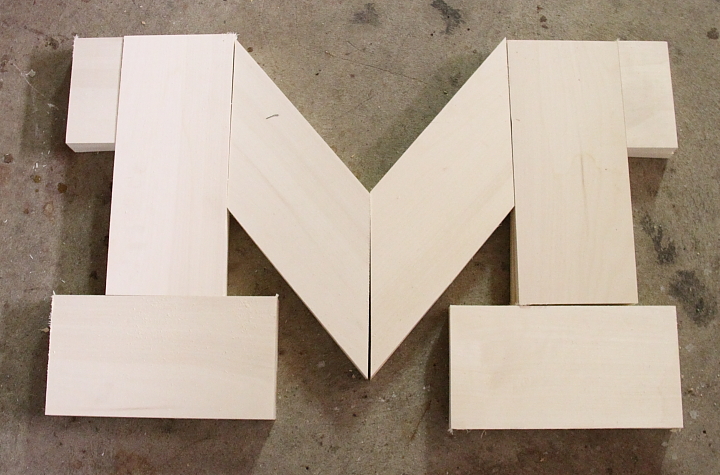
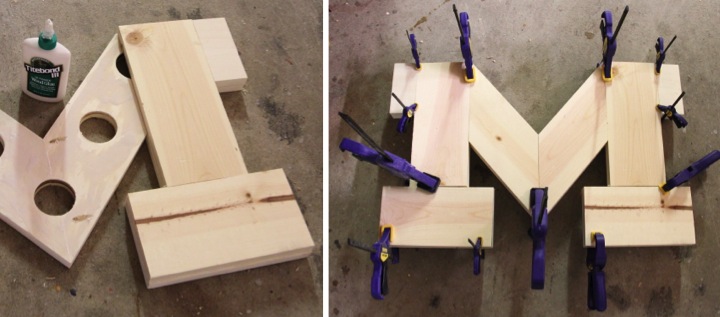
To make the table I did a little math and scaled up a version of the Michigan Block M logo so that the dimensions would work with using 1x6 lumber. Because the M is a mirror image and I was making it two boards deep I cut four of each of the following lengths from the 1x6: 13" (for the sides of the M), 10-1/2" (for the bottom serifs of the M), 2-1/2" (for the top serifs of the M) and 10" at a 50 degree angle (for the middle of the M). I did a dry fit (please excuse my dirty garage floor) to make sure everything lined up well before I continued on putting it together.
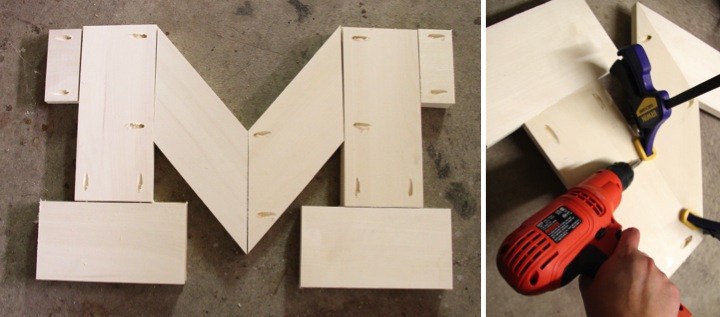
Next I drilled pocket holes in the back of the top pieces using my Kreg Jig (I will forever love Ana White's site for introducing me to the tool!), clamped the pieces together and attached them with 1-1/4" screws.
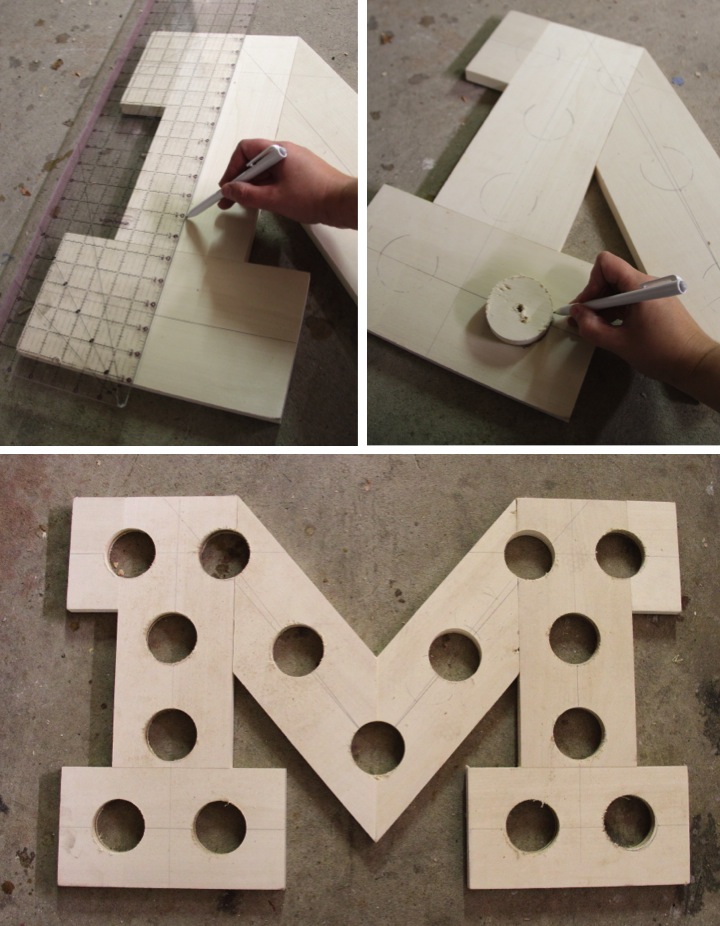
I then proceeded to make holes in the top of the M for drinks to sit in. I measured and marked the center of each board (yes, that is my quilting ruler - it is handy!) and then traced where I wanted the holes to be, making them as evenly spaced as I could. I then used a 2-1/2" hole saw to drill the holes out where I had marked.
With the holes drilled I attached the back pieces to the rear of the M using glue and brad nails. I clamped everything together and let it sit until the glue was fully dried.
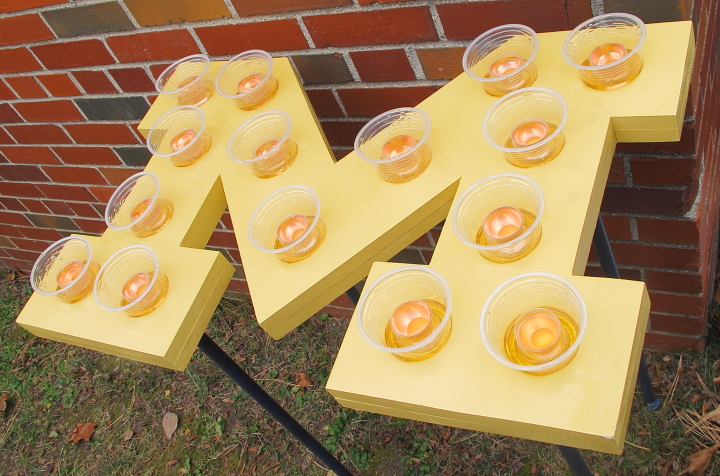
After that I patched the nail holes and seems, sanded it smooth, wiped it down with a tack cloth and spray painted it. I used a coat of white primer followed by two coats of yellow paint.
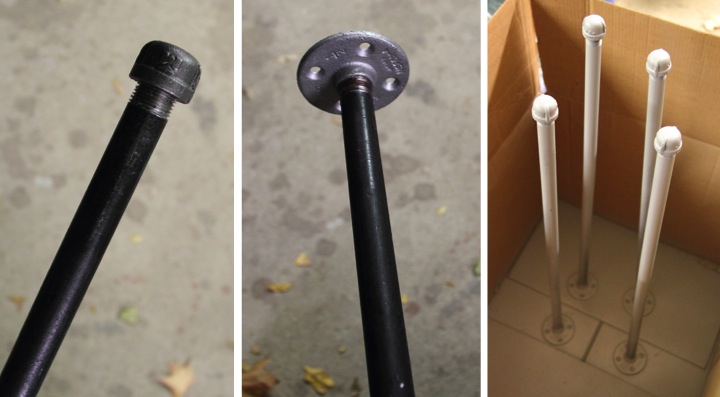
For the legs I wanted something easy to disassemble for moving around. I decided to use black pipe like I did for my console table. I used an end cap on the bottom and a flange on the top and the legs can easily unscrew from the flange. I assembled the legs before spray painting them (a coat of primer plus two coats of blue) so that I wouldn't get paint in the threads of the pipe which might have made it hard to screw together. Also, to keep spray paint from getting all over my garage I painted them in a large box.
Once everything was dry I screwed the flanges onto the back of the M and my table was complete. I have to say that it has a been pretty popular addition to the tailgate.
Cheers!
 Lisa | 6 Comments | Share Article | Email Article | Print Article
Reader Comments (6)
Lisa this is such a cool idea and I am sure it could be used for holding the drinks as well as candles. Your instructions are very clear so it looks very doable ............. thanks.
Mary-Lou- Thank you so much! I agree that it would be great for candles as well. It really wasn't that hard to do, just a little patience required to make sure that everything lined up well.
This is really really cool!!!
You should make this into a product and sell them. A fan just like you did a similar thing and made the block M into a flower vase.
Mike- Thank you! I'm glad that you like it! I can't sell the tables because the Block M is copyrighted.
Did you cut both sides of 10"
Piece at 50 degree angle a?
ellatab e3d3fd1842 https://gayleatherbiker.de/therrelese