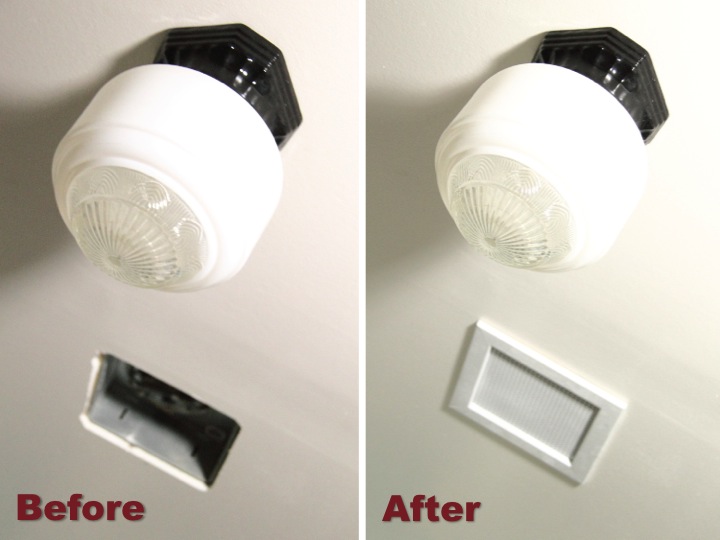
Today I am so excited to share that I finished up my last project in my bathroom: making a vent cover for my bathroom fan. The plastic cover that came with the fan looked cheap and flimsy and really didn't fit in with the vintage style of my bathroom. I searched around to try and find something else that would work but was unsuccessful so I decided that I needed to make something myself. 
To make the vent cover I found some wood trim 3/8" thick and about 1-1/4" wide with slightly a slightly rounded edge to make the frame. I thought about using some craft wood to make a wood lattice but when I saw this metal with perforated holes resembling a caning pattern I knew it would be perfect.
I mitered the corners of the wood trim, used wood glue to assemble it and then clamped it while it was drying. After the glue was set I cut a piece of the metal with some tin snips and then used 1/4" cut tacks to nail the metal to the back of the frame. After a coat of spray paint primer and two coats of my ceiling paint I hung the cover over my opening.
Having the gaping hole in my bathroom ceiling finally covered up makes me really happy and I am so glad that my bathroom is finally finished up. My goal was to complete everything in a month and by doing a little bit everyday I did it. After I get everything cleaned up I'll post some pictures of the whole room.
Has anyone else finished up a big project recently? Are you in the midst of doing some fun things around the house? I'd love to hear what you are up to to get me motivated for my next project.

If you are interested, check out the rest of my bathroom posts here: Bathroom Blog Posts